|
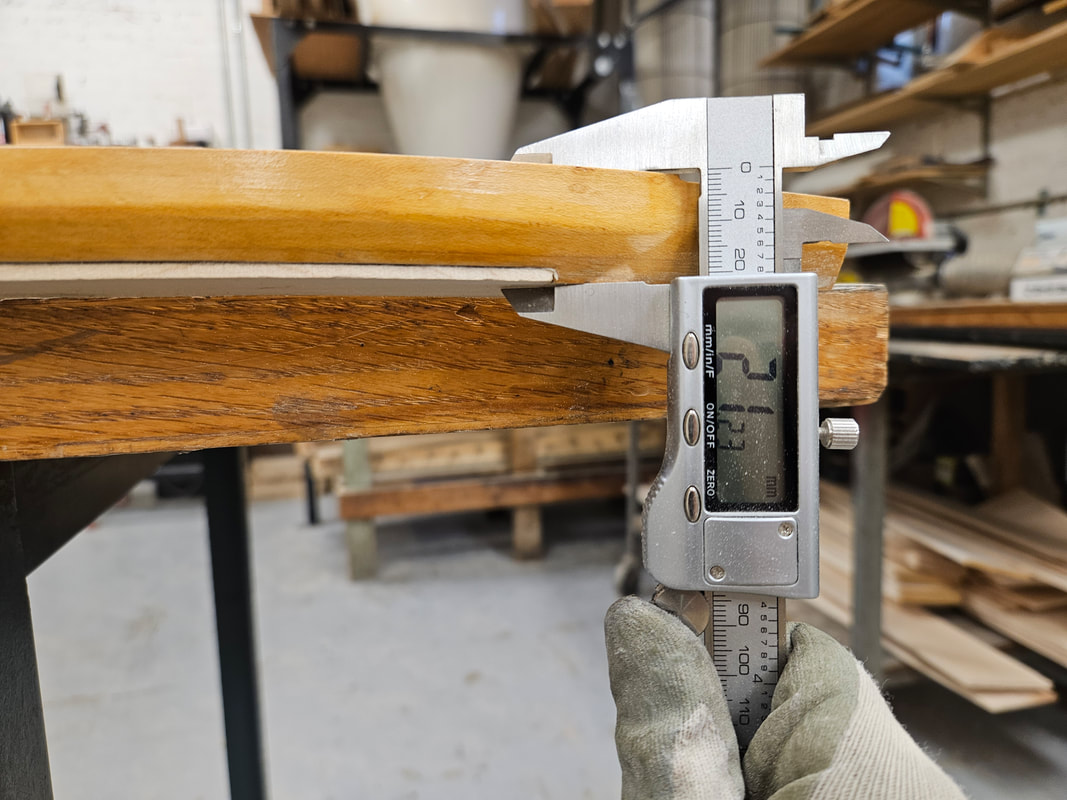
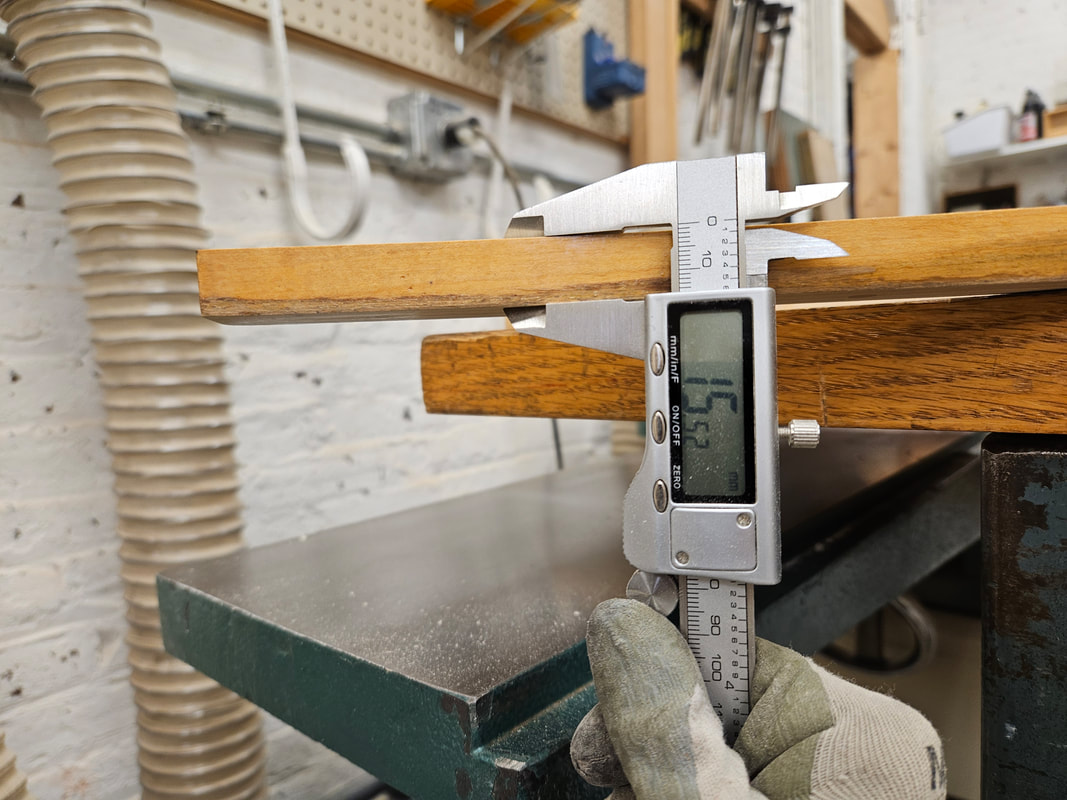
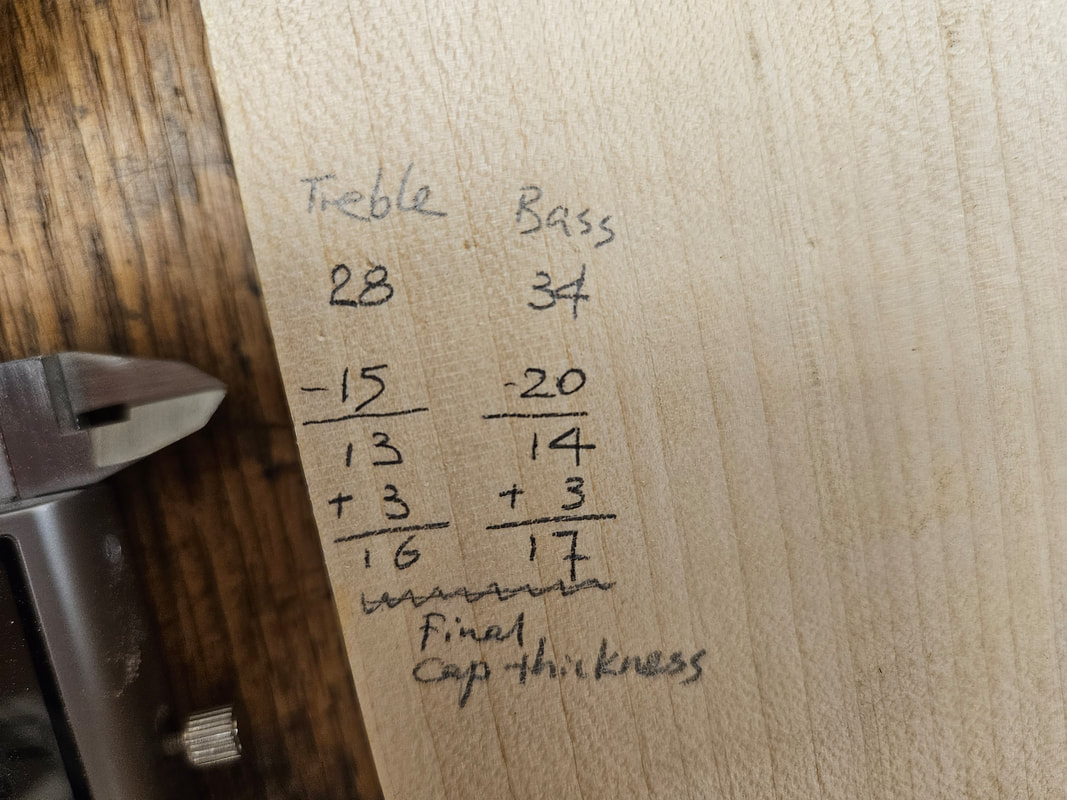
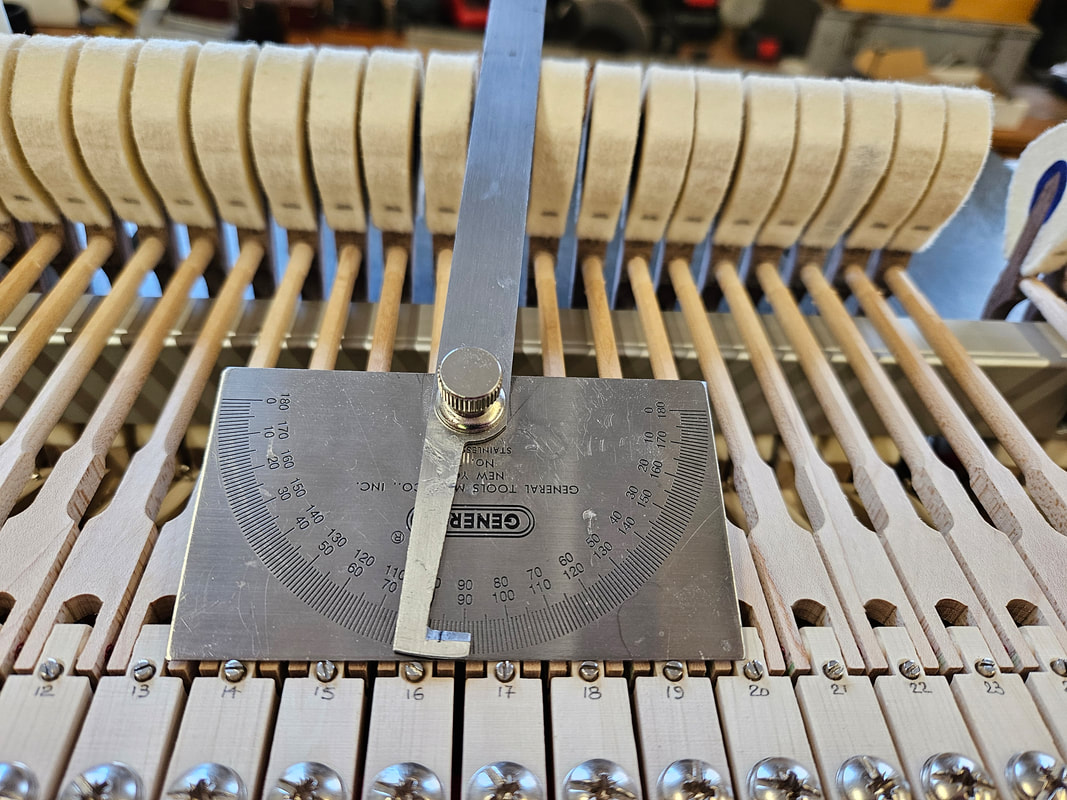
The cloth cushion on old Steinway sostenuto brackets becomes worn and discolored after decades of use. Every time when we rebuild an action at Absolute Piano, the cloth is changed. The cloth making process is instructed by the shop owner Mr. Jude Reveley. This experience is totally personal. The methods are yet to be improved. Thanks to our big boss for teaching us this process. Gratitude to Dana, the tool maker. Texting, in my mind, to Mr. David Betts wherever he is, maybe fly fishing in Vermont? This is how we darken the casted letters on the cast iron plate at Absolute Piano as of June 2024. The skill and method are yet to be improved and/or modified. This note is what I noticed during this recent capstan and backcheck installation. Skills and methods are to be improved. The installation videos and information can be found on WNG website. There are also PDF instructions available. This process took about five hours as of May 2024. The old cap is sawn off and the root planed smooth. The original bridge height was 28mm at treble and 34mm at bass. We want to give the new cap 3mm extra height to play with. According to the current root height, we need the bridge cap to be at least 17mm in thickness.
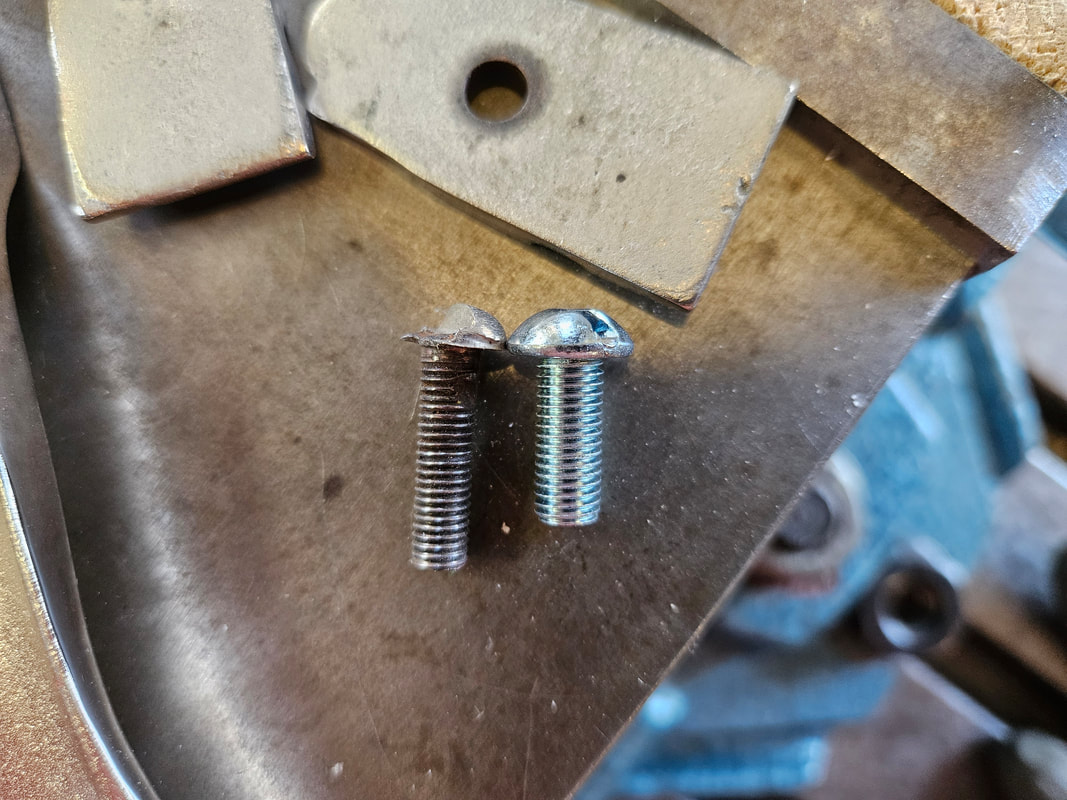
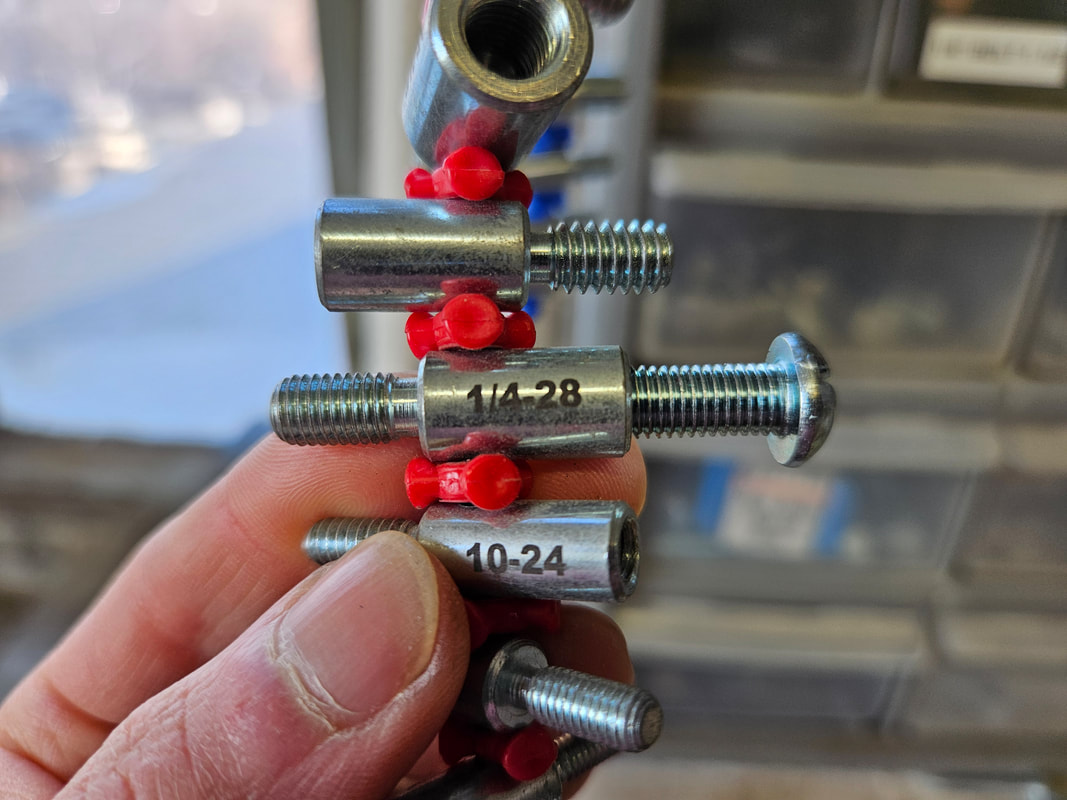
The pedal bottom plate screw is broken, half of it's head is missing. We couldn't find a machine screw the same size with the original one. Only screws at a slightly larger size are available at our local hardware store. Instead of replacing one screw, we decided to replace all three for uniformity. The new screw size is 1/4-28 or 1/4" in total diameter, 28 threads per inch.
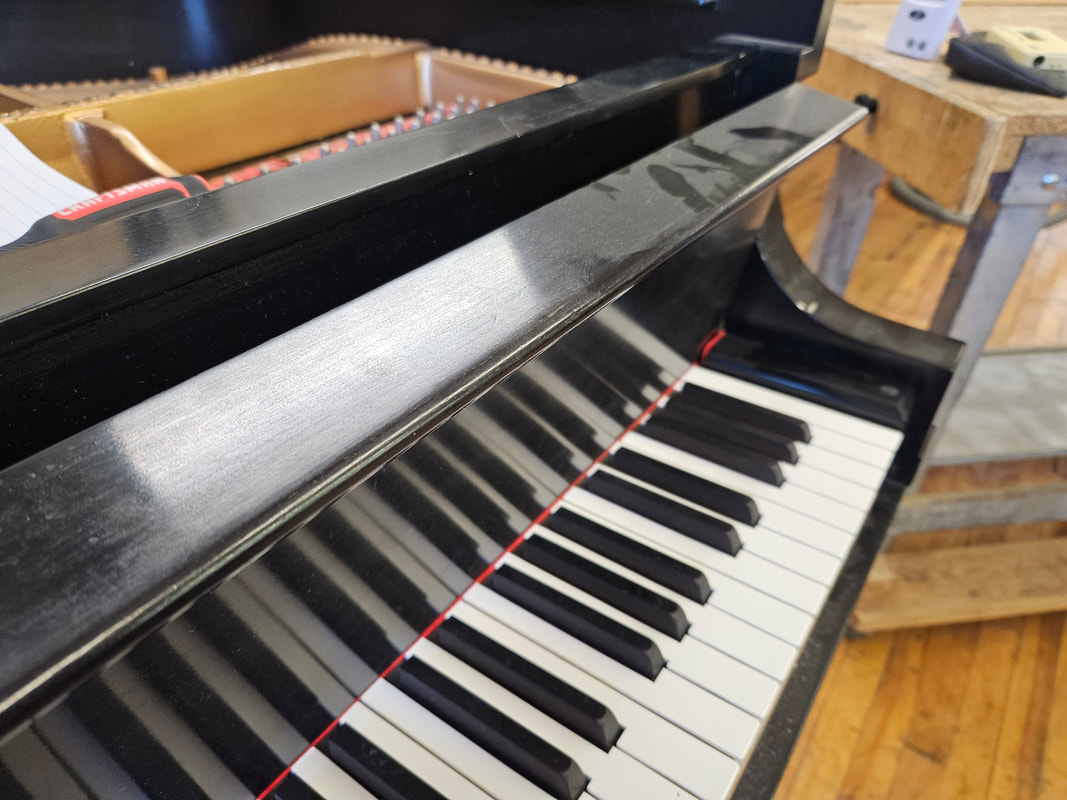
This method was noticed during a tour at Mason & Hamlin piano factory in Haverhill, MA years ago. Renner Academy near Phoenix, AZ teaches hammer angling in a similar way. As always, this is essentially a note to myself. The current method may change in the future. On the afternoon before this piano was going to be moved back to her school, I was putting all parts together. The fallboard didn't want to lift all the way up. It turned out that we raised the key height too high according to the new action design. The felt on bottom of fallboard was rubbing on key tops. About a week before leaving the shop, the piano shall be put together to make sure nothing goes wrong at the last minute.
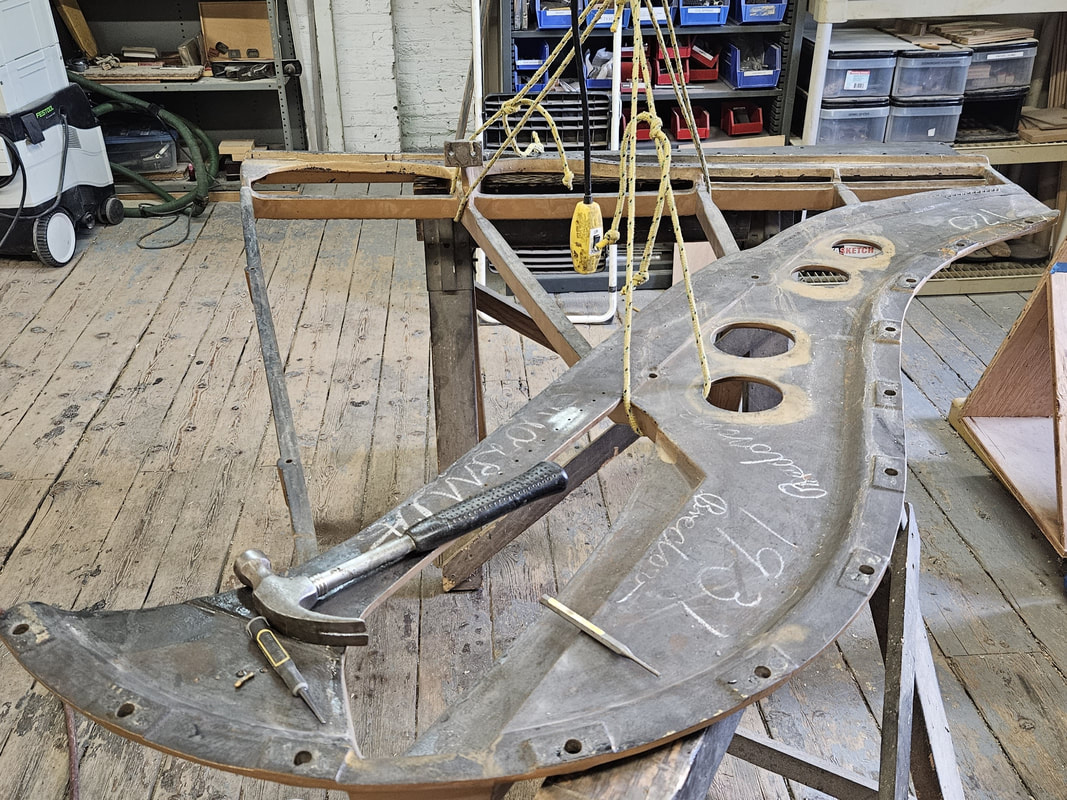
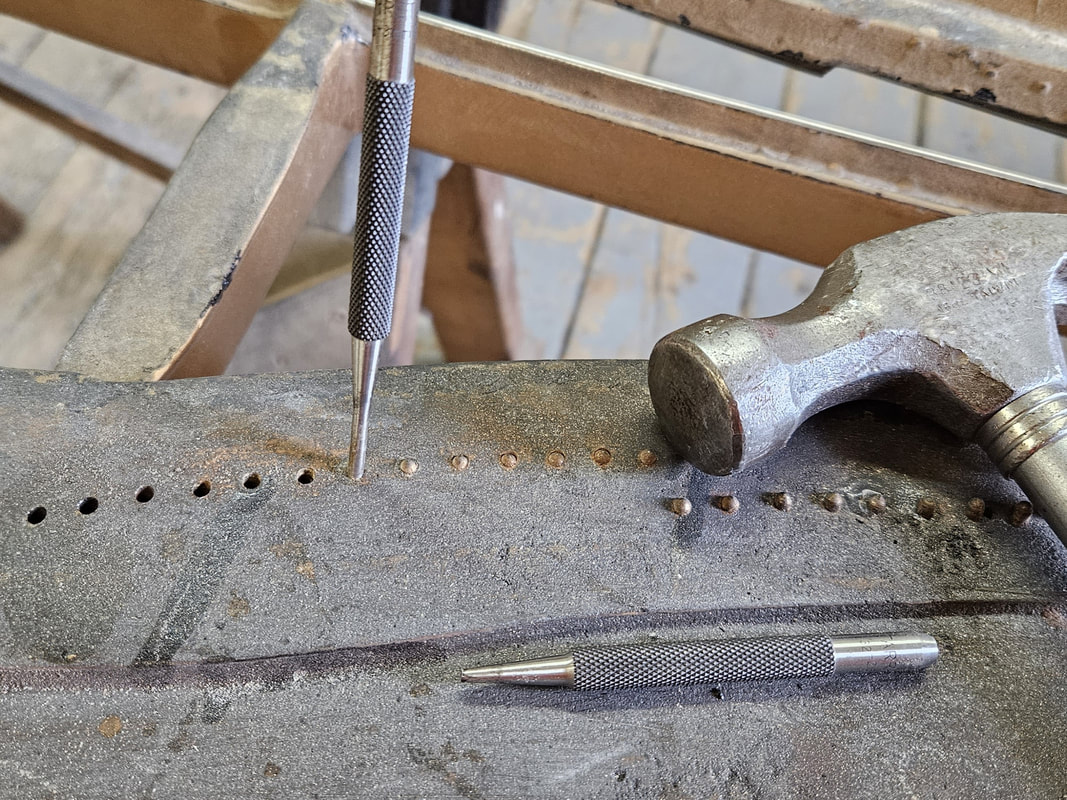
This is the first time I install a Renner backaction by myself following instruction from shop owner Mr. Jude Reveley. This plate receives new hitch pins. With a nail punch like this, the old pins are punched out from underneath. Pay attention not to enlarge the holes.
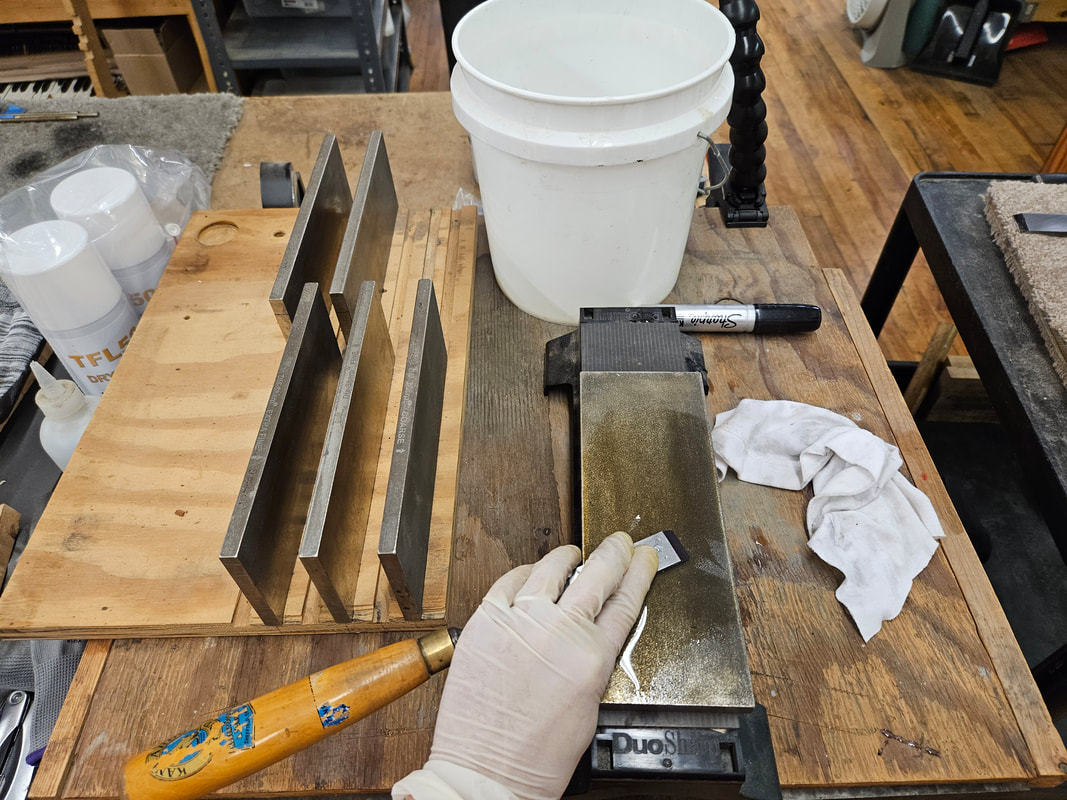
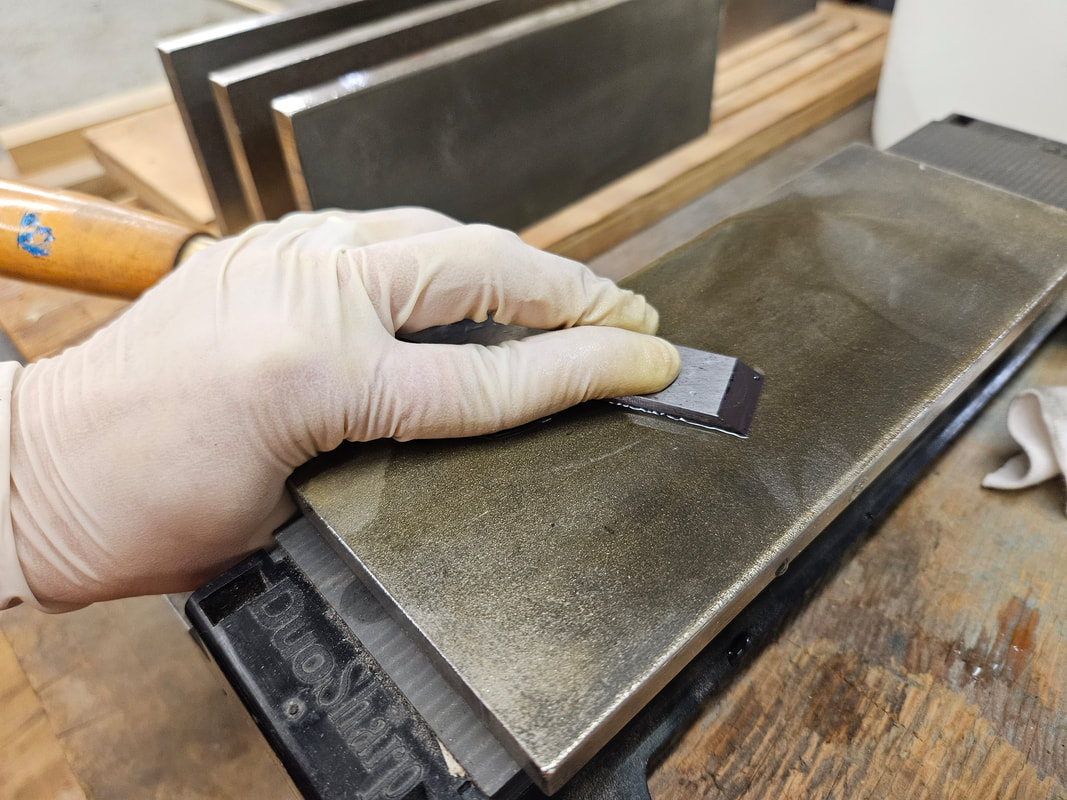
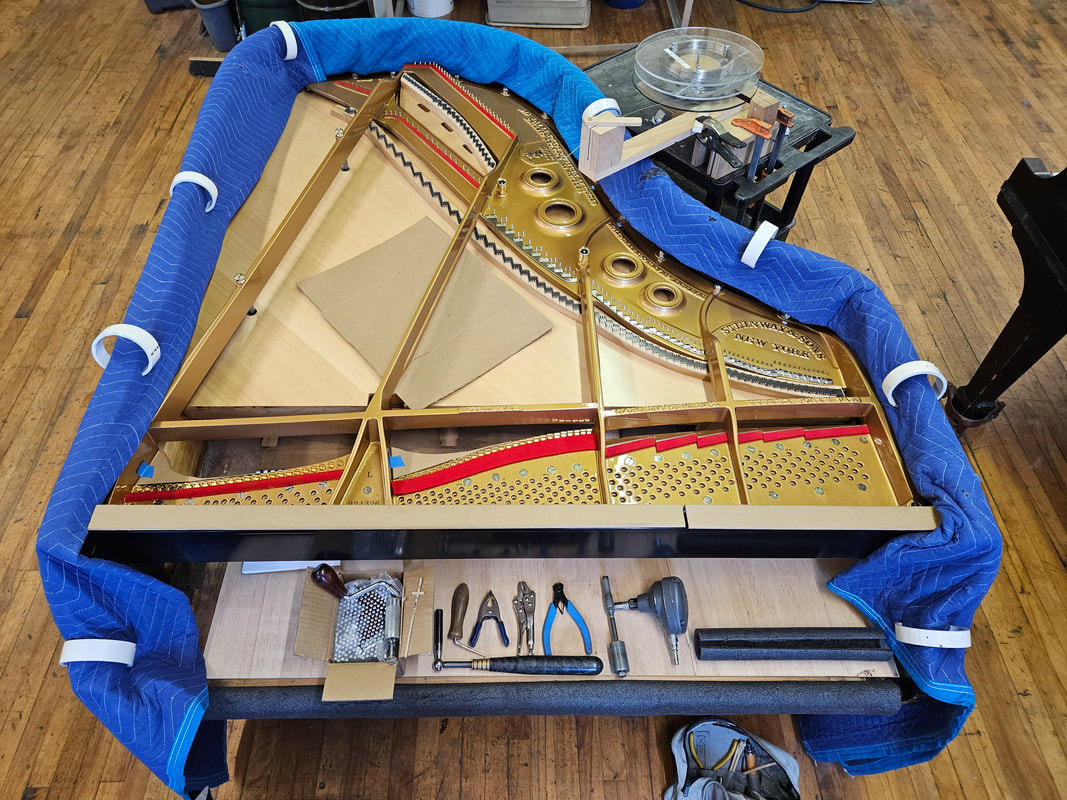
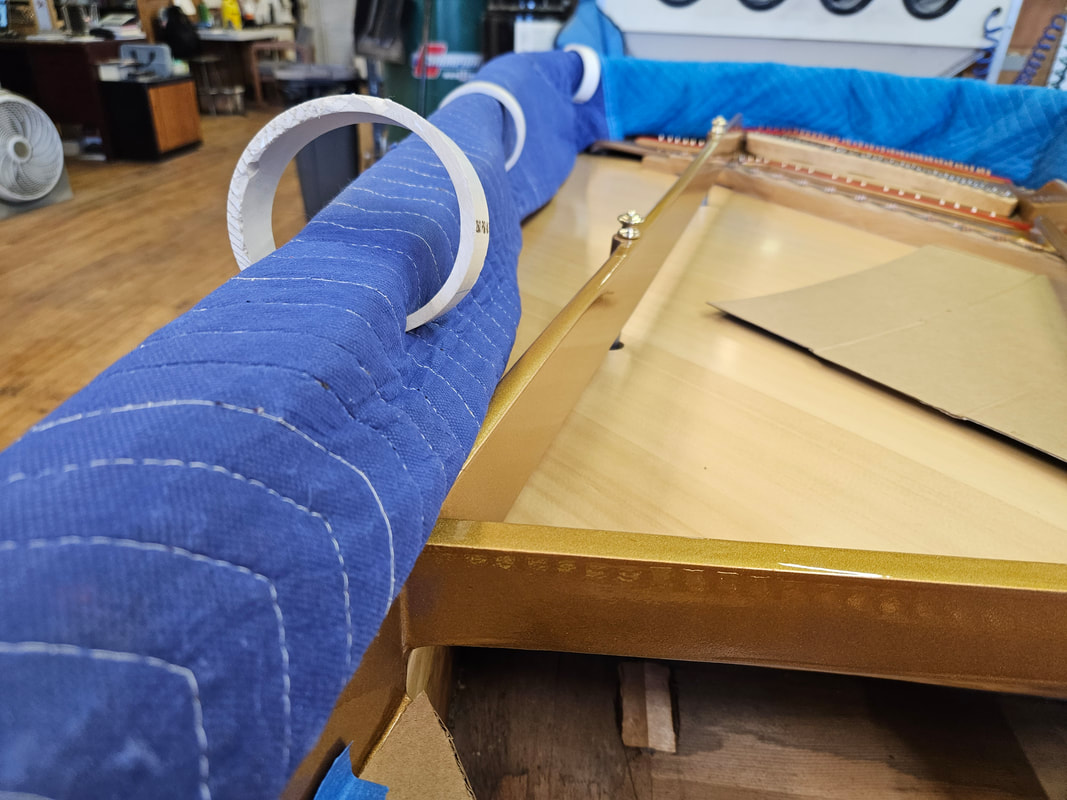
This is another ongoing tribute, in my life, to Piano Technology mentor Mr. David Betts and Ms. Debbie Cyr. At the piano shop, the owner prefers DMT diamond stones. They are heavy and solid. I work with his set the best I can but found that the course stone looses its grit very quickly, and quickly it becomes close to "fine". Recommended by fine woodworker Mr. John Cameron located in Gloucester, MA, I bought a set of water stone. They work much better, not loosing grit. The stone brand and price vary greatly. So far, this set of Naniwa water stone from Sharpeningsupplies is working well. The preparation takes about an hour yet it is essential for a good stringing job without much damage on the piano case. First, the top surface is covered by blankets and cardboards for protection. The little rings to fasten blankets are chopped from PVC pipes.
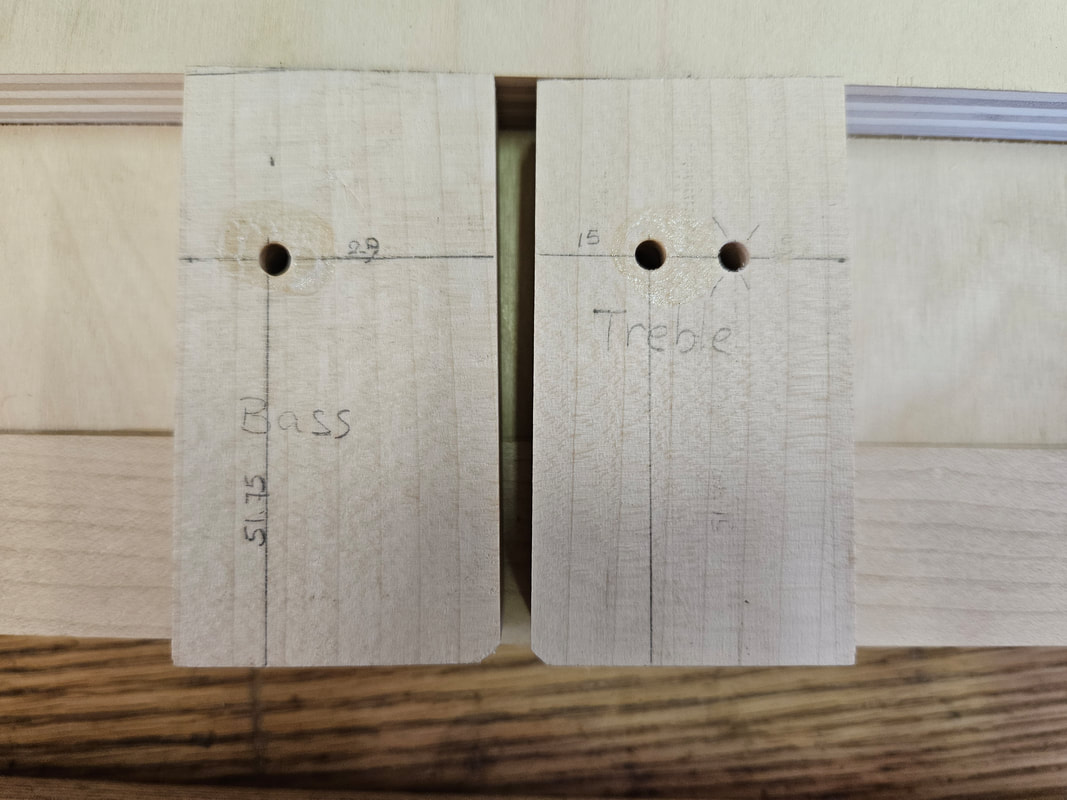
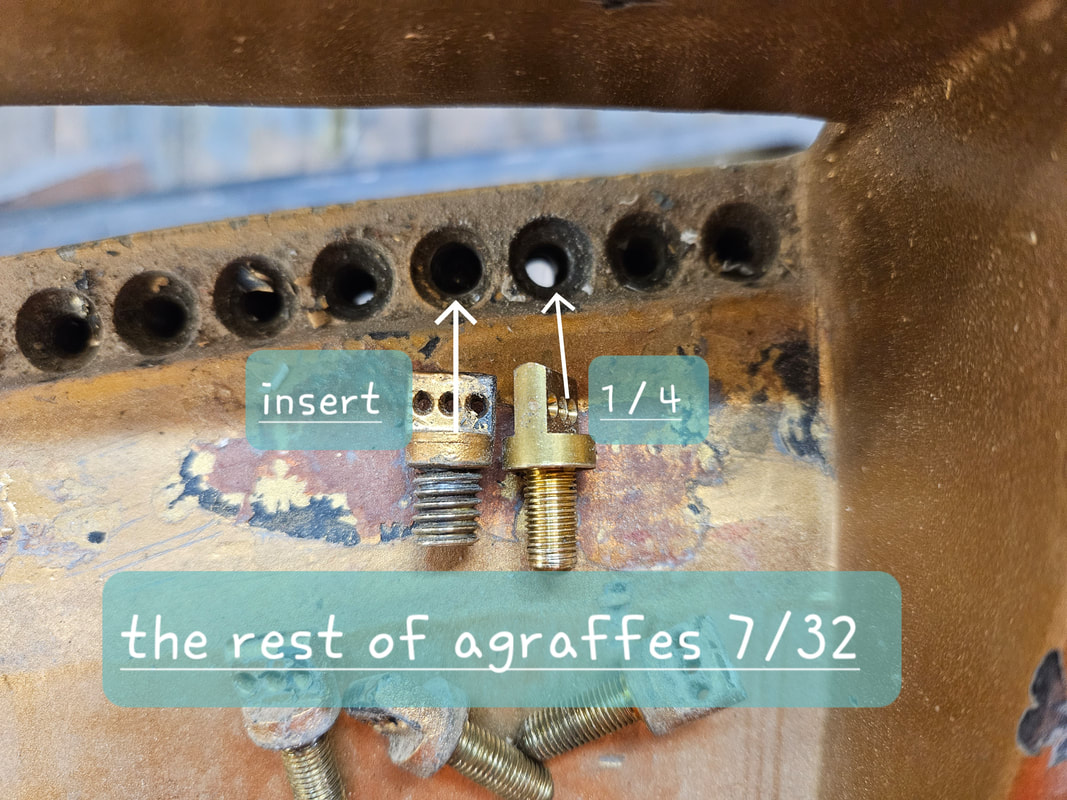
The plate is ready to be sanded down and refinished. Before sanding, the agraffes are removed. I noticed while taking them out, it felt very tight to them turn up. There might be adhesive applied by the last rebuilder who may had a very hard time dealing with these little thingies. This piano has one agraffe insert and a large size (1/4") agraffe as repair from before. The rest are 7/32" in size. Oh, there is also a long-ago broken agraffe possibly from over tightening. The bottom part of that broken one is still in the hole. How to get it out? Hmmm. There are 3 way I have learned:
1. Put the top piece back on, use friction to turn the bottom up since brass is soft and can be easy to turn up. 2. Tap a sharp slotted screw driver in, then turn it out while hammering it down. 3. Drill through the bottom part with a small bit, increase the bit size and drill until a thin layer of brass is left inside the screw hole. The thin piece can then be easily chipped out. 4. Easy-out or screw extractor. Drill a hole for the size of the easy-out, tap in the extraction bit, turn it counter clock wise by hand to extract the broken brass bottom. This is the last solution. Easy-out can do big damage. This operation is documented on two pianos, a Steinway L and a Steinway O. Work is guided by shop owner Mr. Jude Reveley at Absolute Piano Restoration. Before working on bridge, the plate is clamped at ideal position. Normally 2 clamps are enough. The pinblock is being glued down under plate, thus many clamps here.
|