|
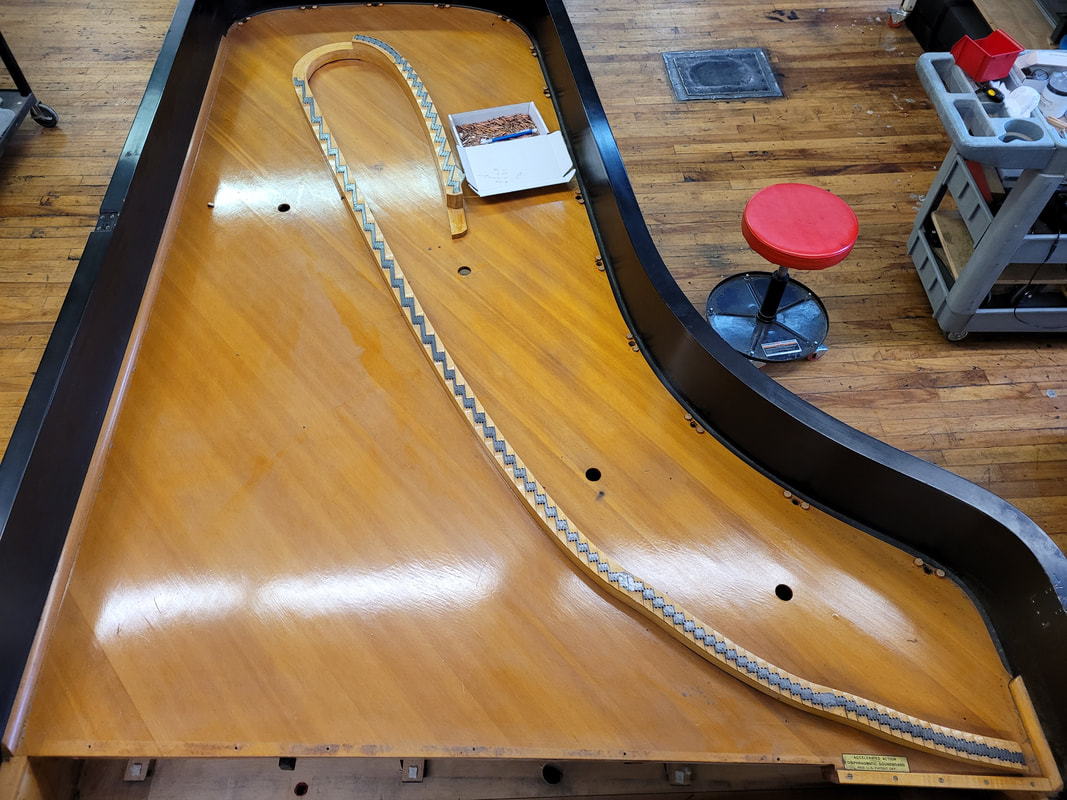
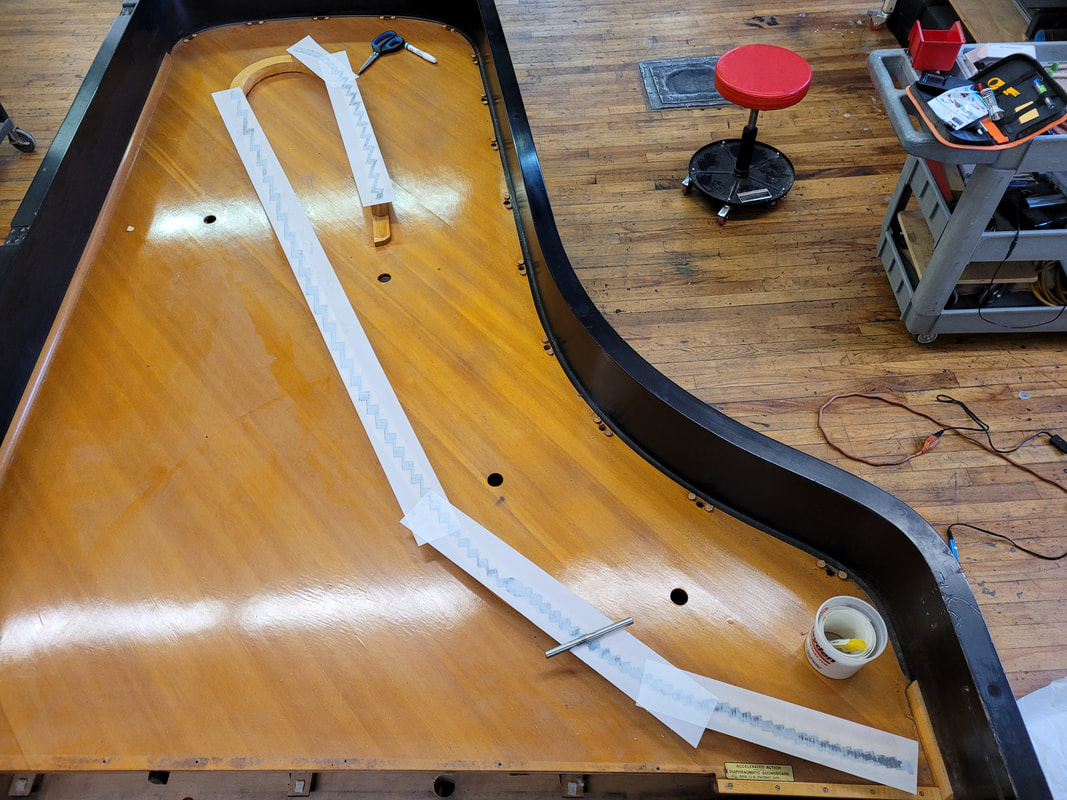
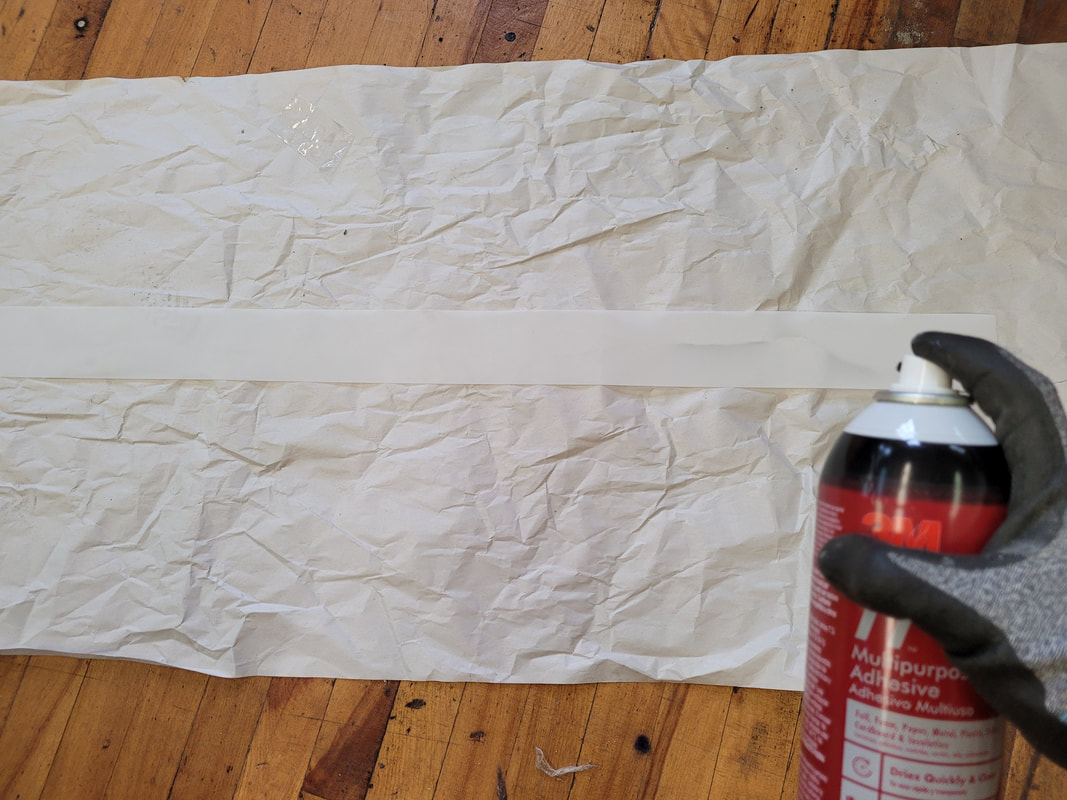
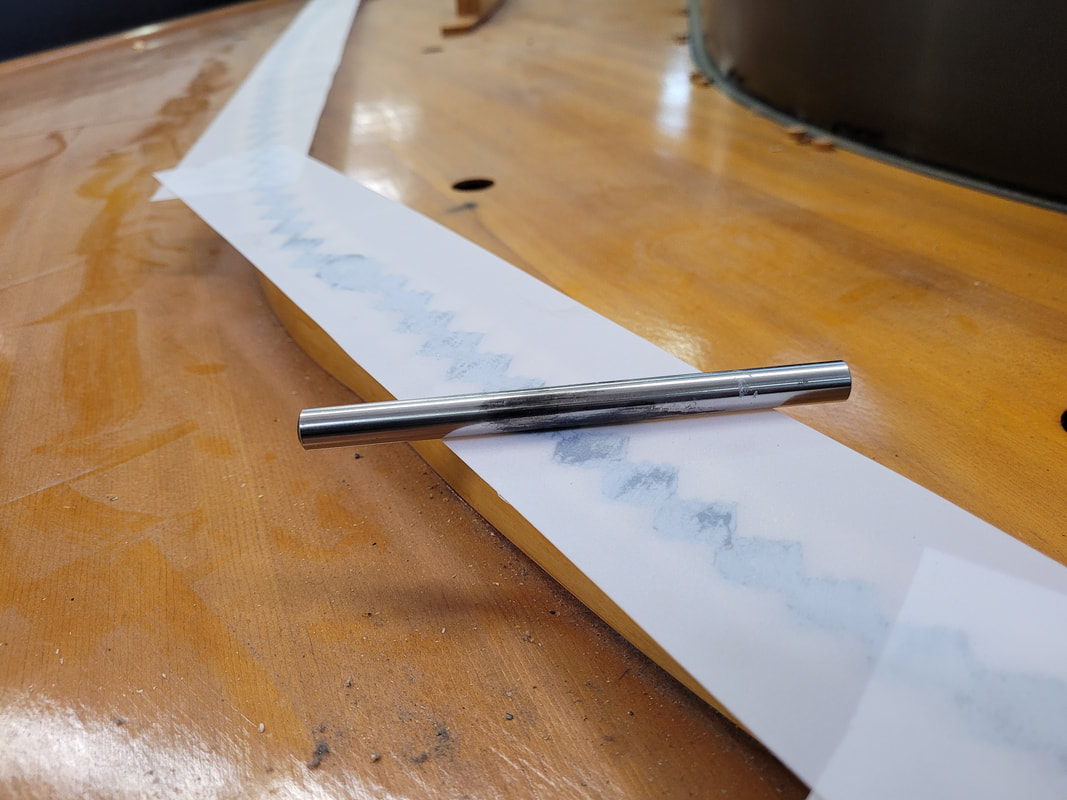
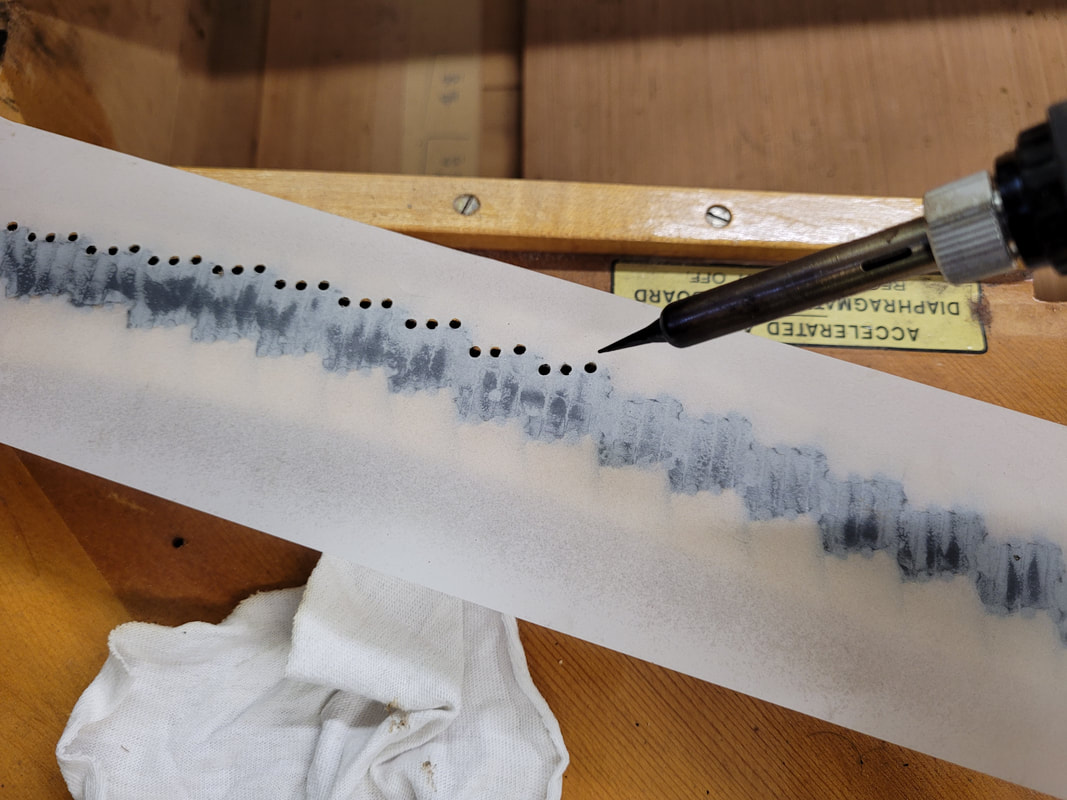
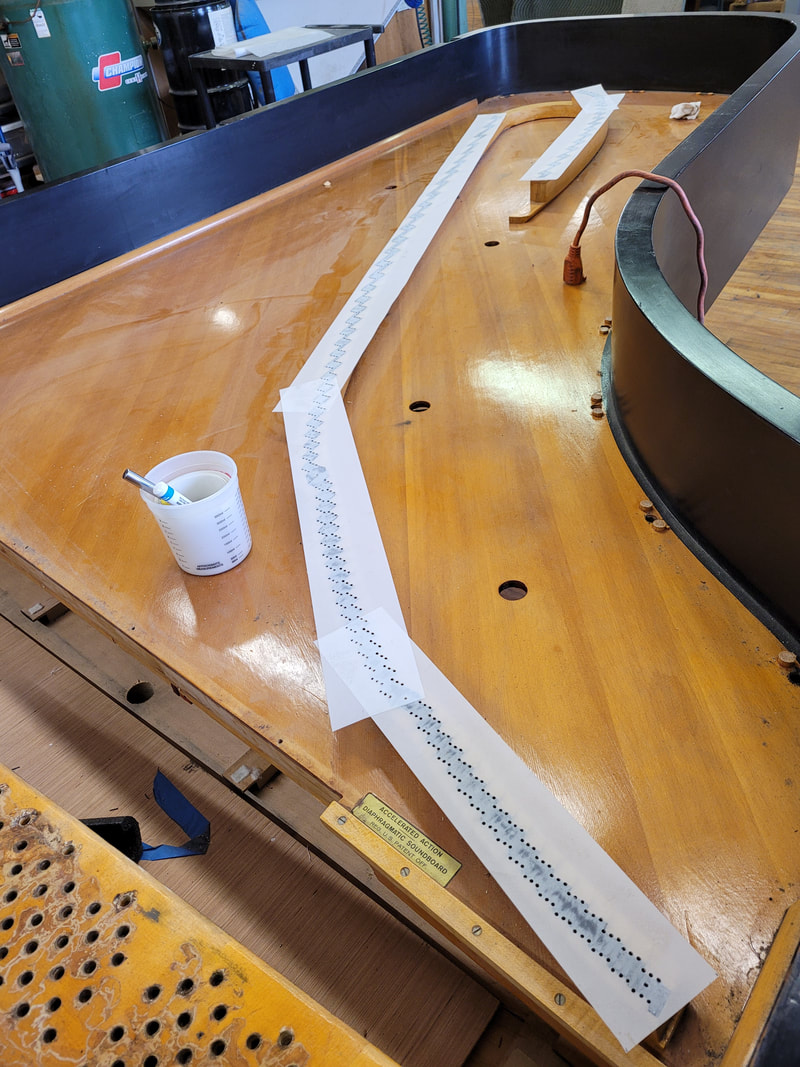
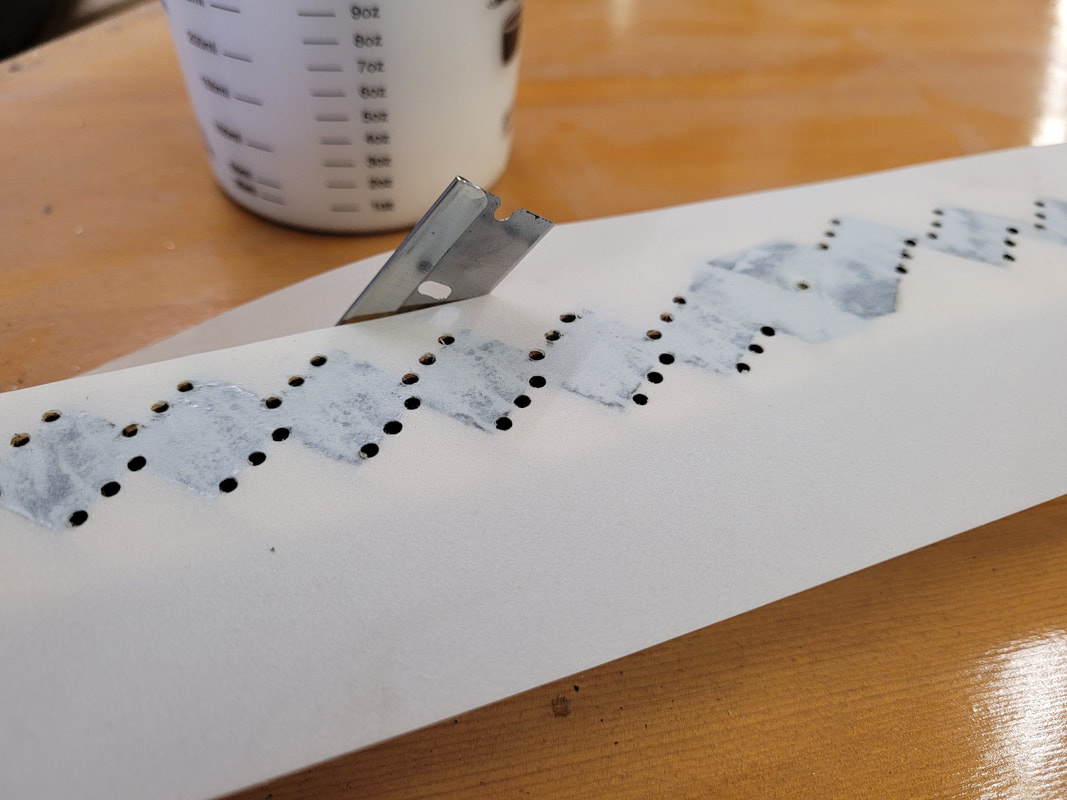
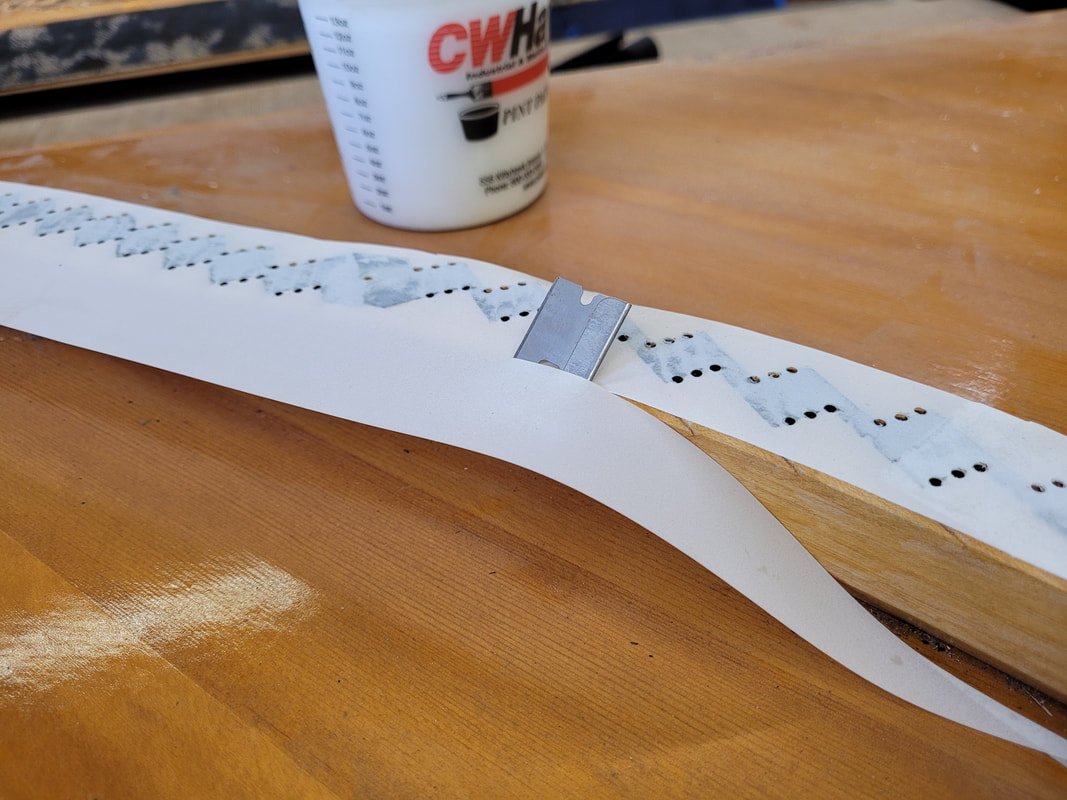
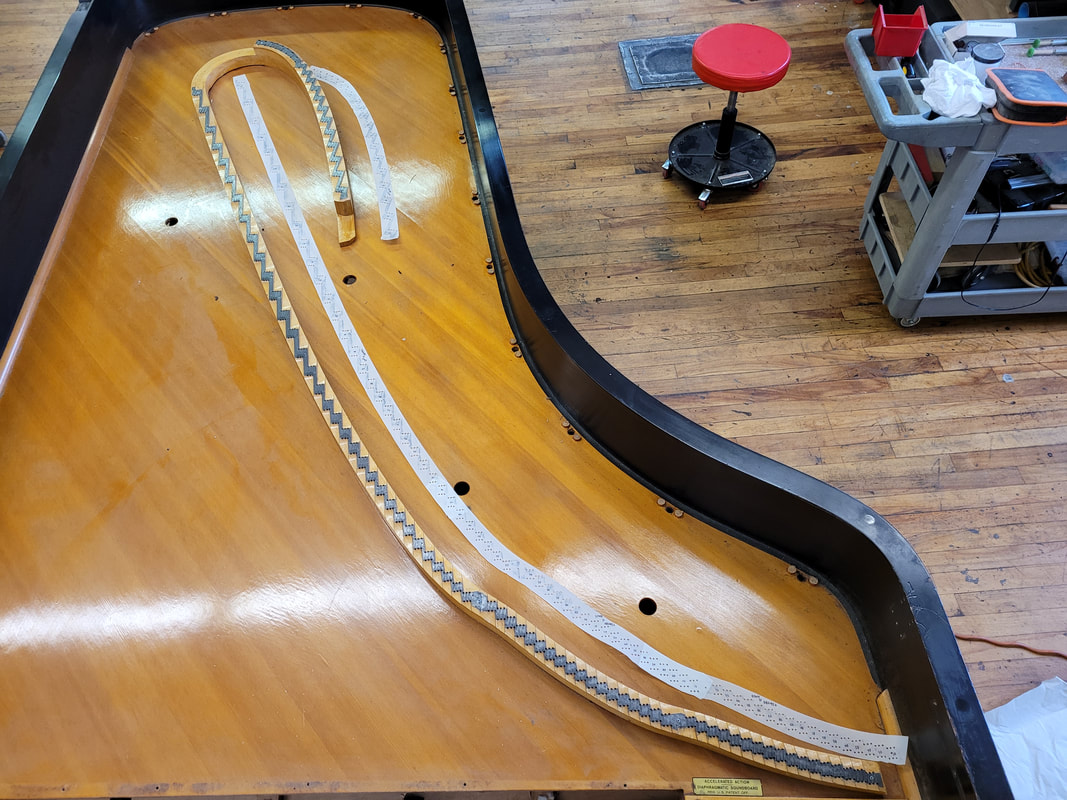
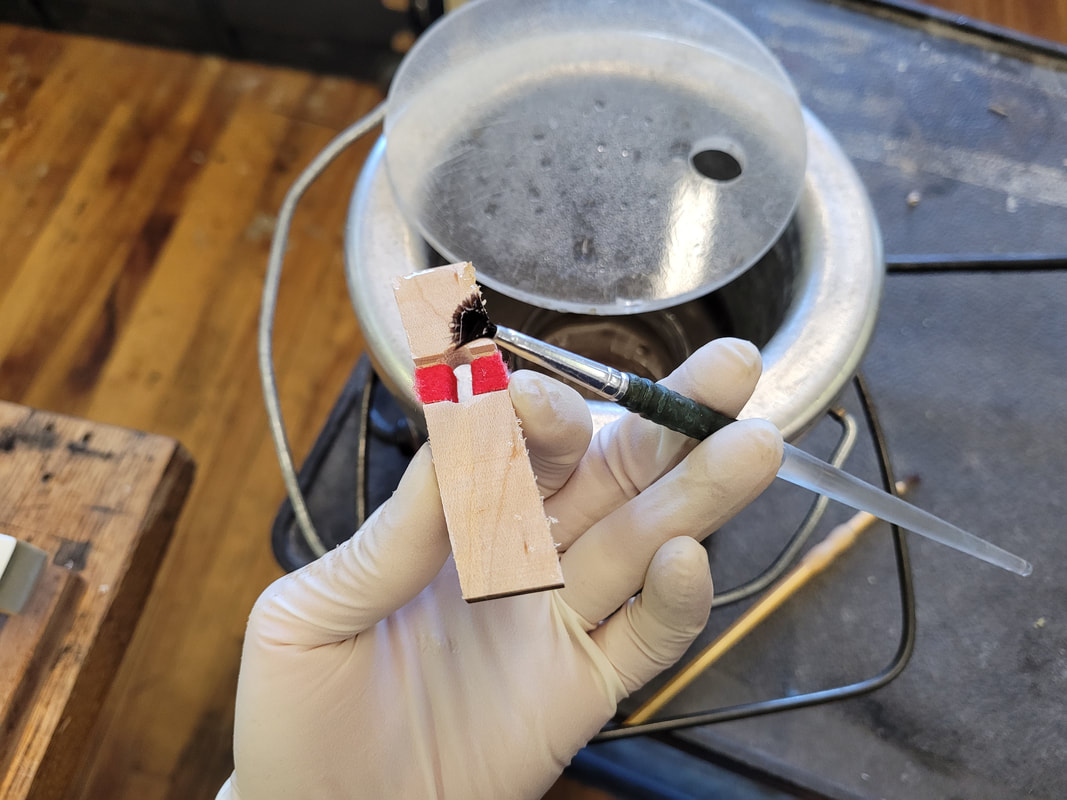
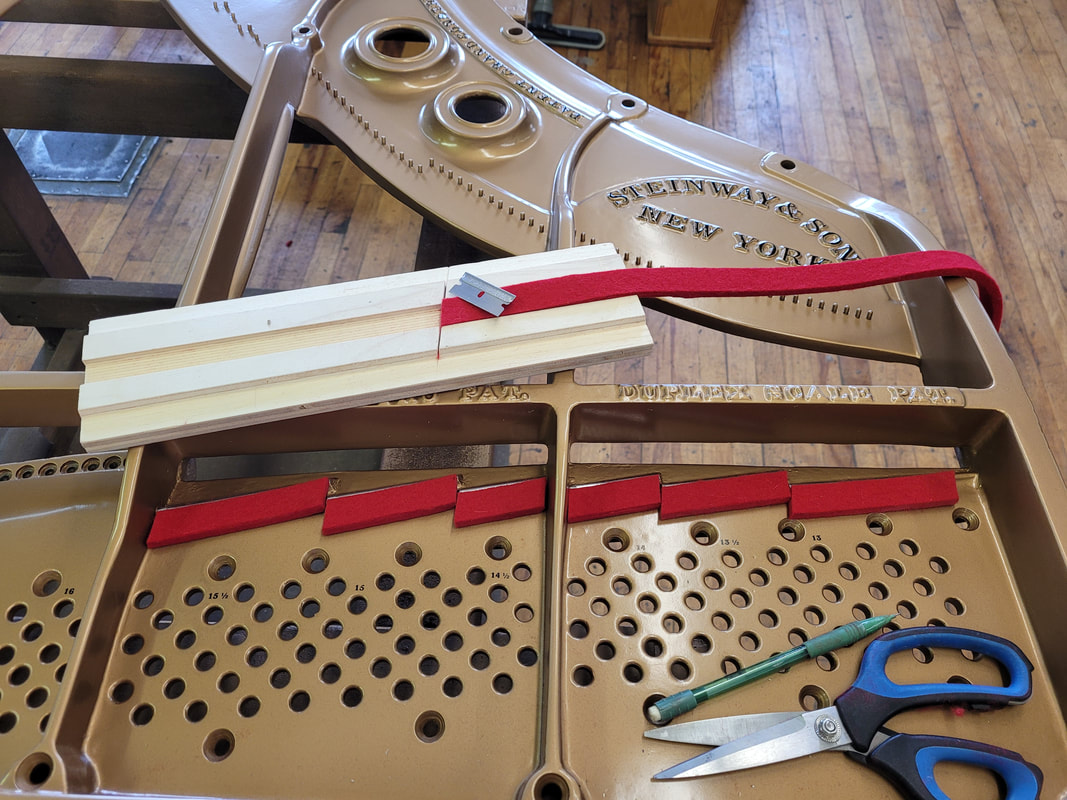
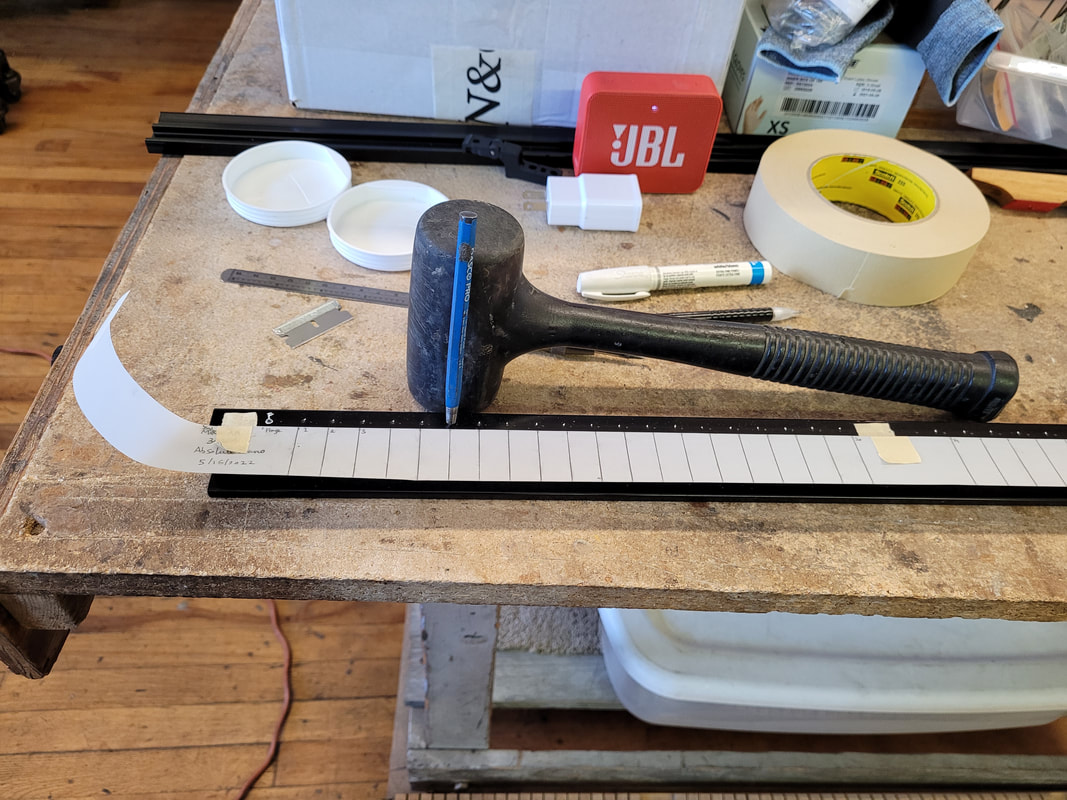
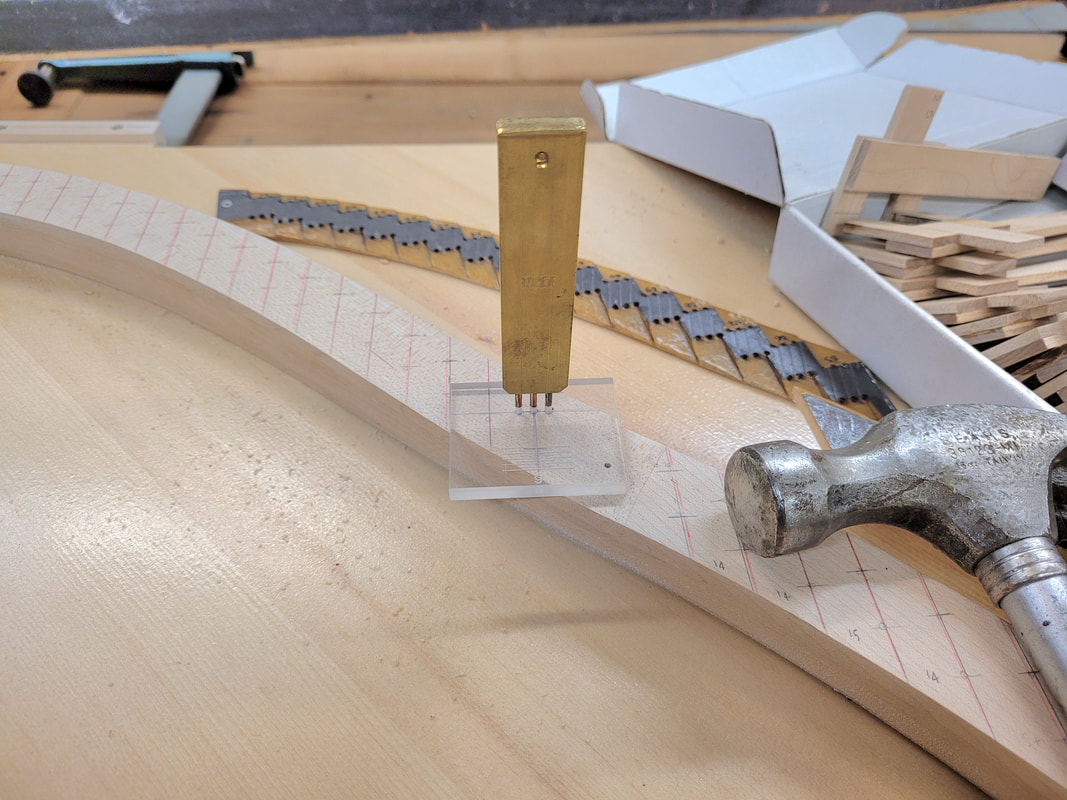
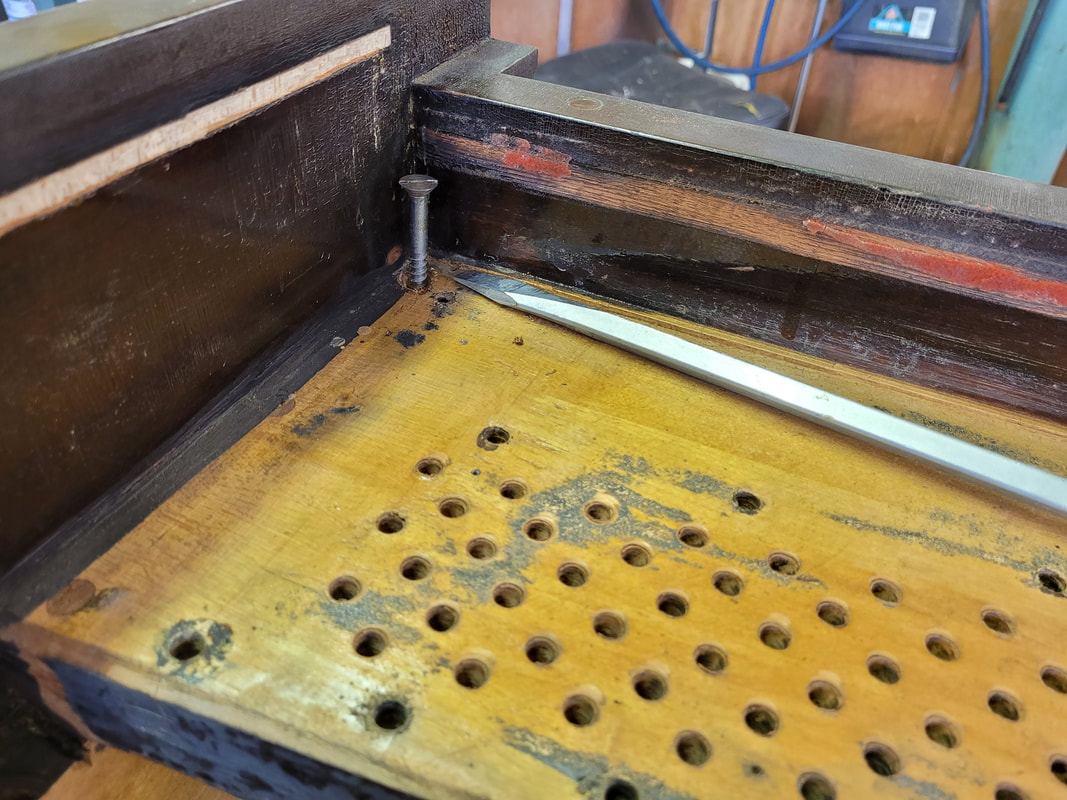
A bridge pattern is made before bridge top is taken off. The pattern will be reference to new bridge pin patterns once bridge top is replaced. Remove all old and rusty bridge pins, take out pre-sliced mylar strips and cut to fit on the bridge top. Each piece of mylar shall over lap to secure each other. Plug in soldering pen to allow it to heat up. It is better to get some black paint transferred onto mylar pattern from old bridge top. Spray mylar with adhesive, then lay on bridge and rub vigorously with a piece of metal dowel/stick to let the black paint stick onto mylar. Take the hot soldering pen, carefully punch into each bridge pin hole. Note, the front and back holes are drilled at opposite directions. Melted mylar sticks on soldering iron, wipe constantly for the accuracy of the pattern. After all holes are poked, double check if there is any part missing. Cut 2 sides of the pattern with a razer blade, blade bottom pressed against bridge wall. Number note numbers, write piano make and serial number on each section of mylar incase any piece gets unglued or fell off. Carefully take the pattern off bridge and store till new bridge top is installed and new bridge pin pattern ready to be laid out.
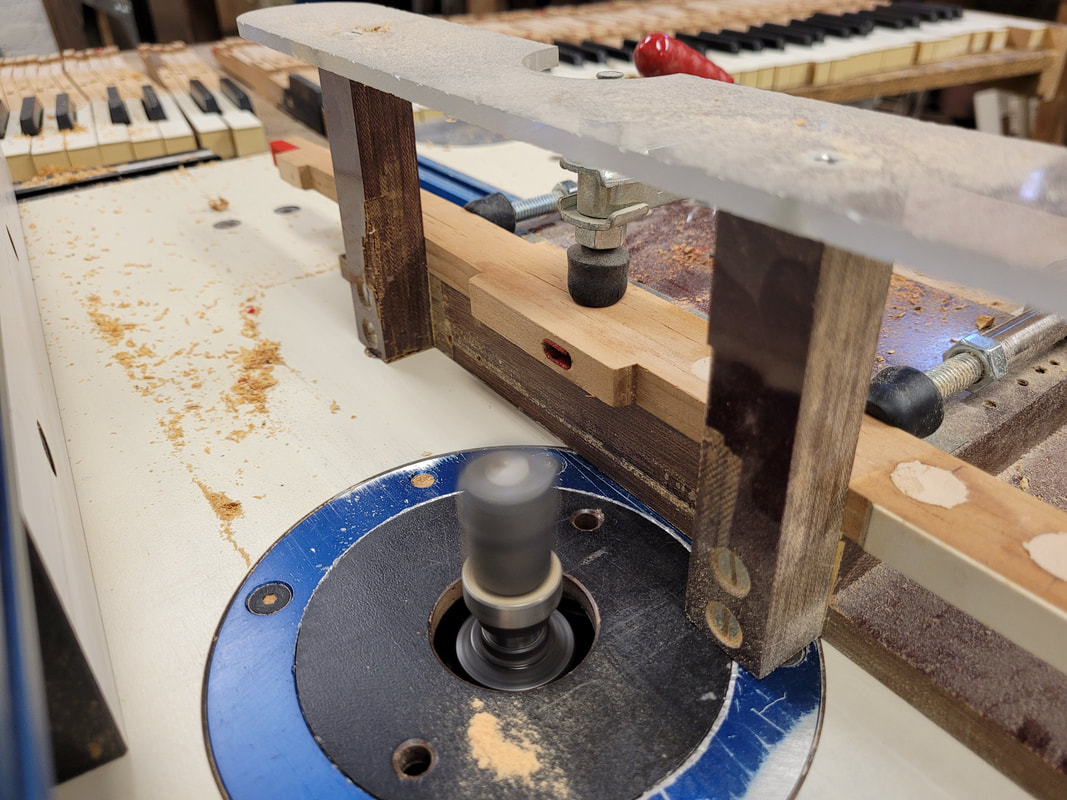
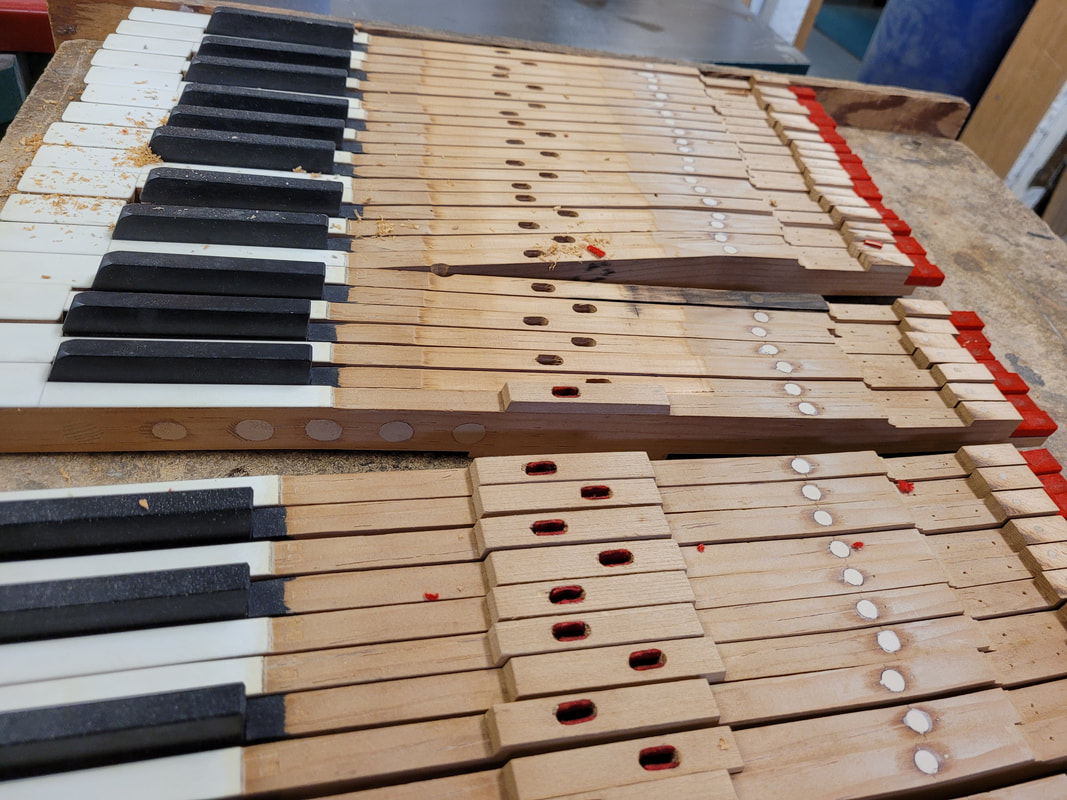
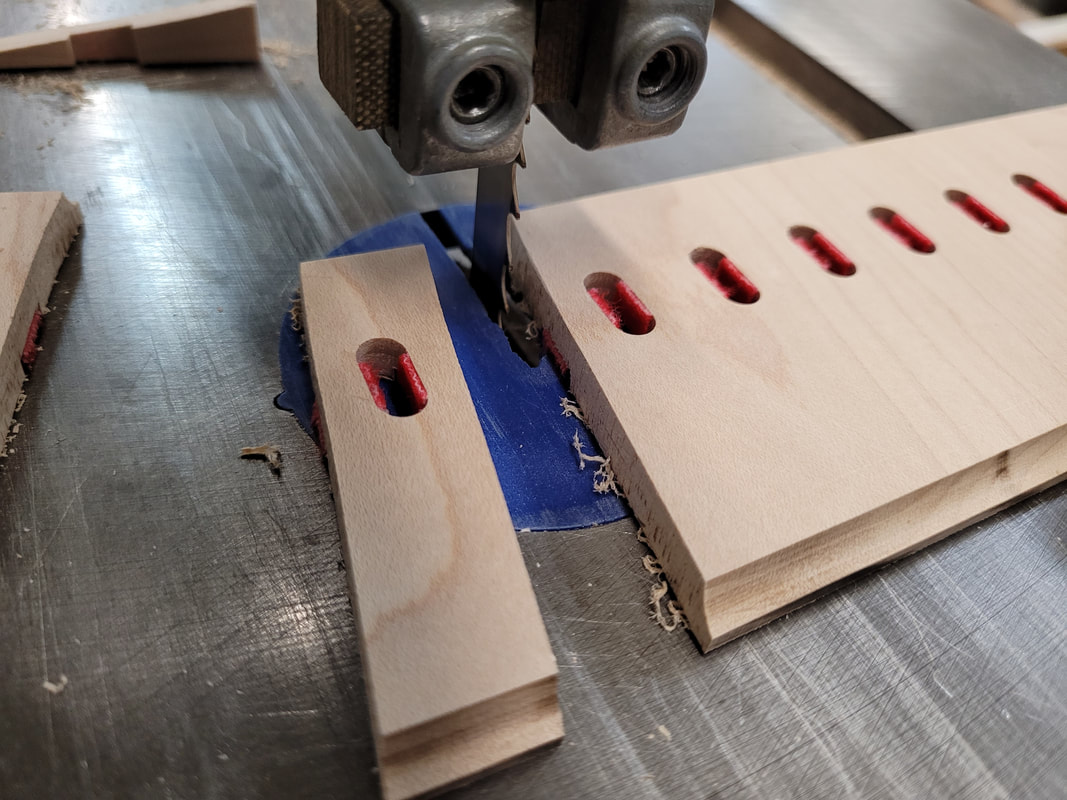
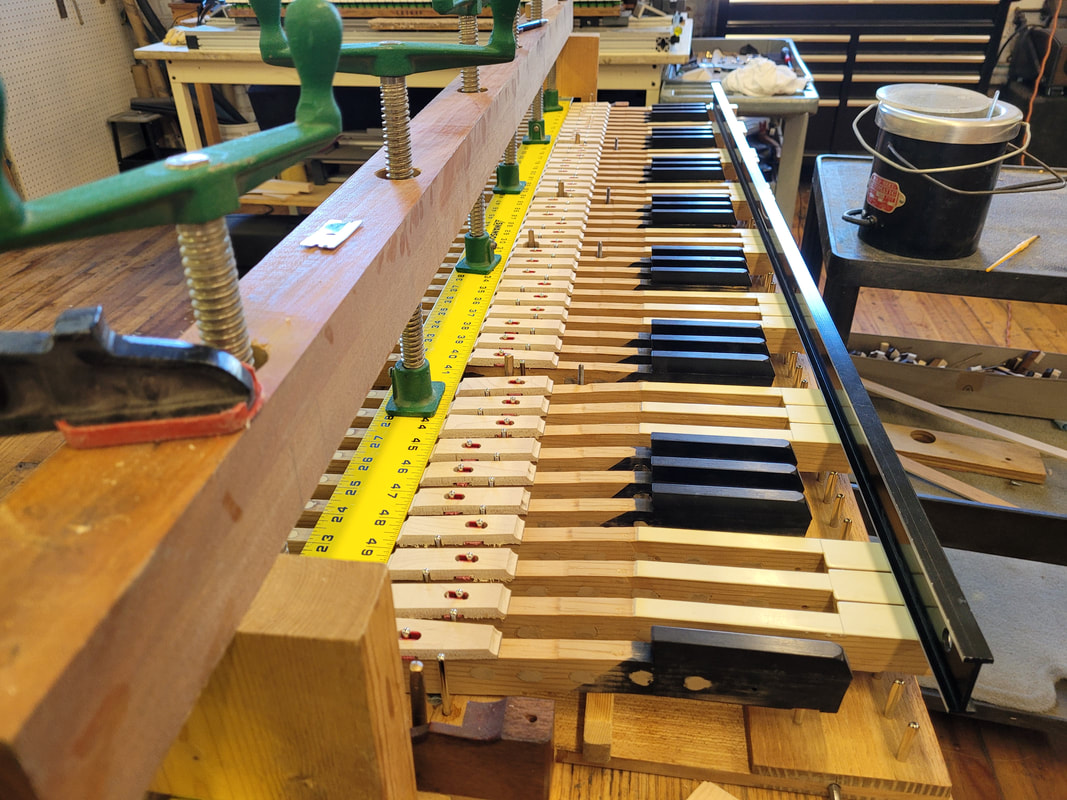
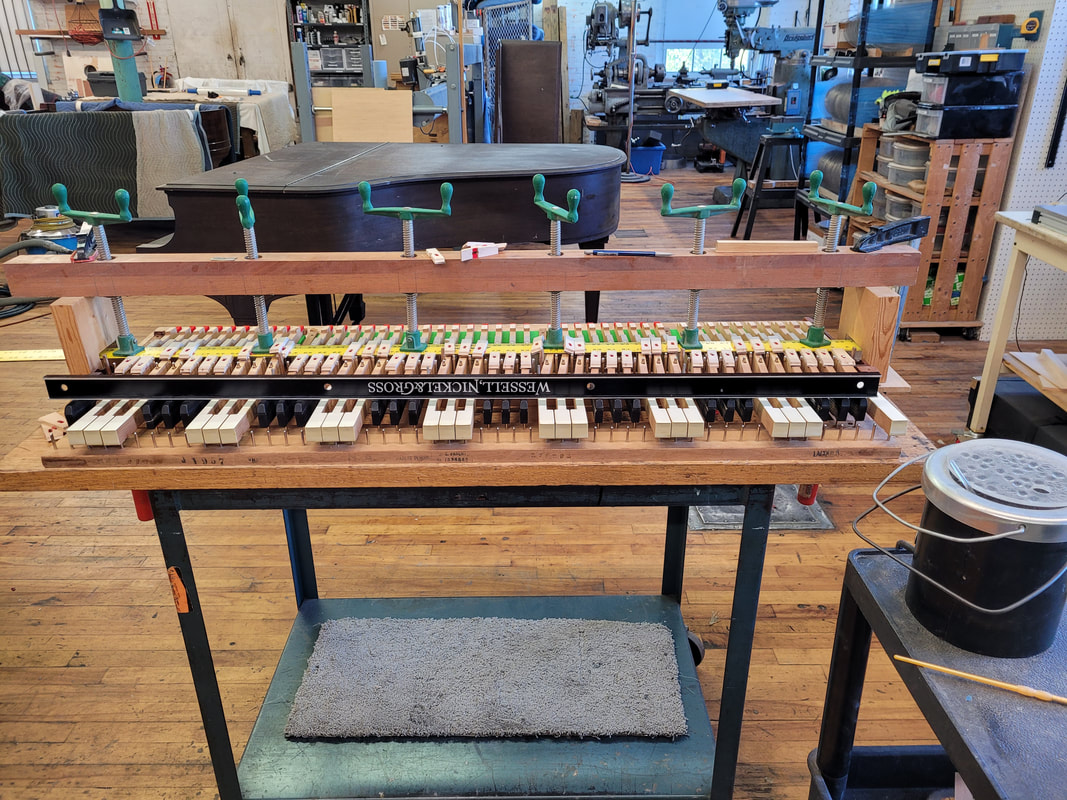
Remove old key buttons on router table with a jig, or clamp key on vise then remove key buttons with a felt knife. Trim key button stock to width, route decorative edges, and mark them according to angle of keys. On a bandsaw, cut off each key button according to the angled lines marked, set up jig to glue the buttons, apply hot hide glue for this job. The glue sets in seconds, so work fast but as accurately as can be. For each round of gluing, work on every other key because the buttons are cut wide to give room to be trimmed flush to two sides of keys. Let them dry for an hour, then rough trim on bandsaw (not shown in pictures). The last pass is to sand them on an clamped up side down Festool detail sander. The sander is very heavy, and gets heavier as work goes by. This way, one can work fast and save energy.
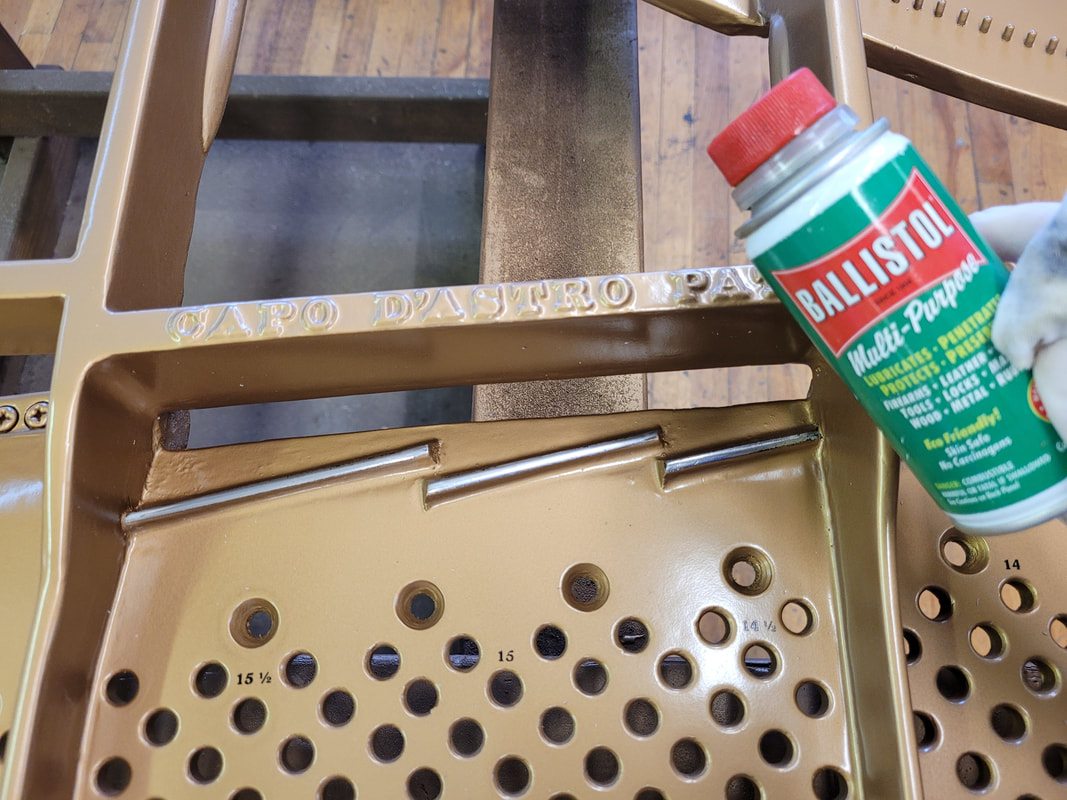
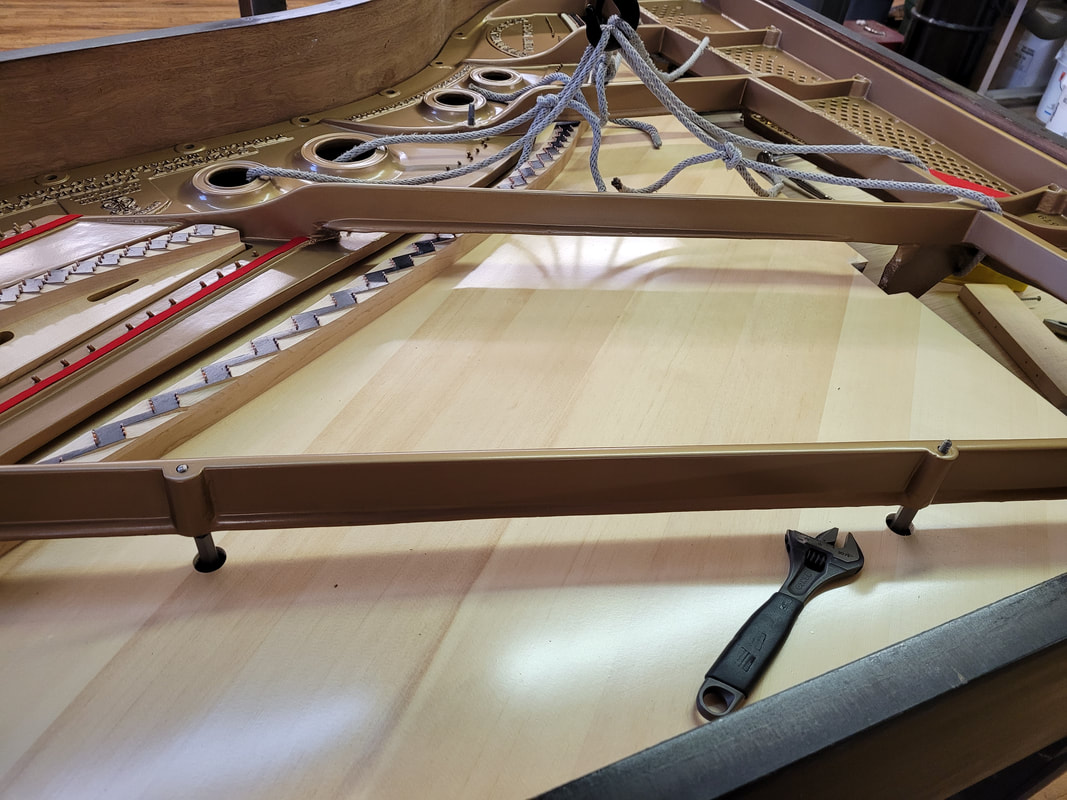
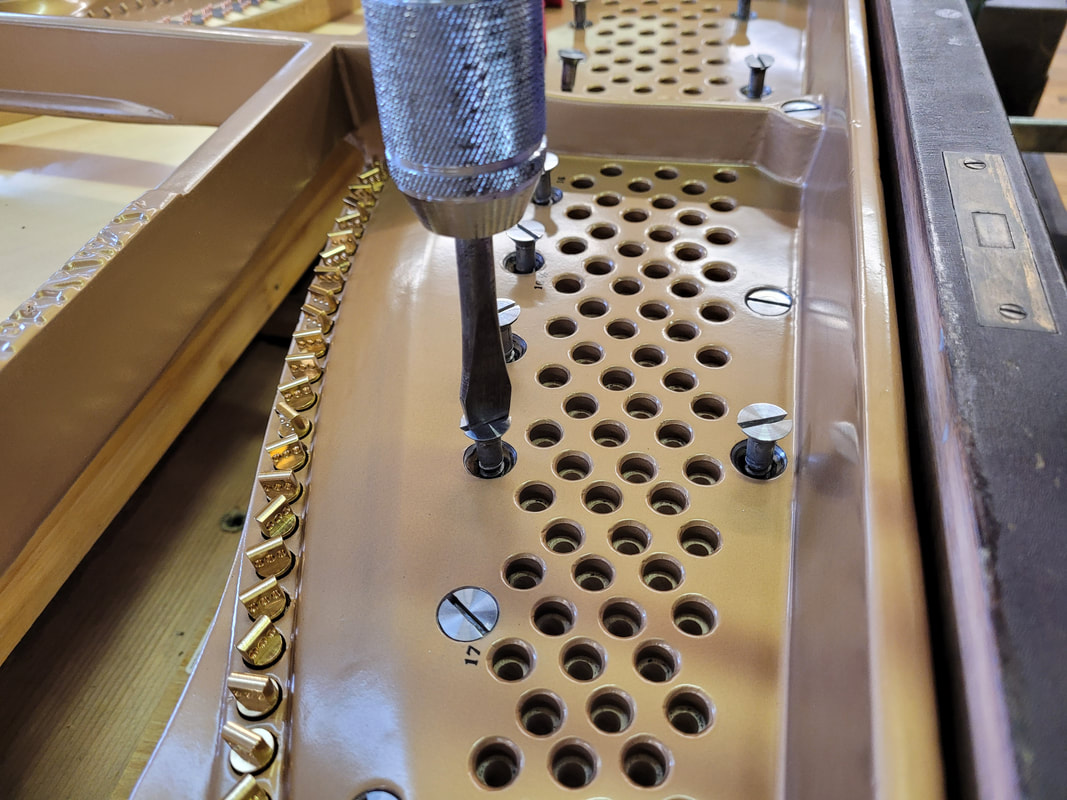
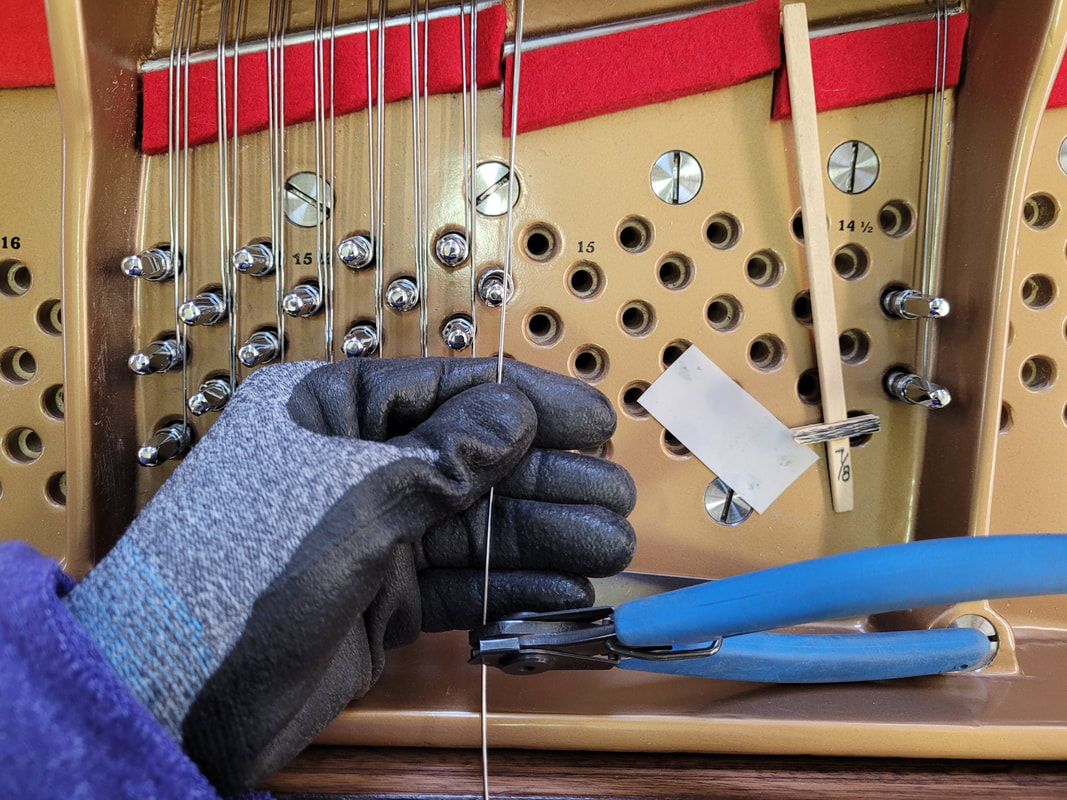
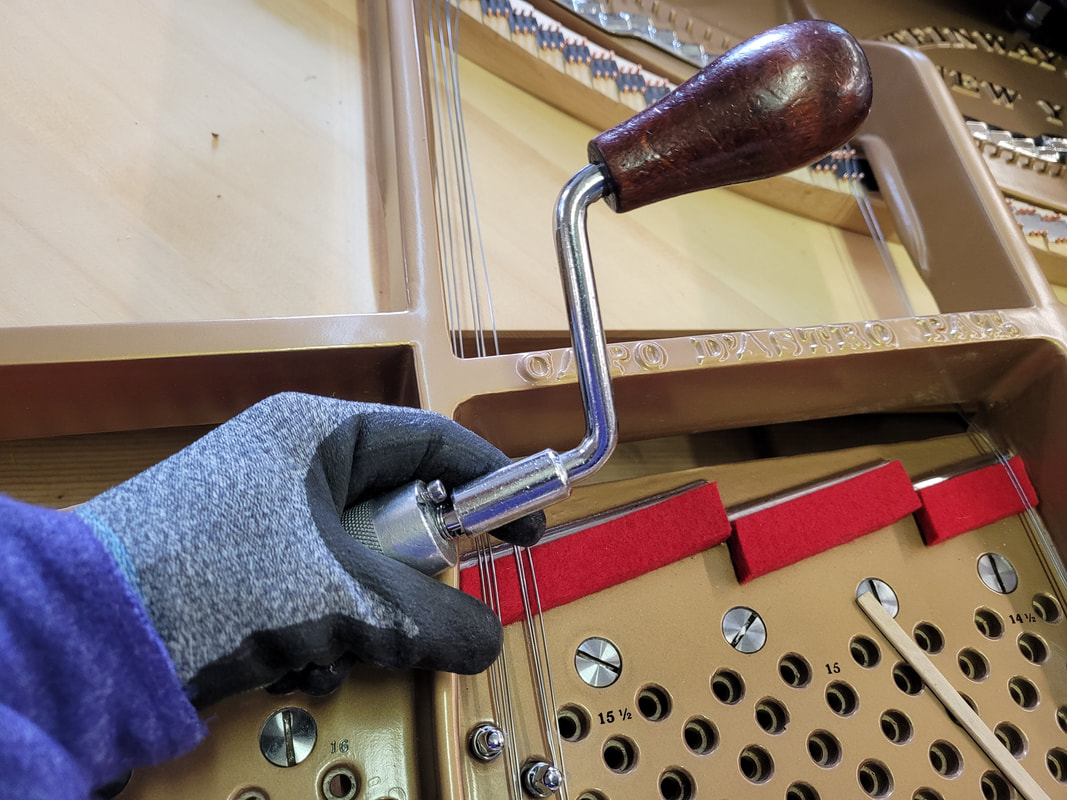
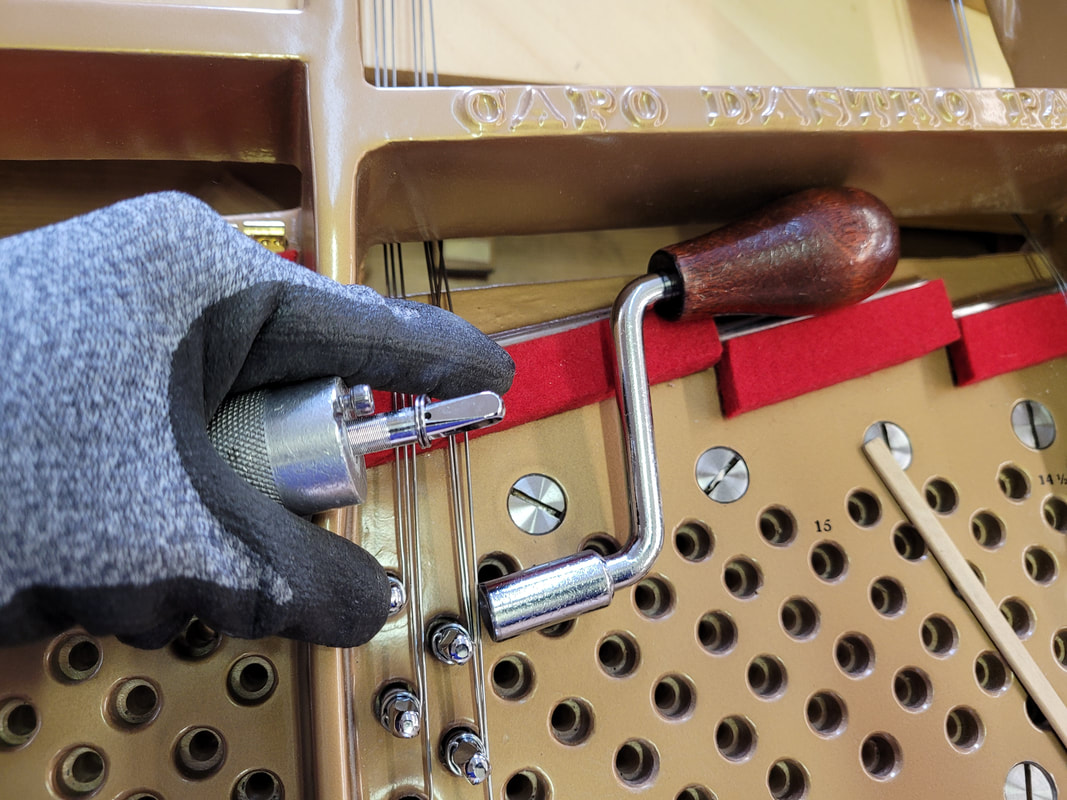
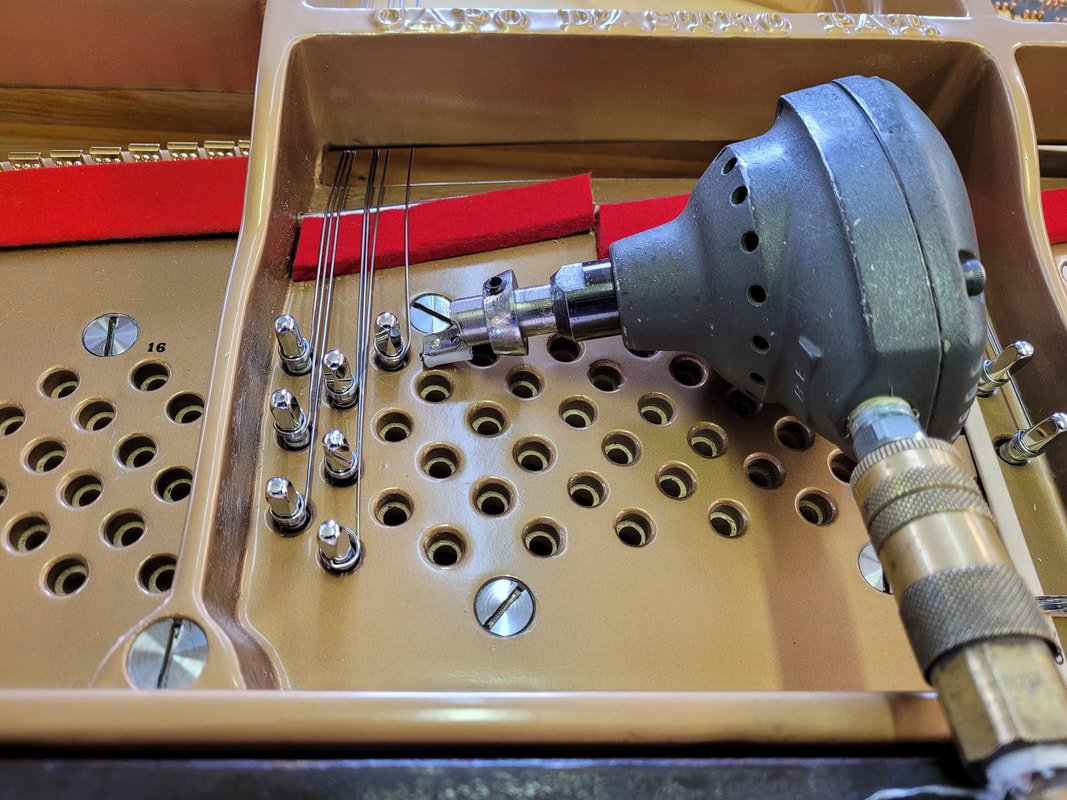
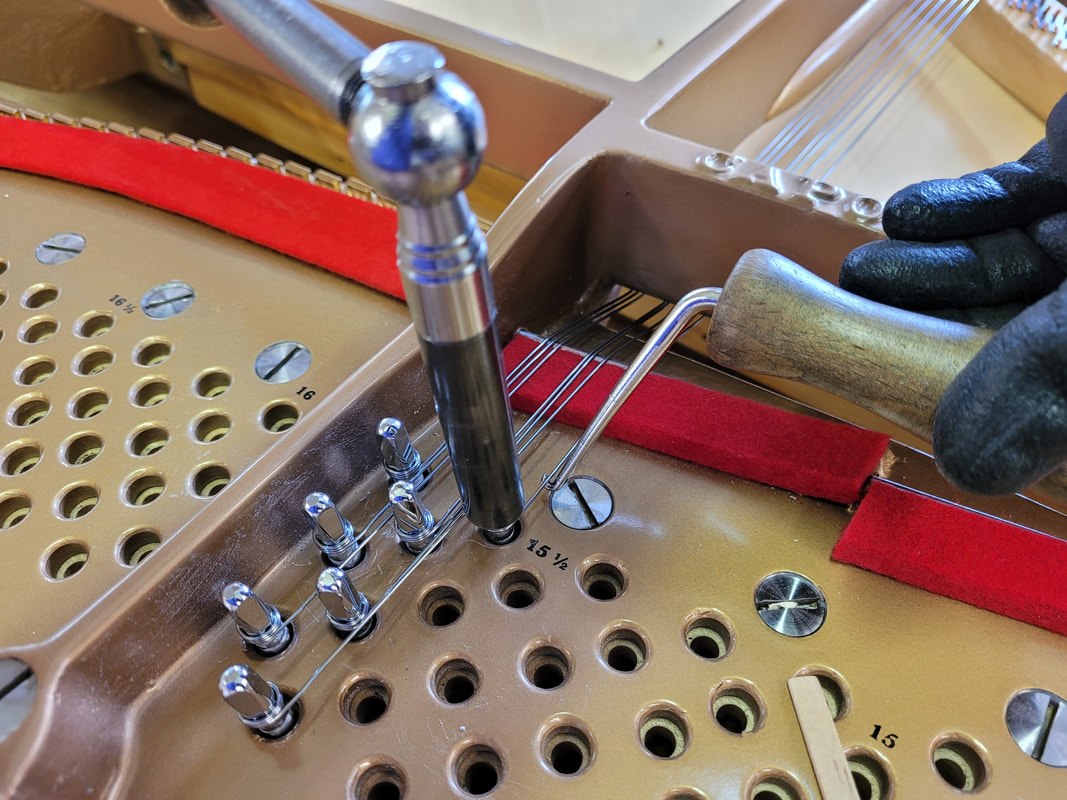
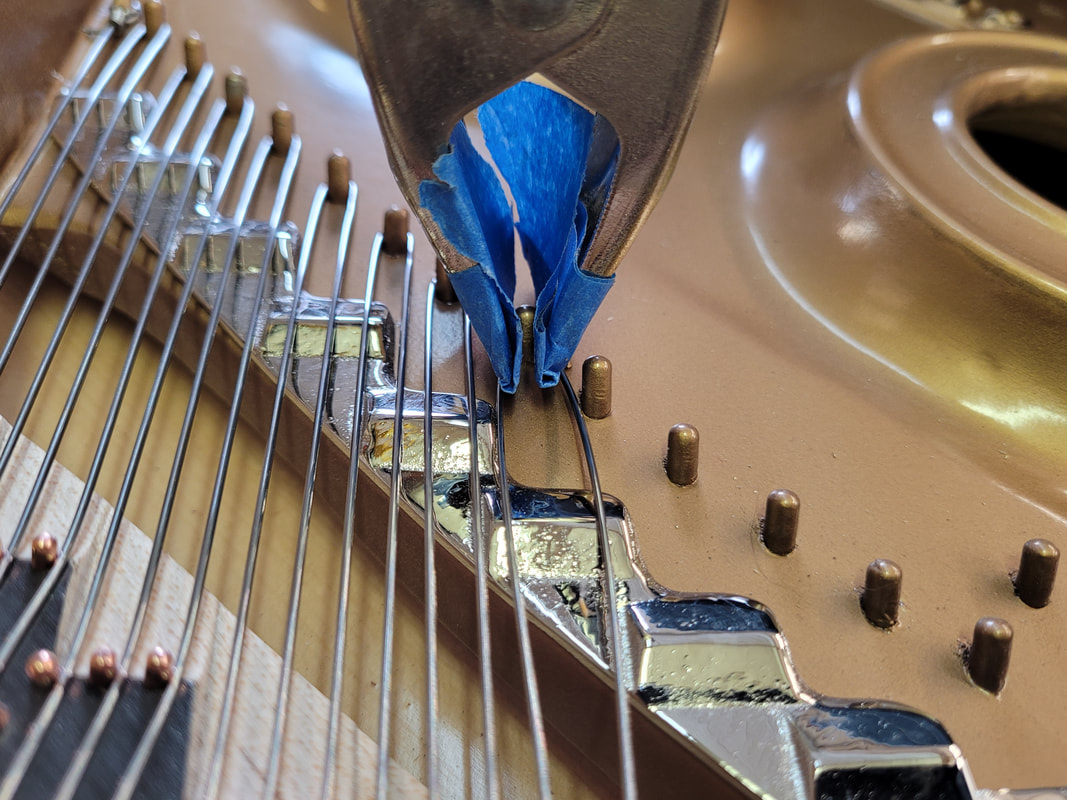
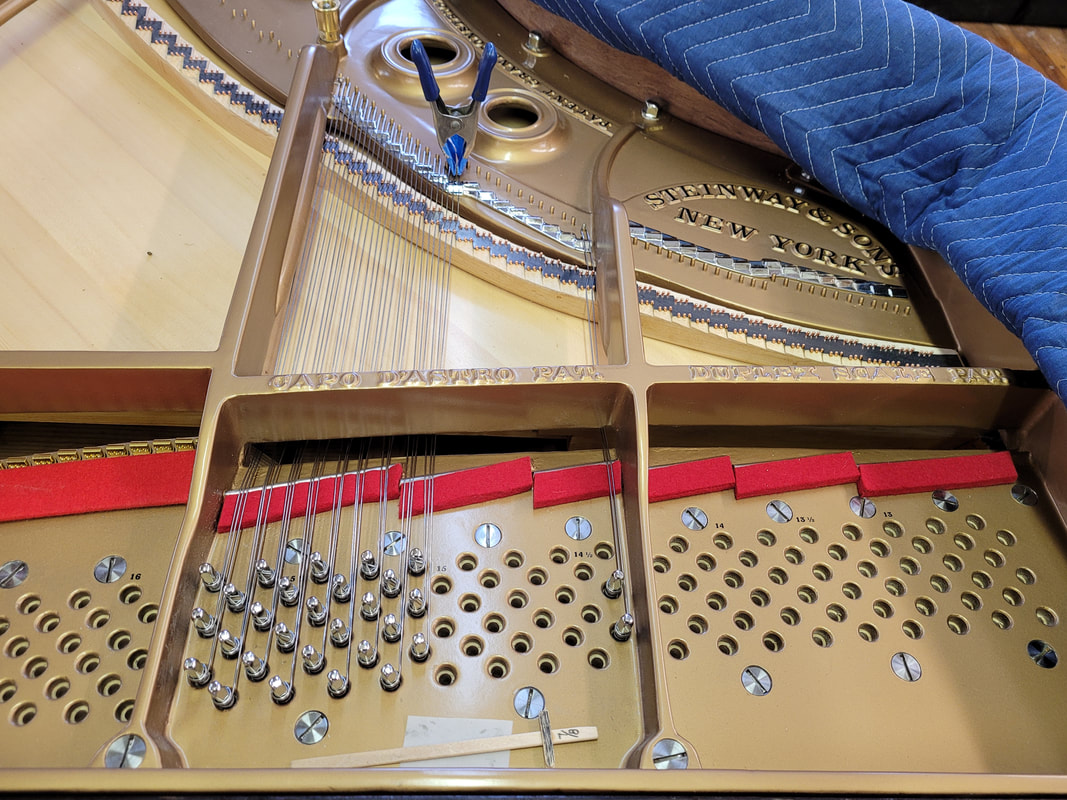
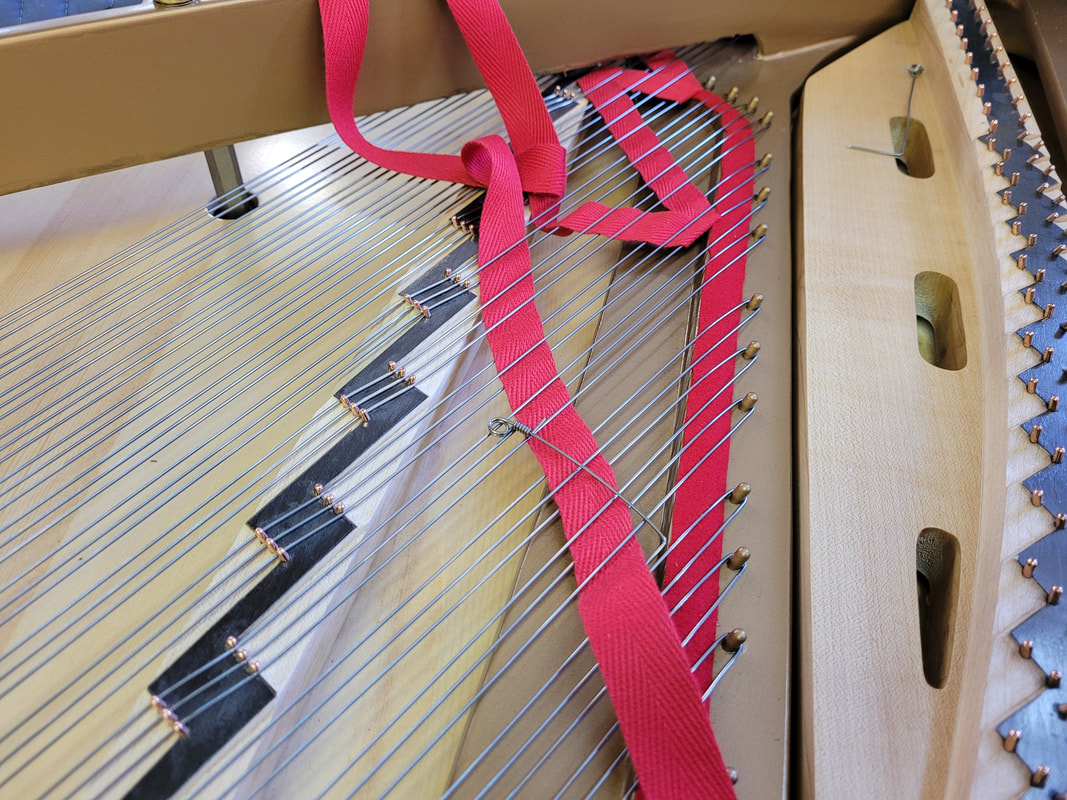
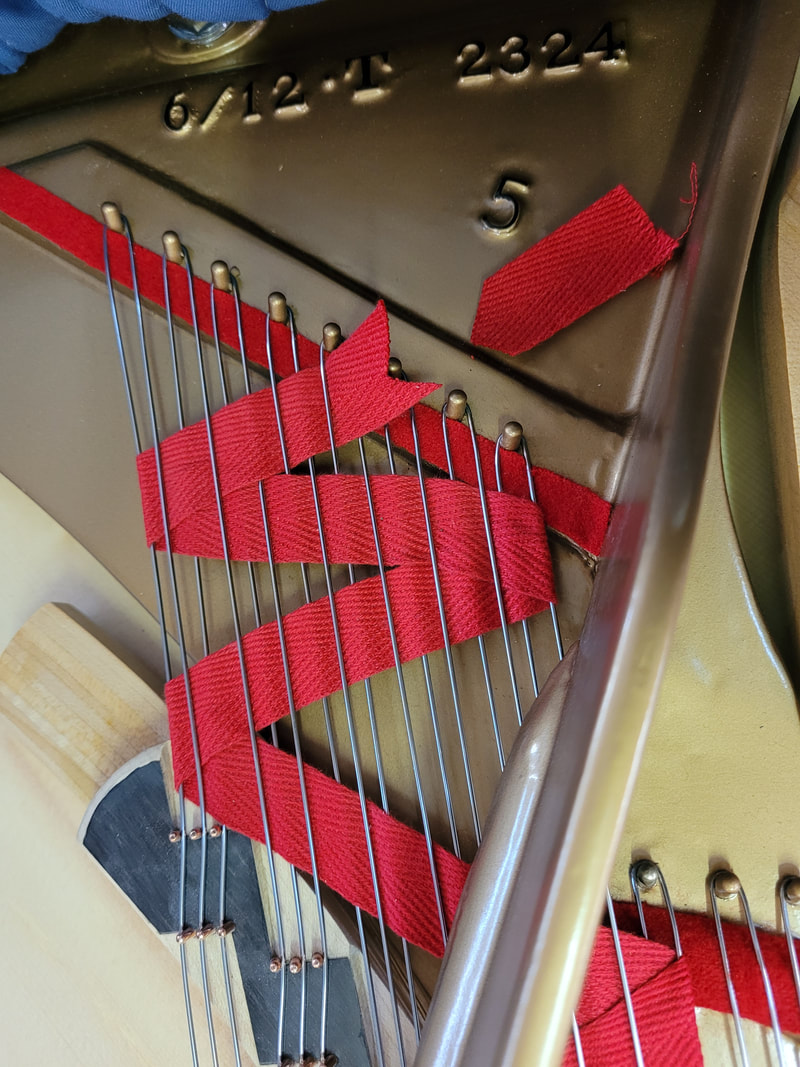
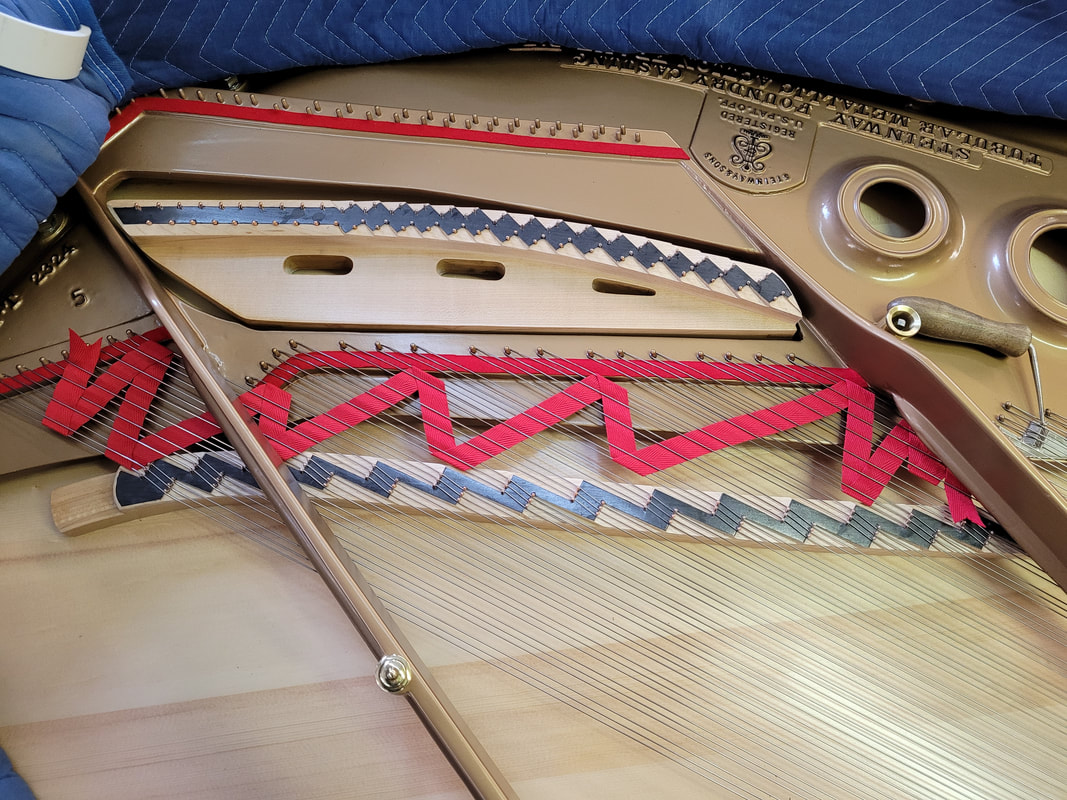
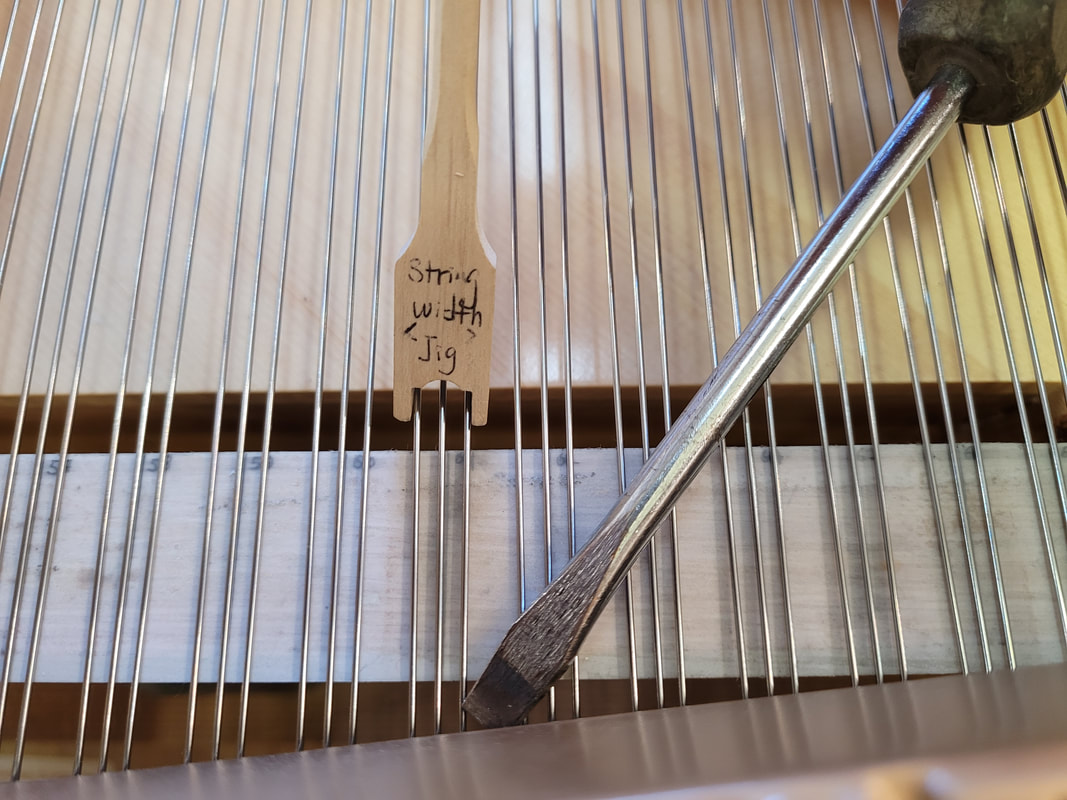
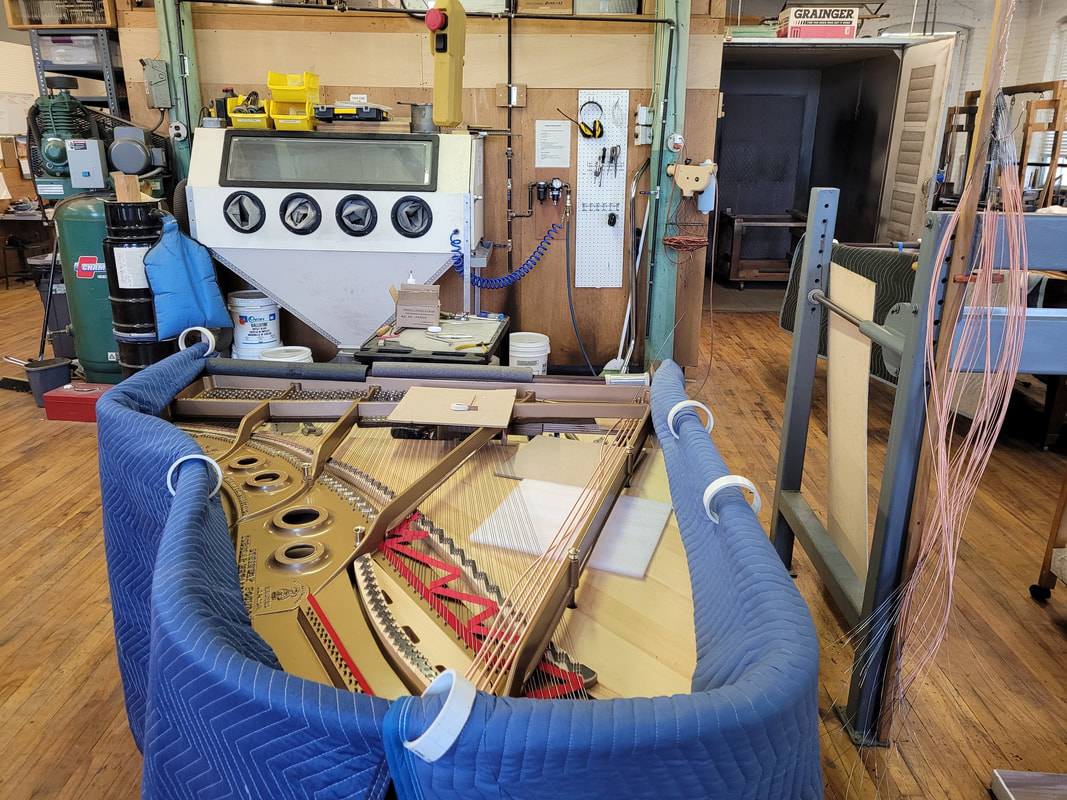
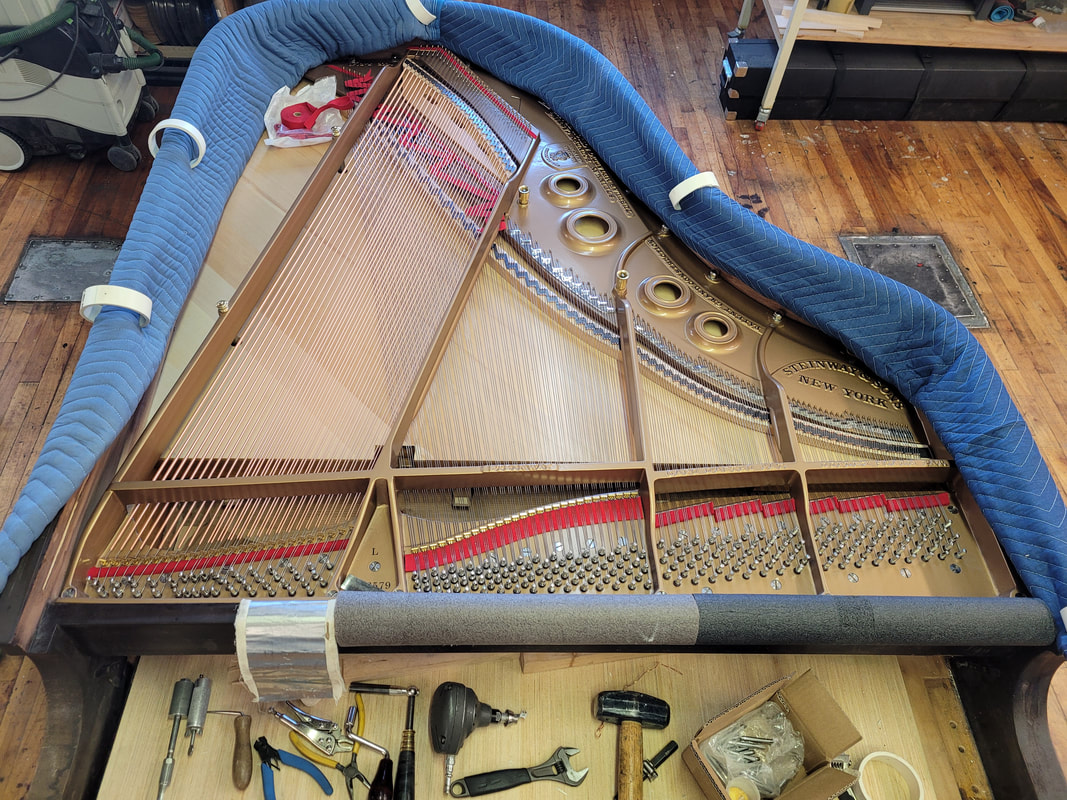
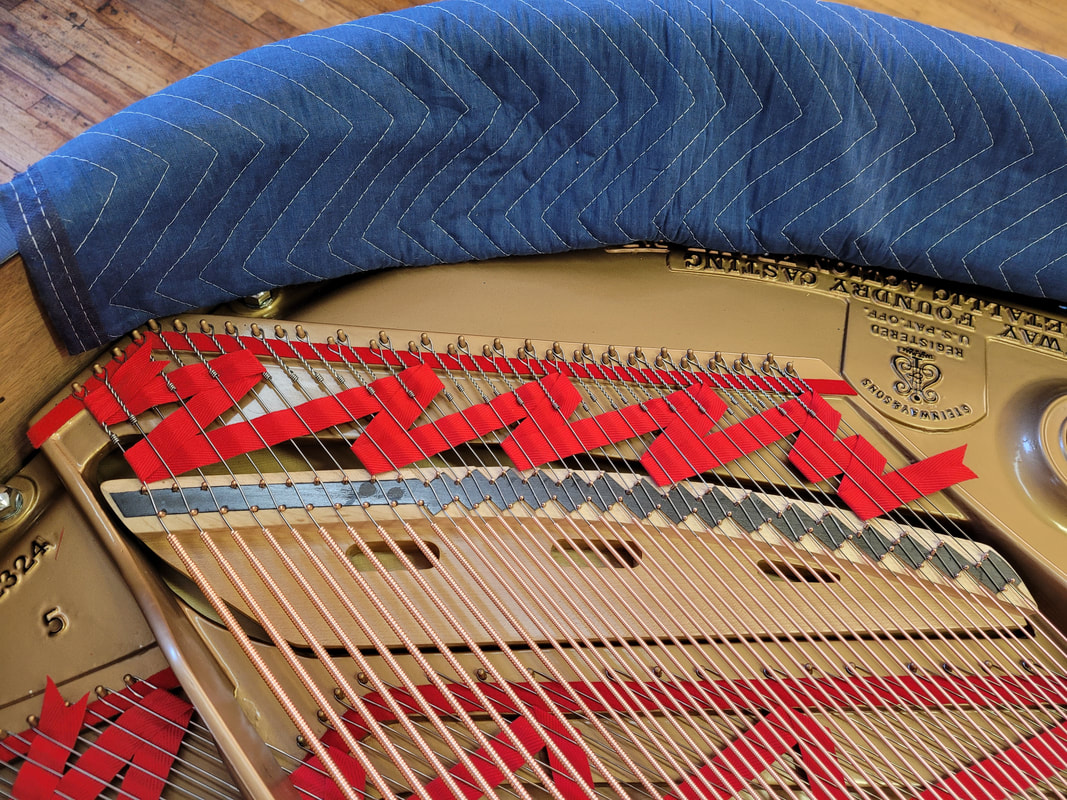
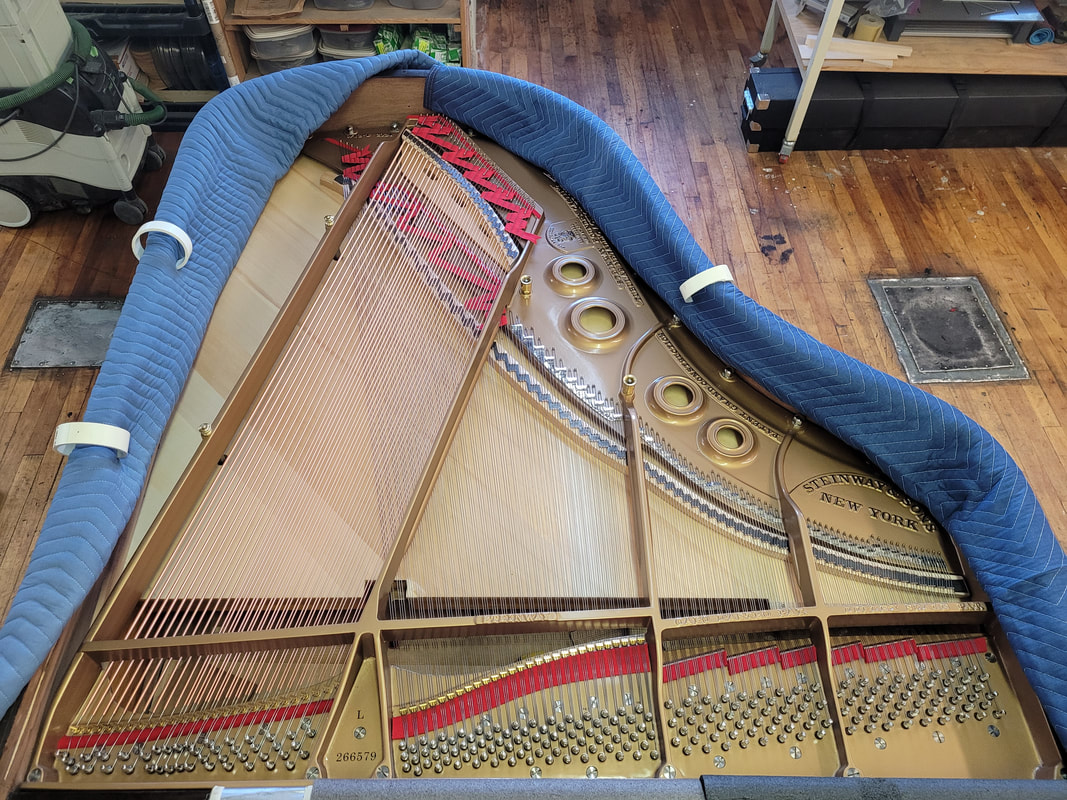
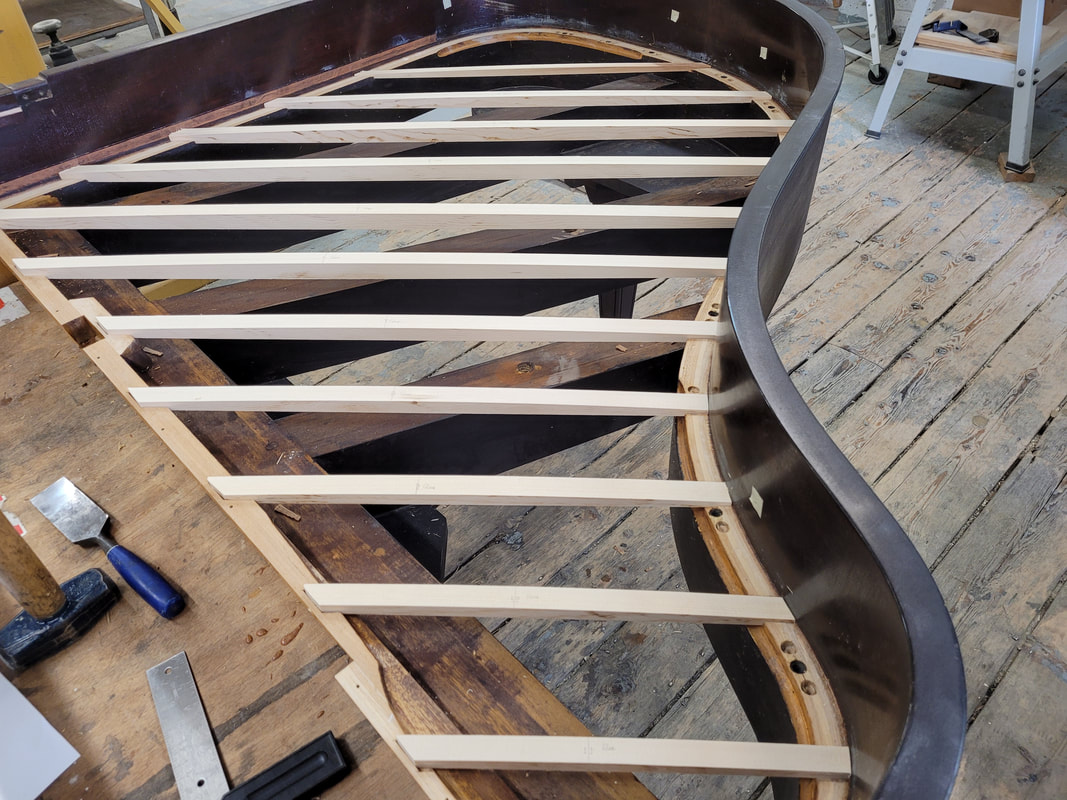
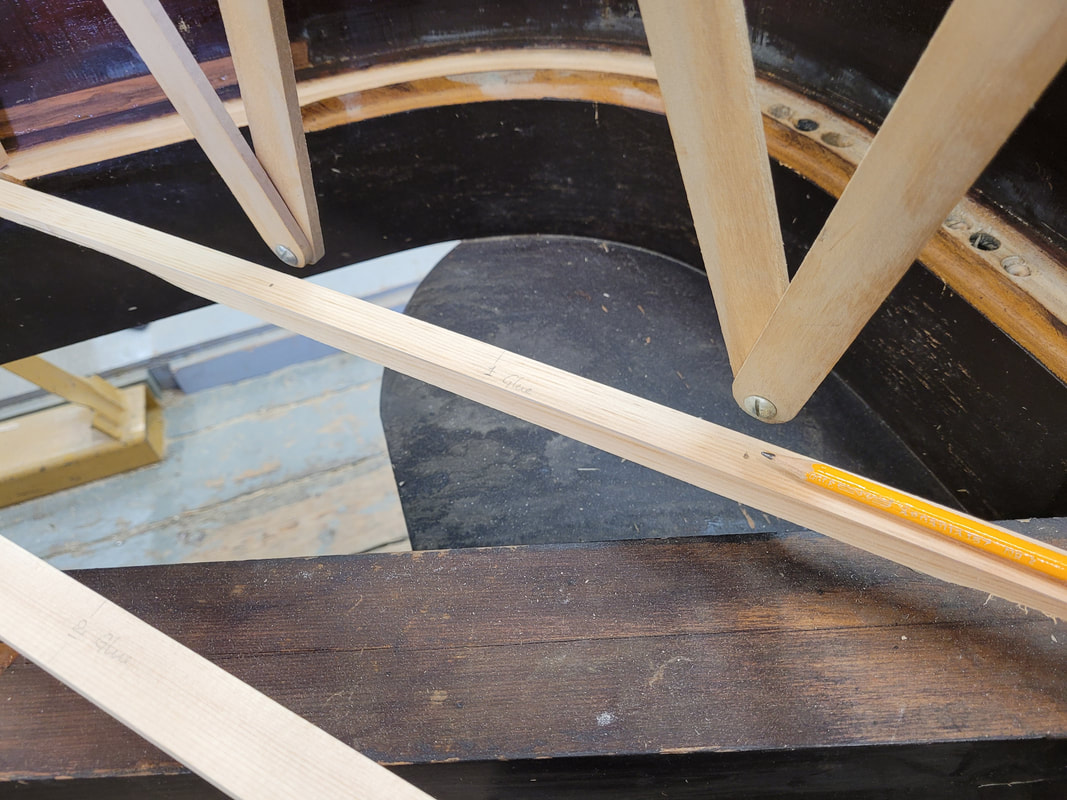
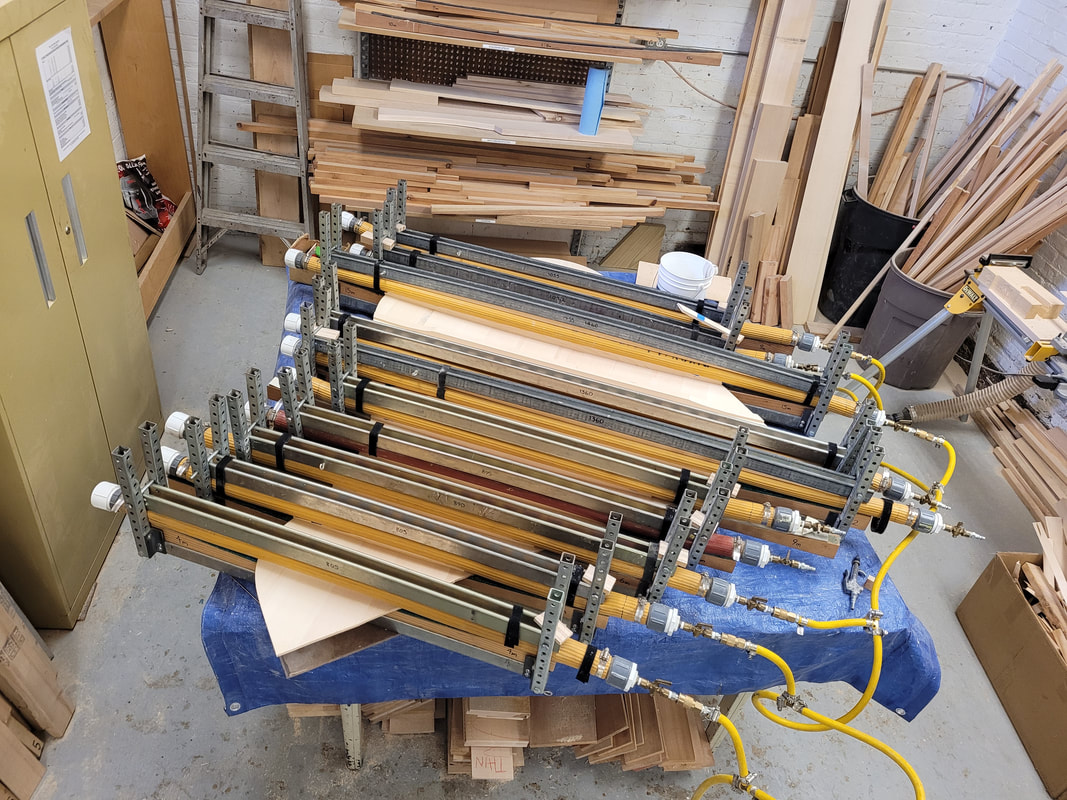
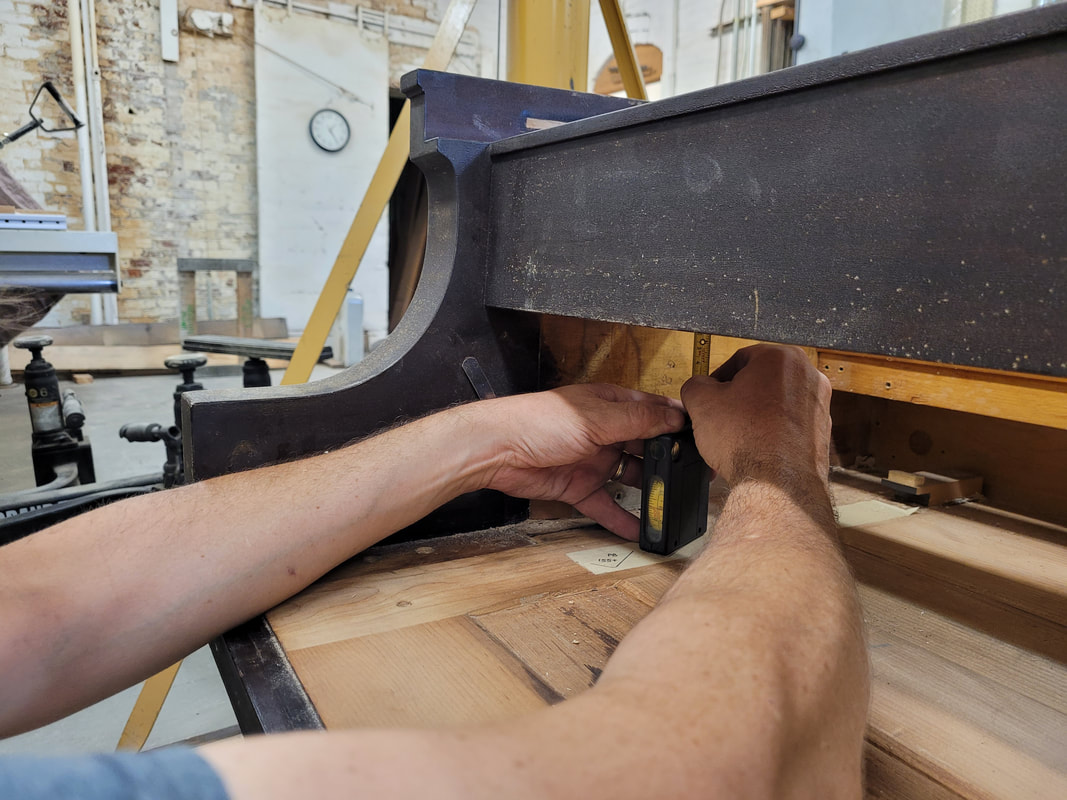
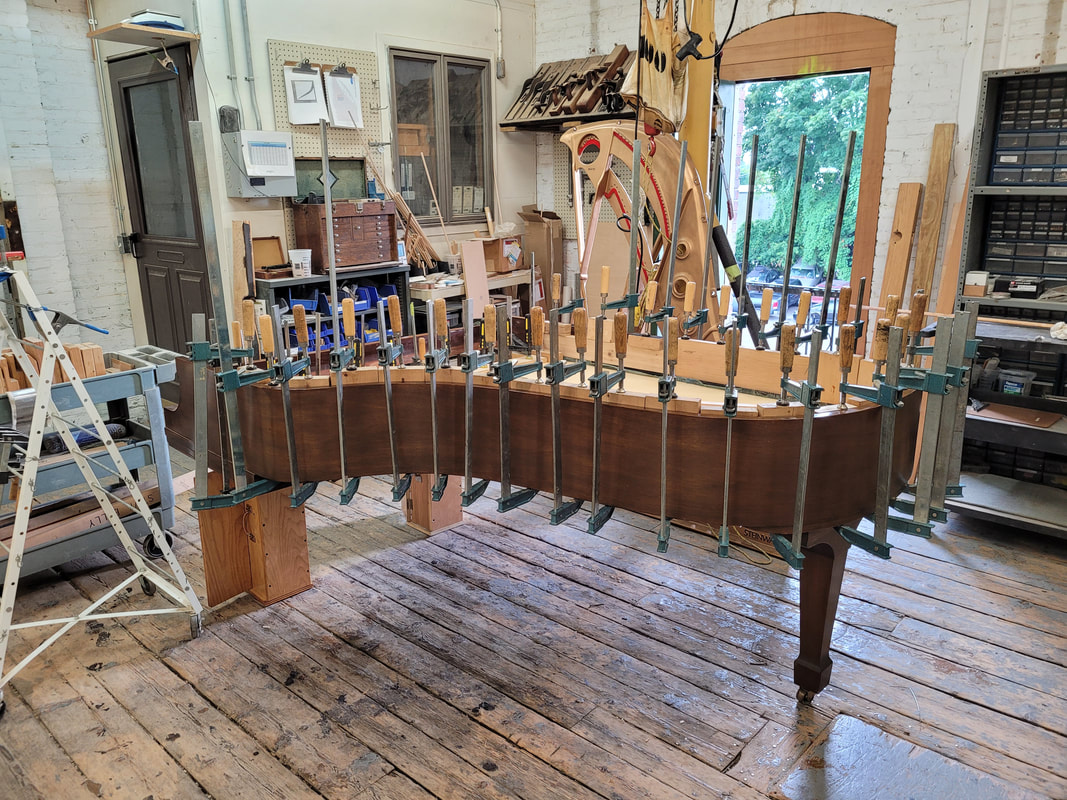
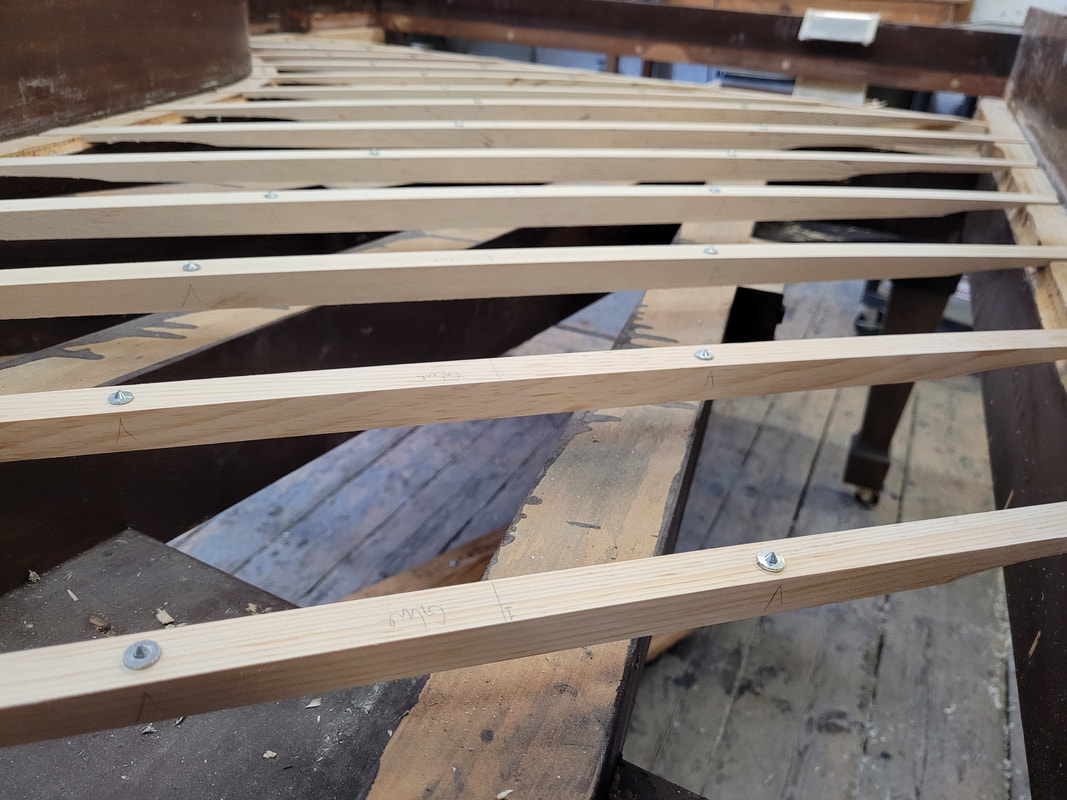
Lubricate areas where strings will go over, here shows front counter bearings lubed with ballistol. Cut and glue on felts for the strings also. Install nosebolts and place plate in piano. turn up nosebolts to just touching the plate, tighten all webbing screws and perimeter bolts. Align agraffes so they are perpendicular to the strings. One piece of wire makes a loop to make two strings. Cut string end to length. 4 fingers out of a small hand work well here. Make coils with coil maker or other tools. Pound down tuning pins with hammer or air pounder. After a loop is installed, lift strings and tighten them. Make sure coils are tight, no gap between coil loops. If possible, tighten coils with coil tightener, squeeze beckets tight also. In order that the strings stay put, secure them with a clamp at hitch pins. On each end of a loop, beckets shall face the same or similar direction. But this is only cosmetic. We are slowly making progress. Wave string braces on the back scale of tenor strings to reduce noise or over tone. On treble side where there is no agraffe, use scale copied from action as string spacing reference, secure spacer on each note/group of 3 strings, tap with hammer till center string is sitting on mark on the scale. Refine spacing with note width gage and a not-sharp-at-all screw driver to make sure each note is at the same width. Install base strings, one at a time. Protect soundboard with anything on hand. Install bass string braces then take a long break before chipping piano to pitch, tighten coils and beckets, even out tuning pin height, and so on.
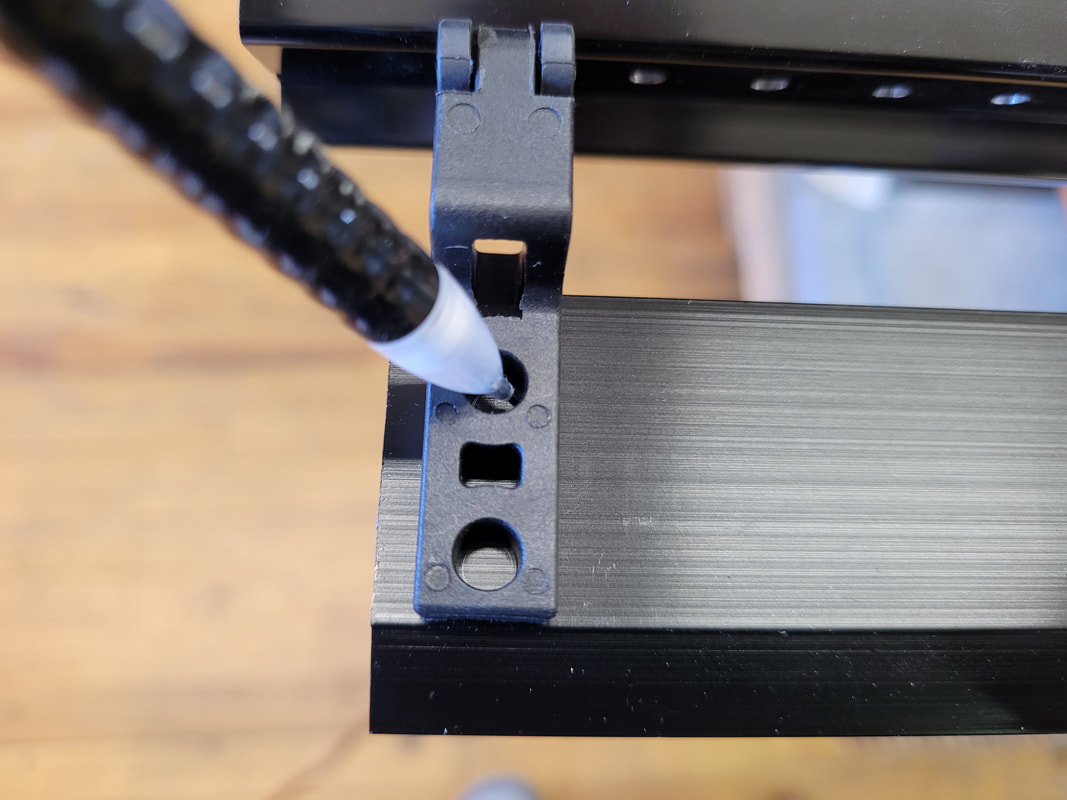
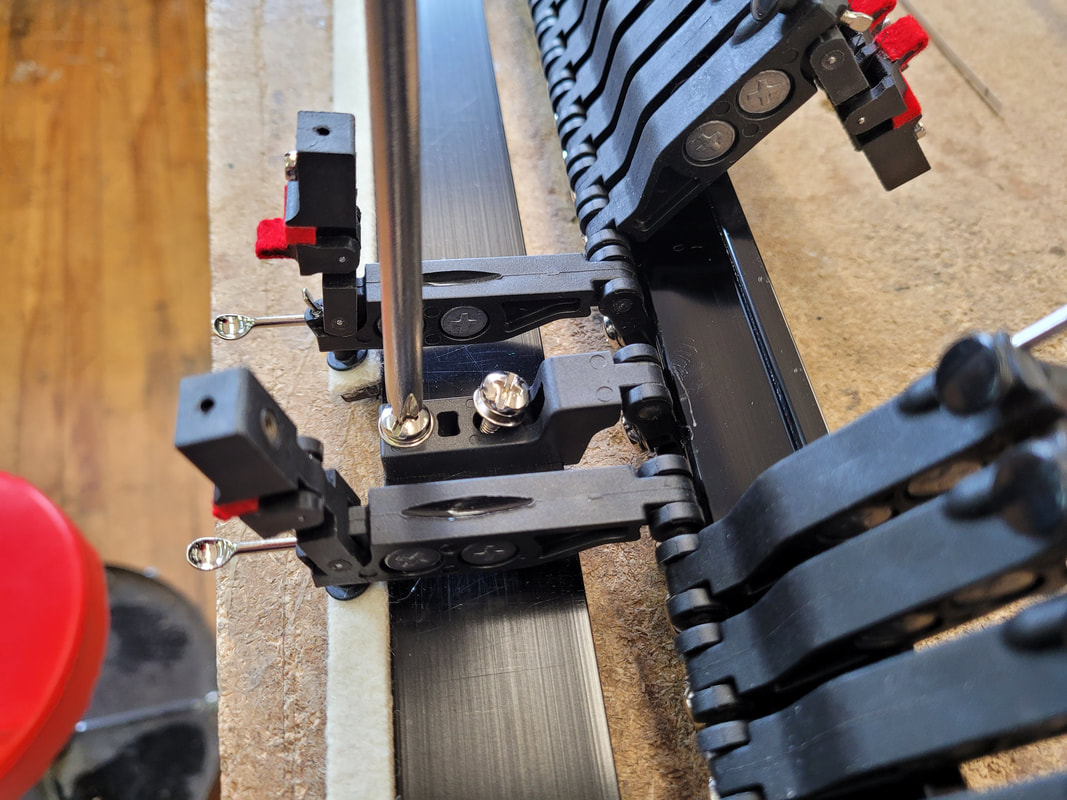
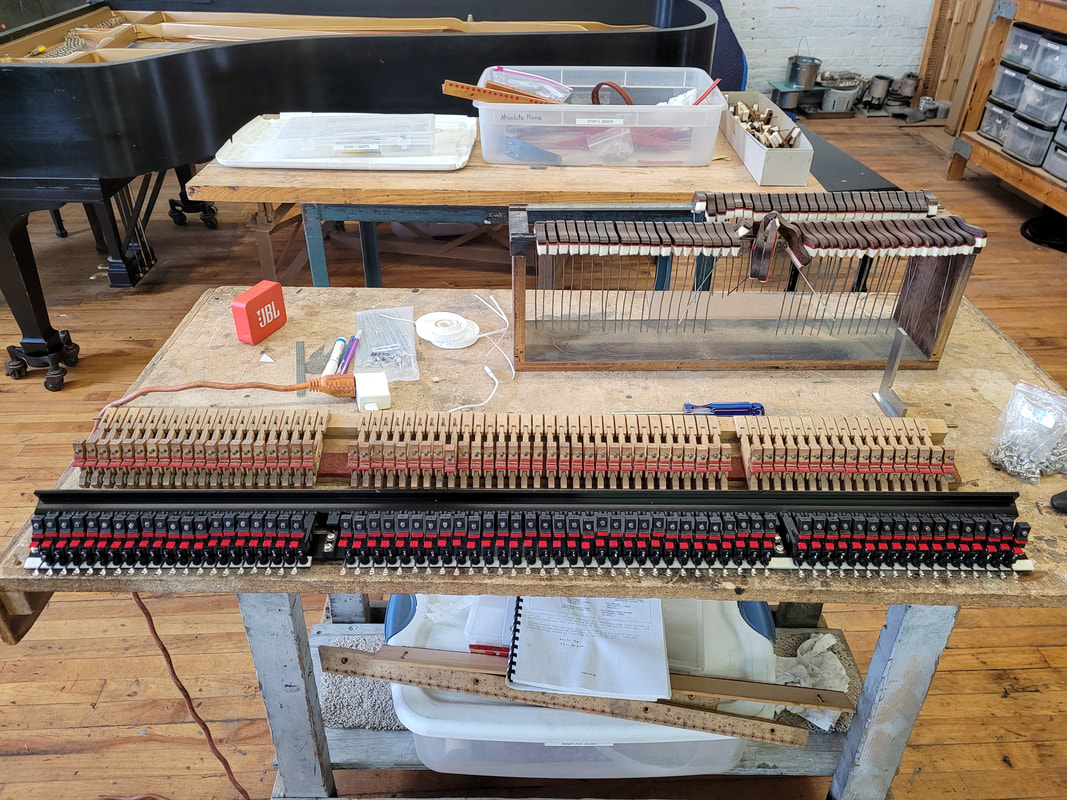
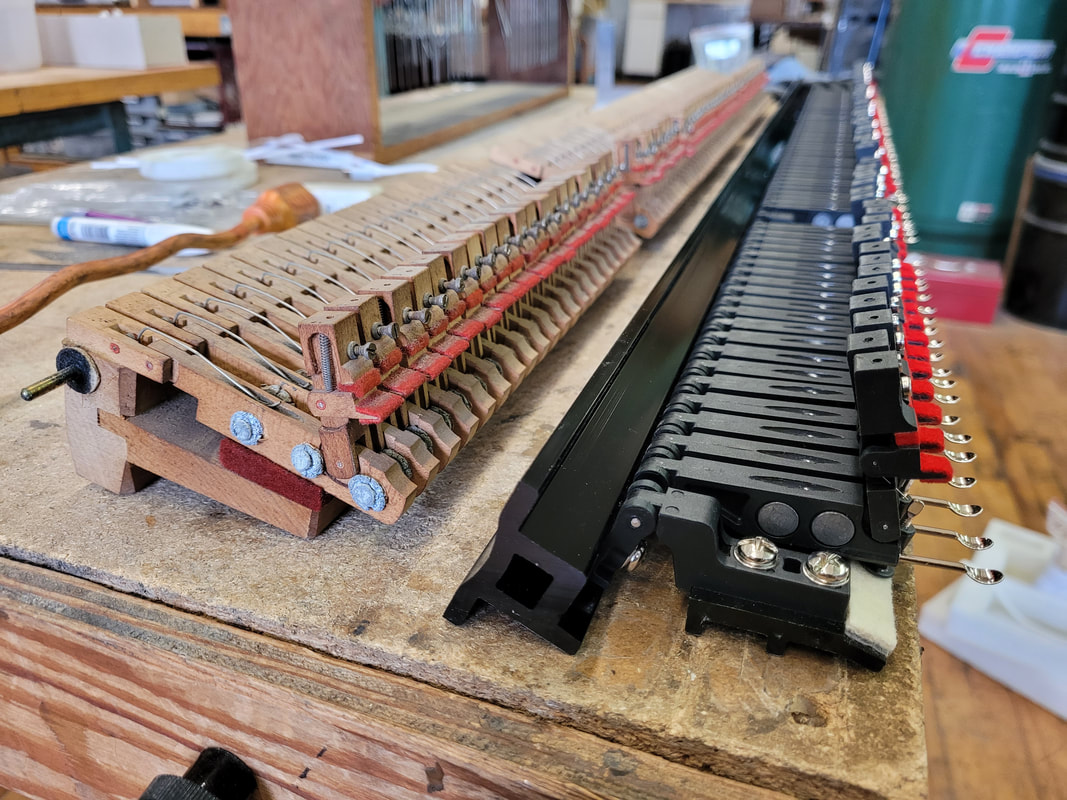
WNG backaction is made of aluminum. We made a scale stick according to top action. Transfer the marks/spacing to backaction rail, then drill open with 3.3mm drill bit. Tap for damper tray flanges with M4.7 thread tap, install flanges. On damper tray, mark 10mm from bass edge, then mark where flange screws will be. Drill with 3.3mm bit. Tap all drilled screw holes with M4.7 thread tap. Apply tapping fluid for every 3 to 4 holes, without fluid, it will be very hard to tap and bit can break. Mark where the tray ends, cut with metal cutter, clean cut surface with file. Install damper posts and damper tray felt. Use a square, check if under levers are square. If not, remove under lever, shim under screw surface, screw back, and double check. Install damper tray. Note that a slot to clear sostenuto monkey was cut off on damper tray. Old and new backaction comparison. At least we don't have those swelled leads anymore.
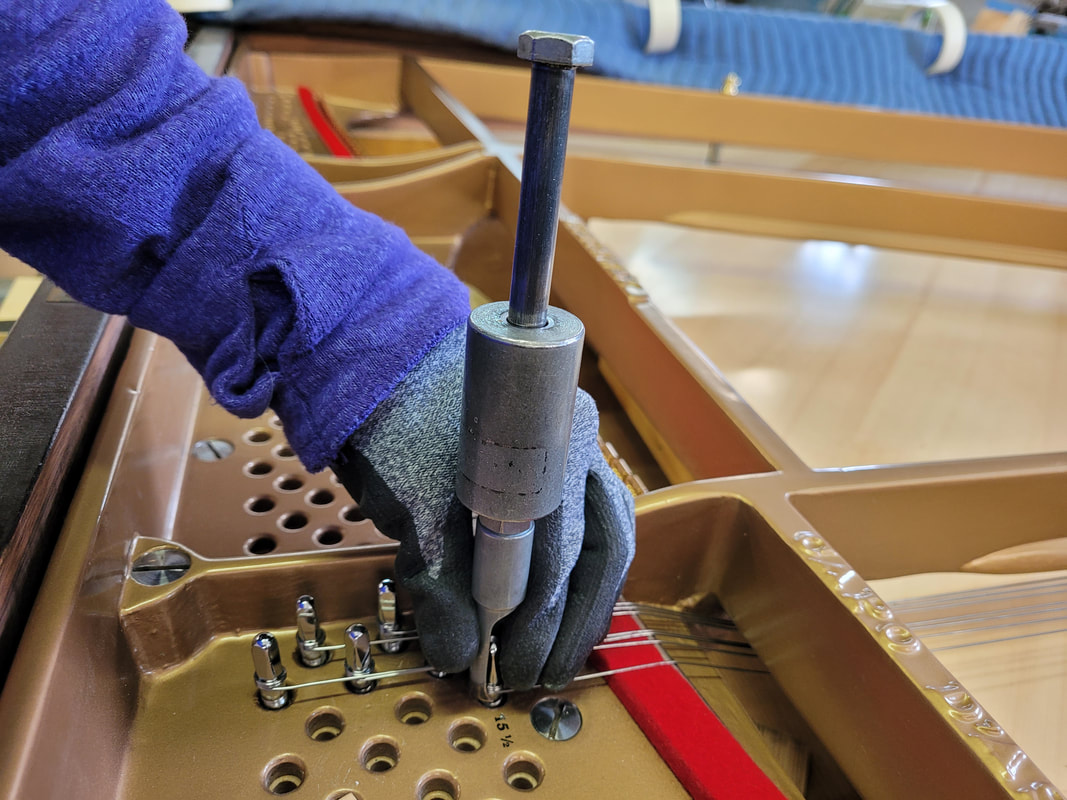
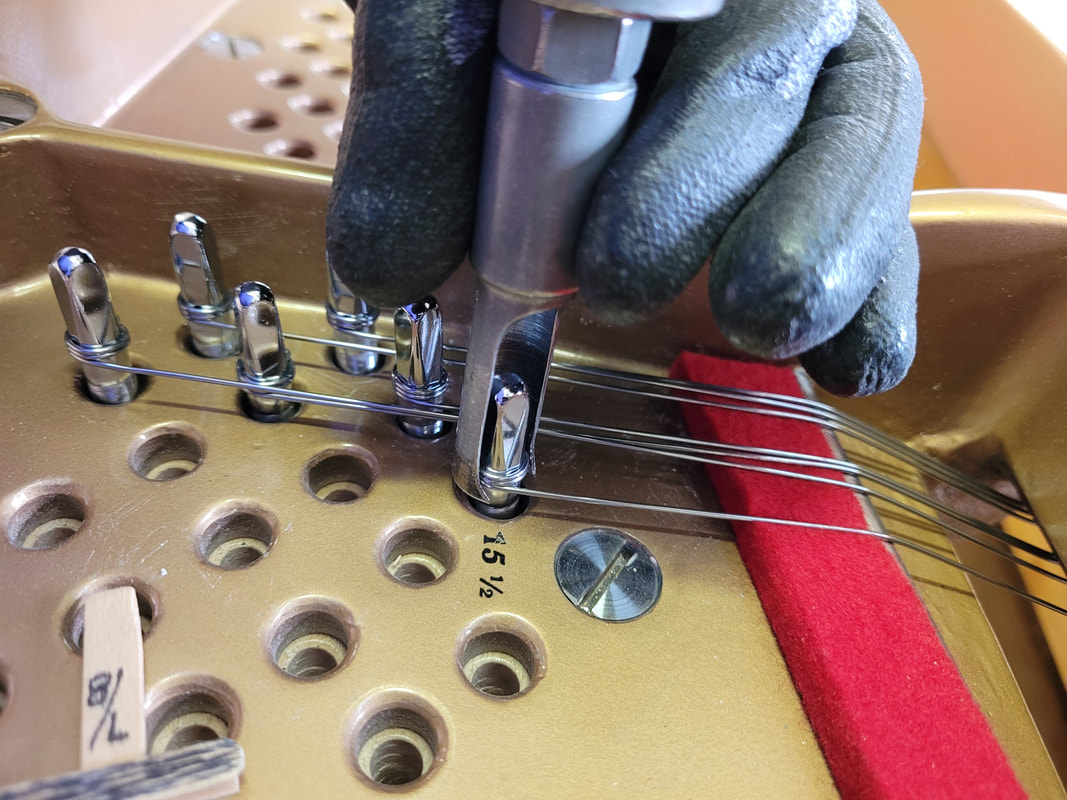
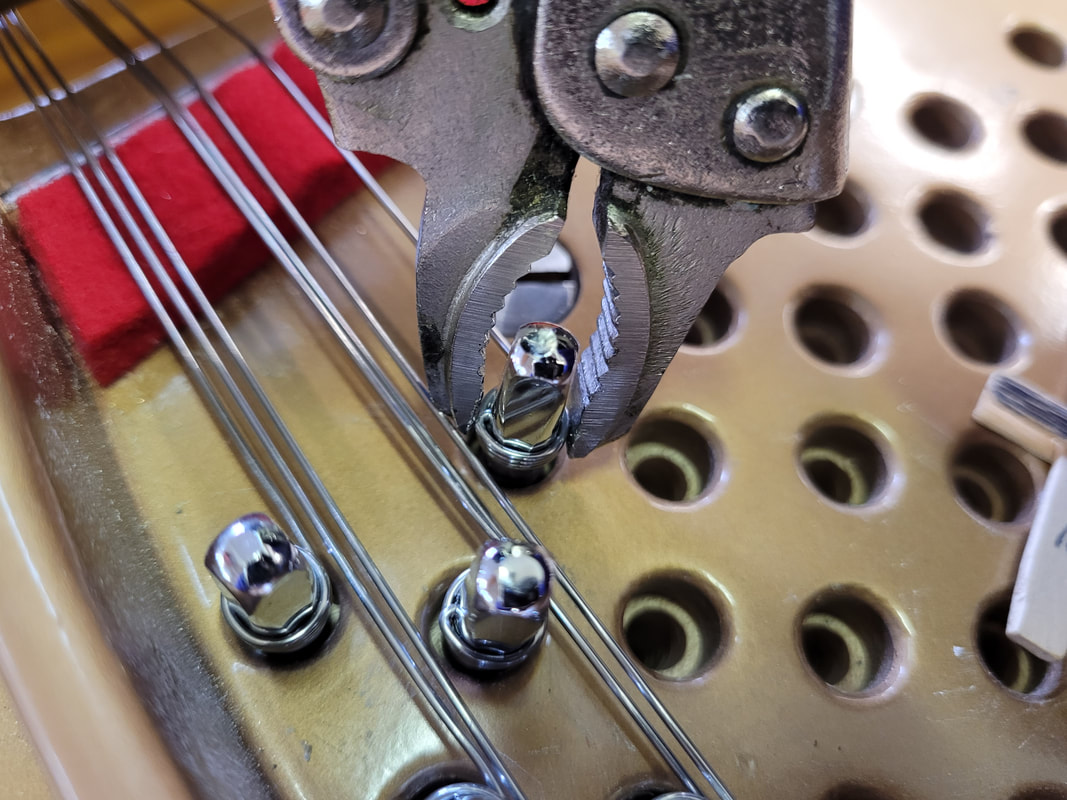
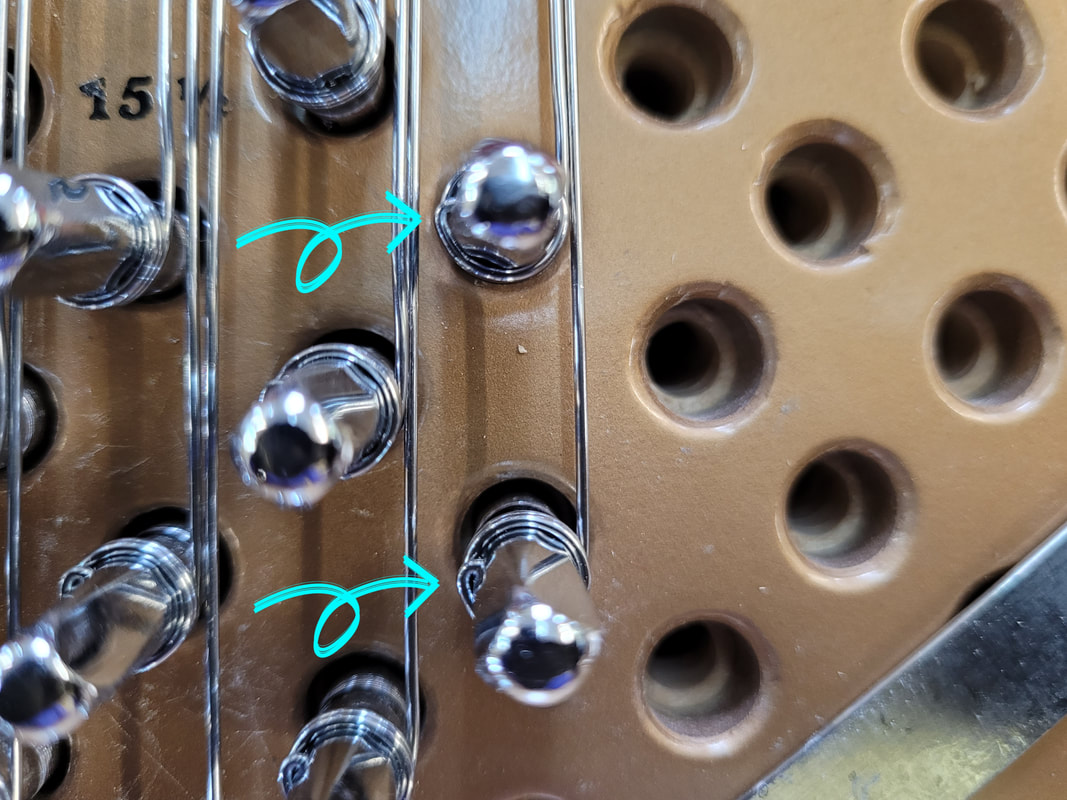
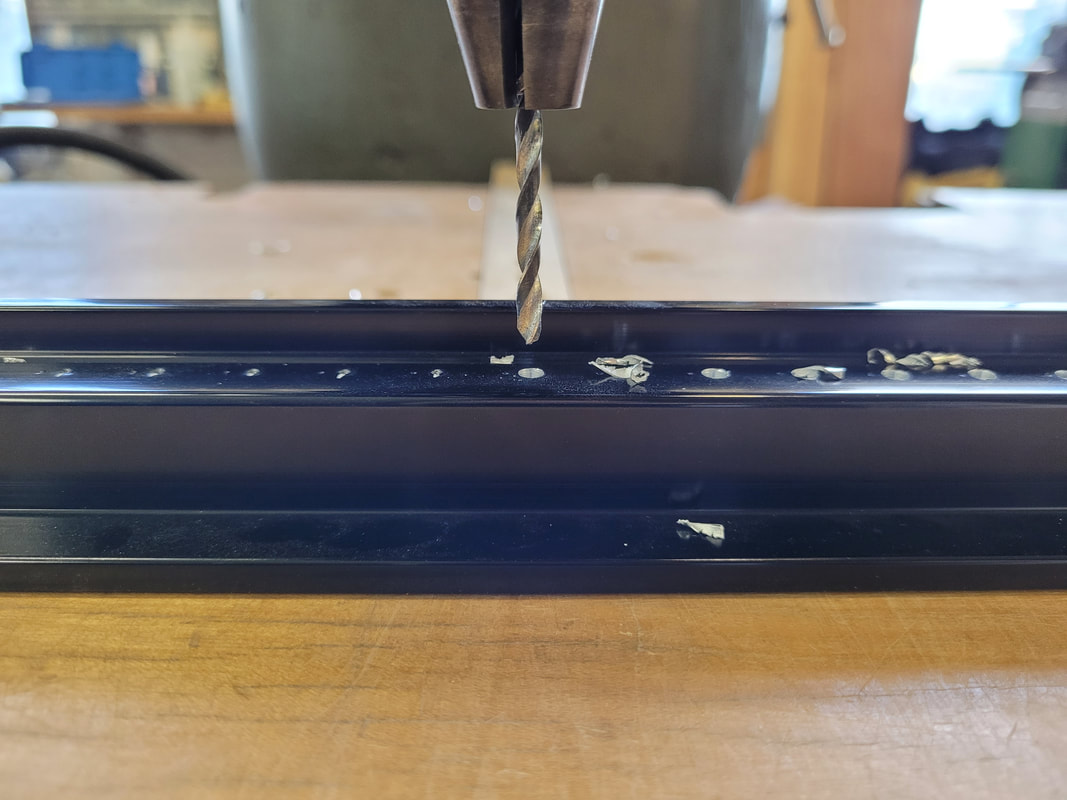
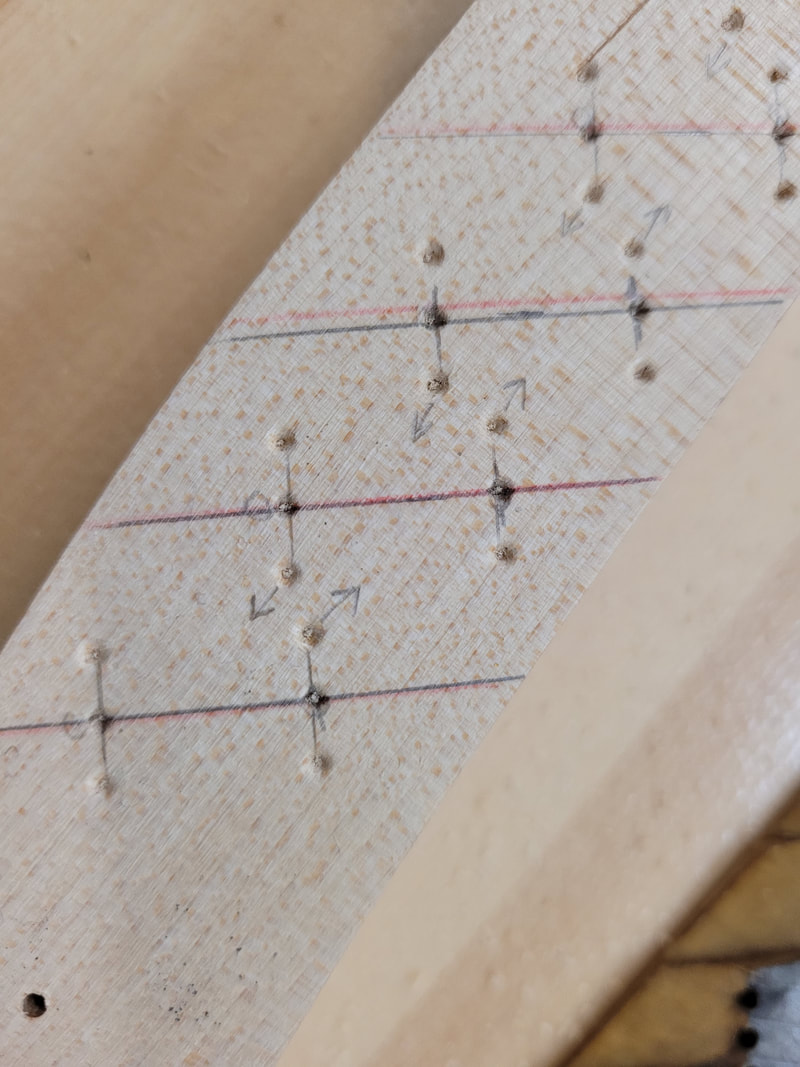
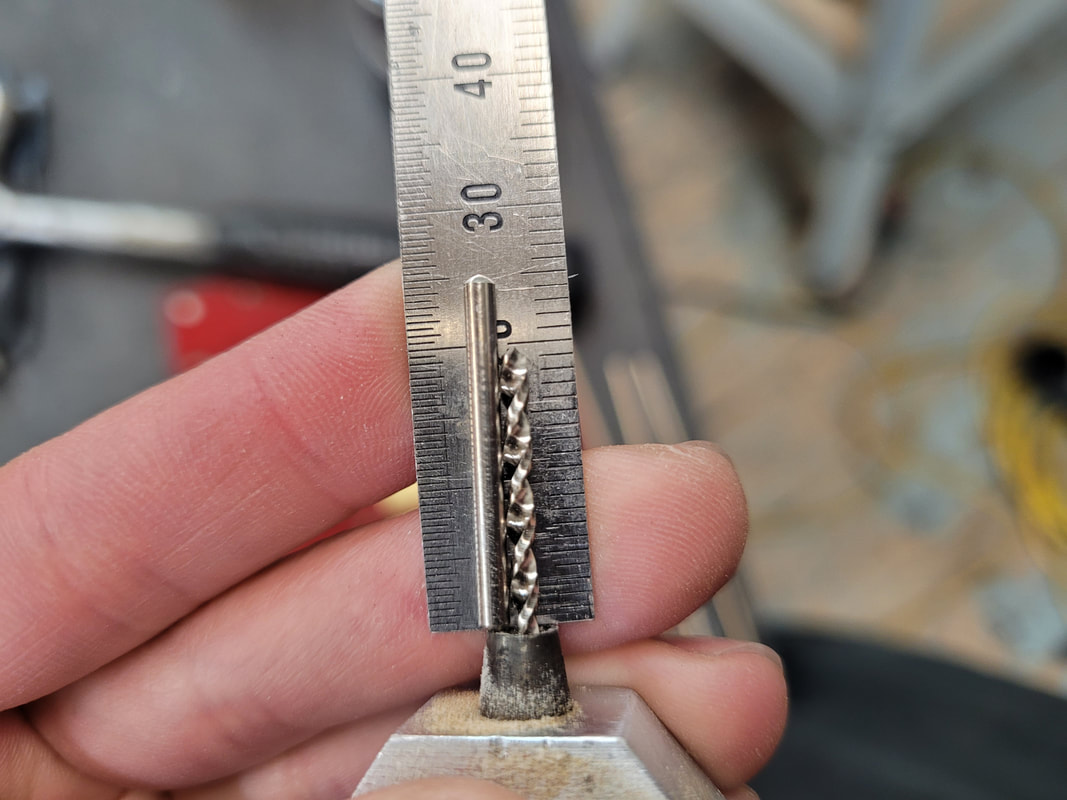
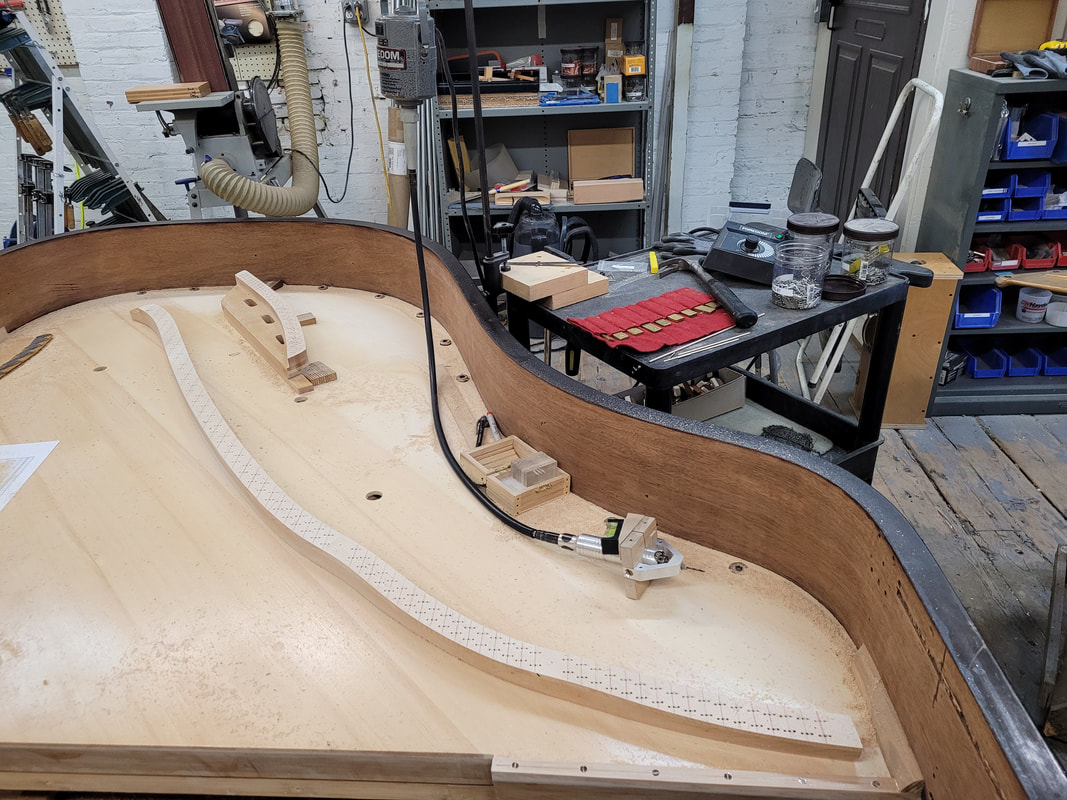
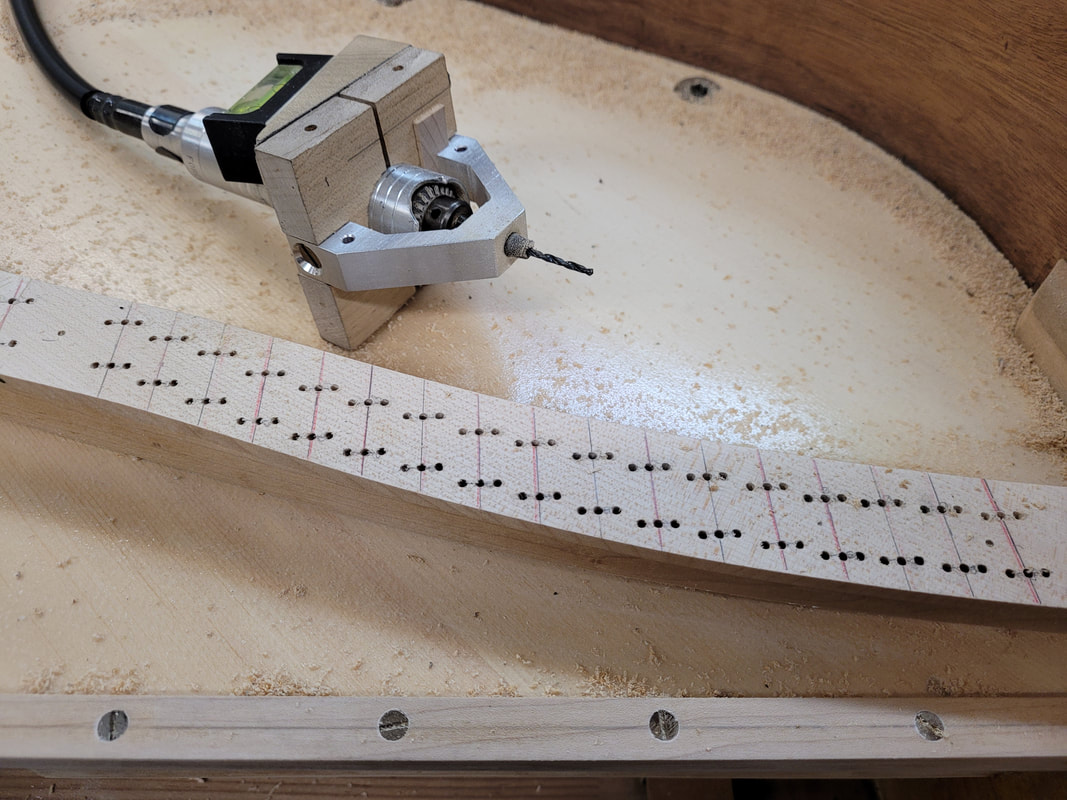
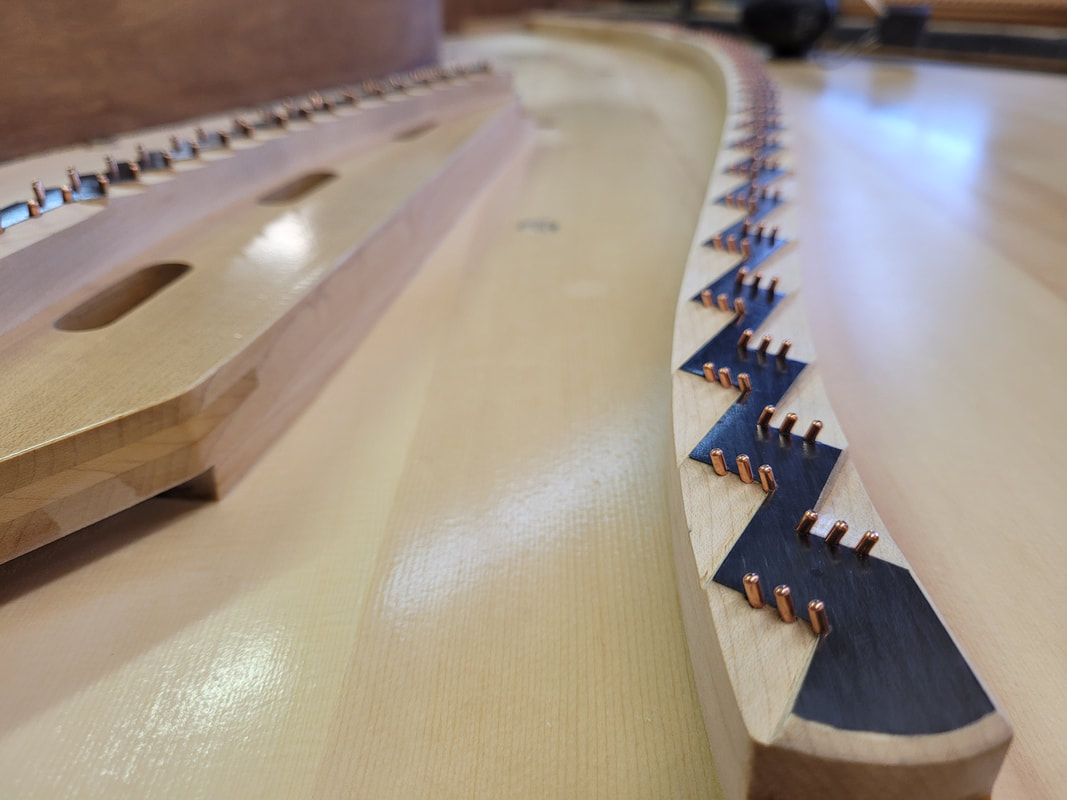
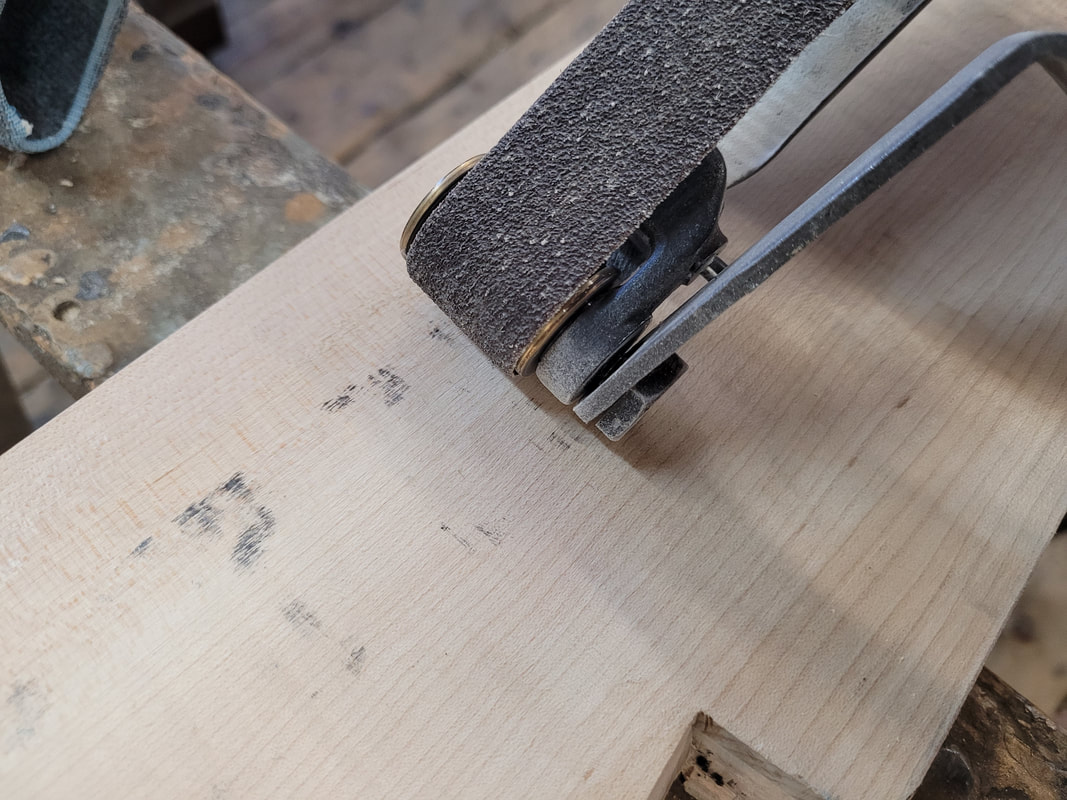
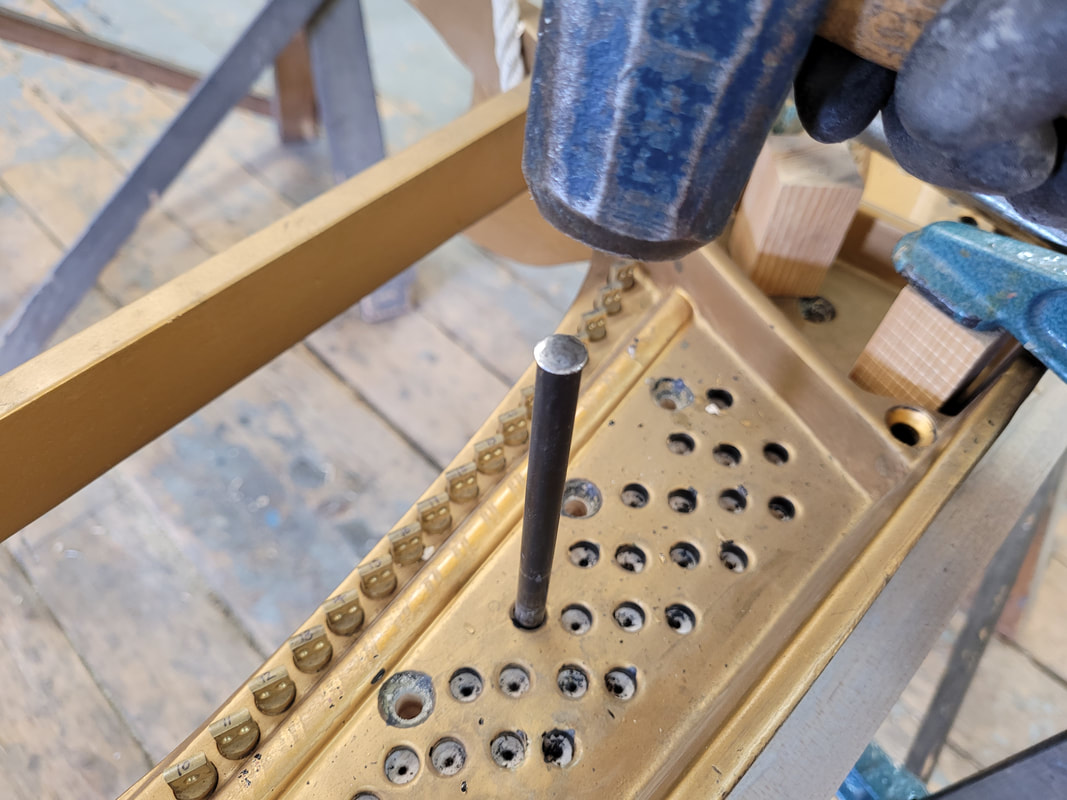
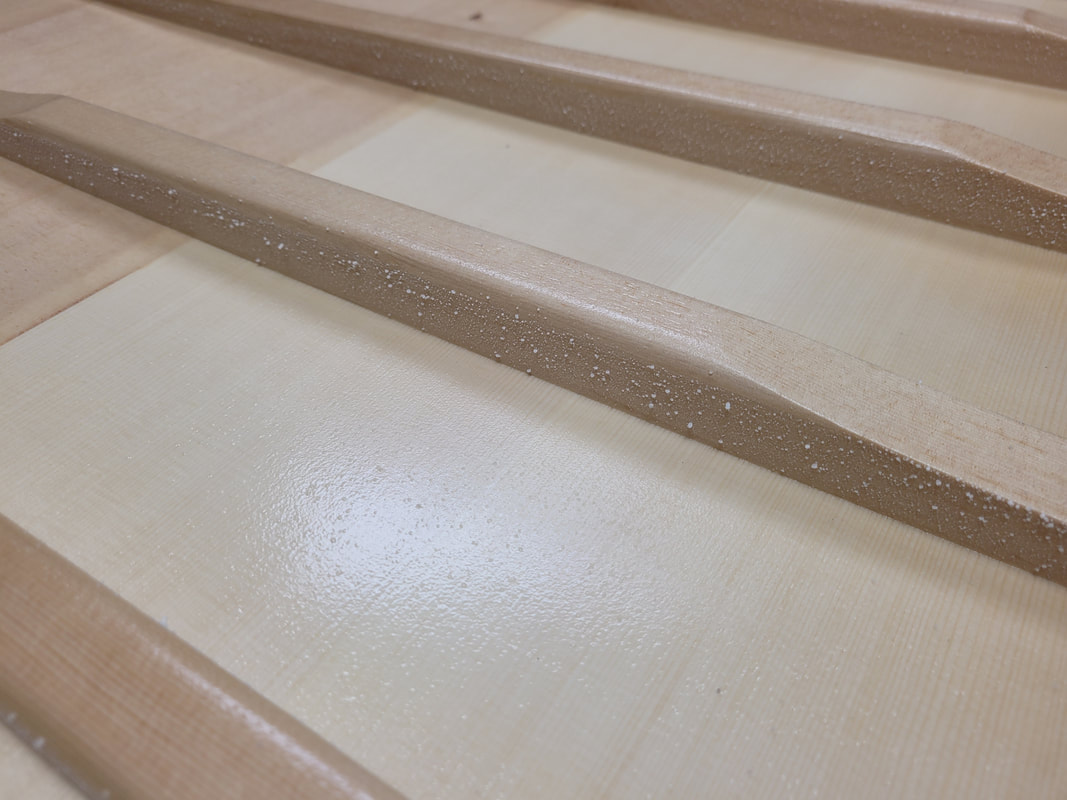
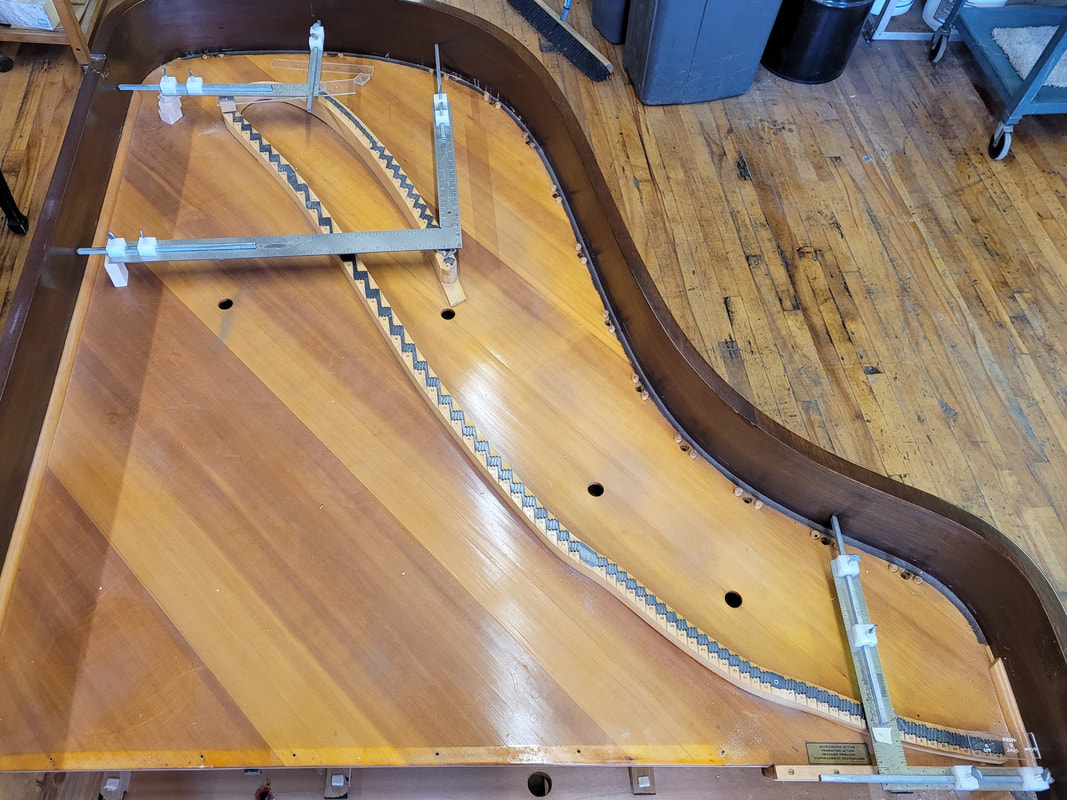
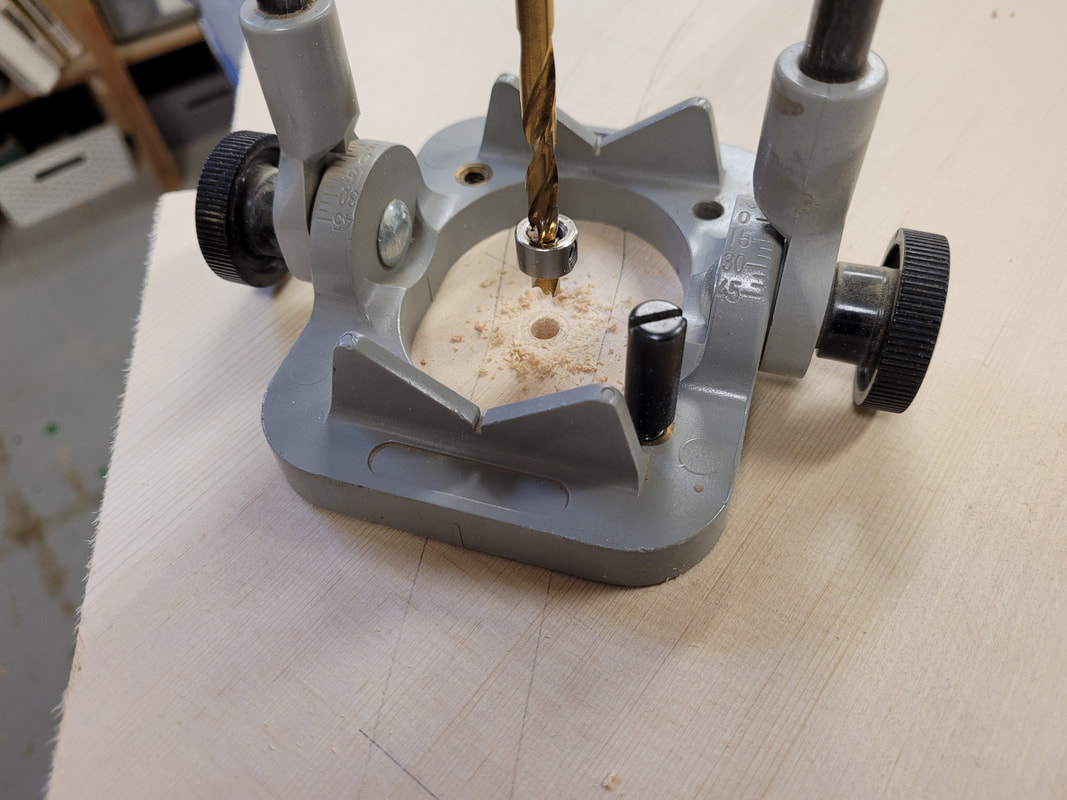
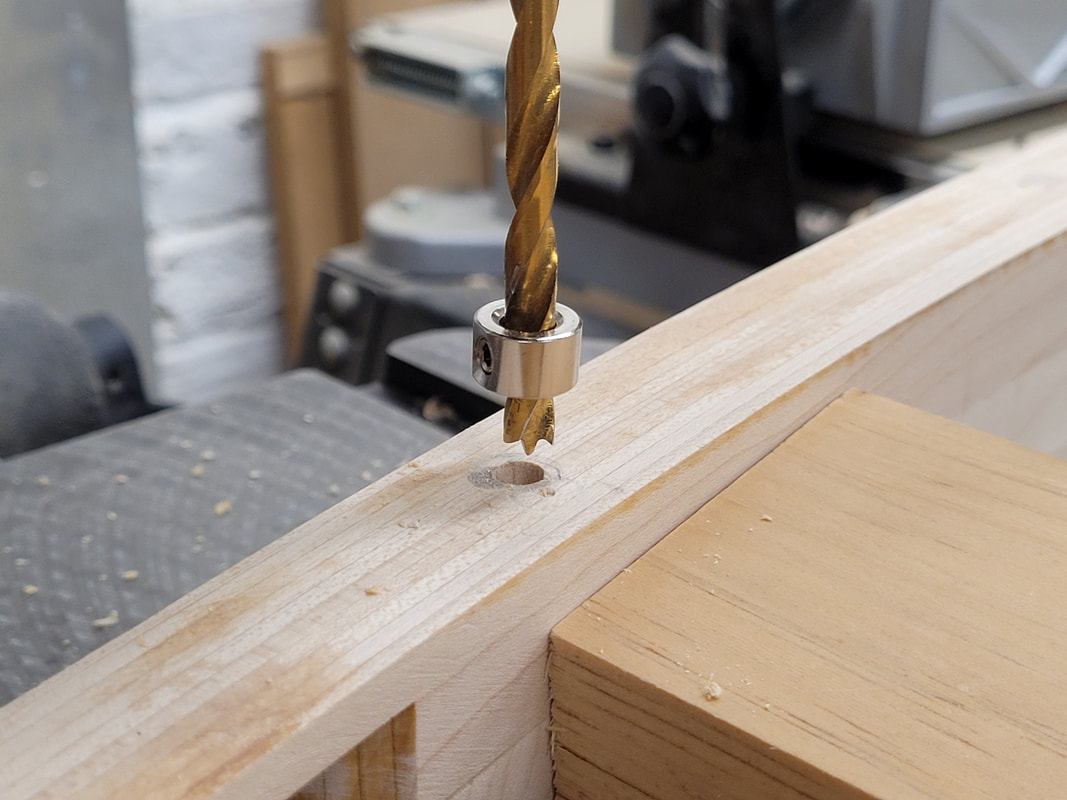
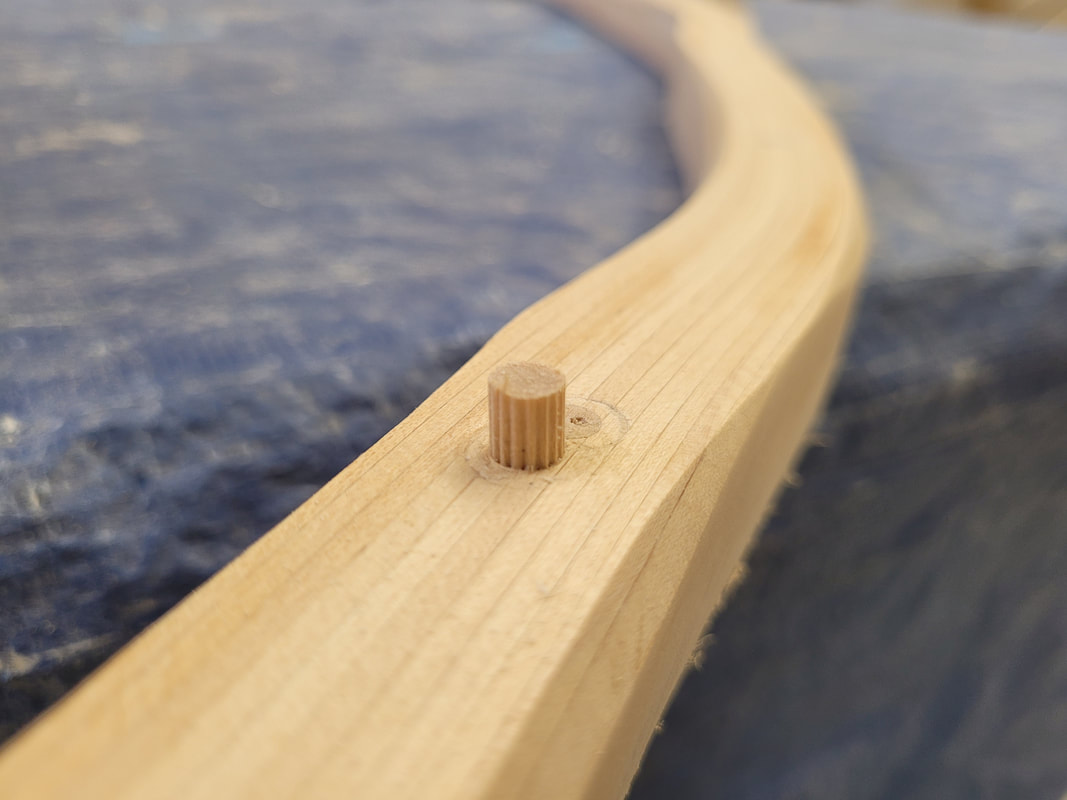
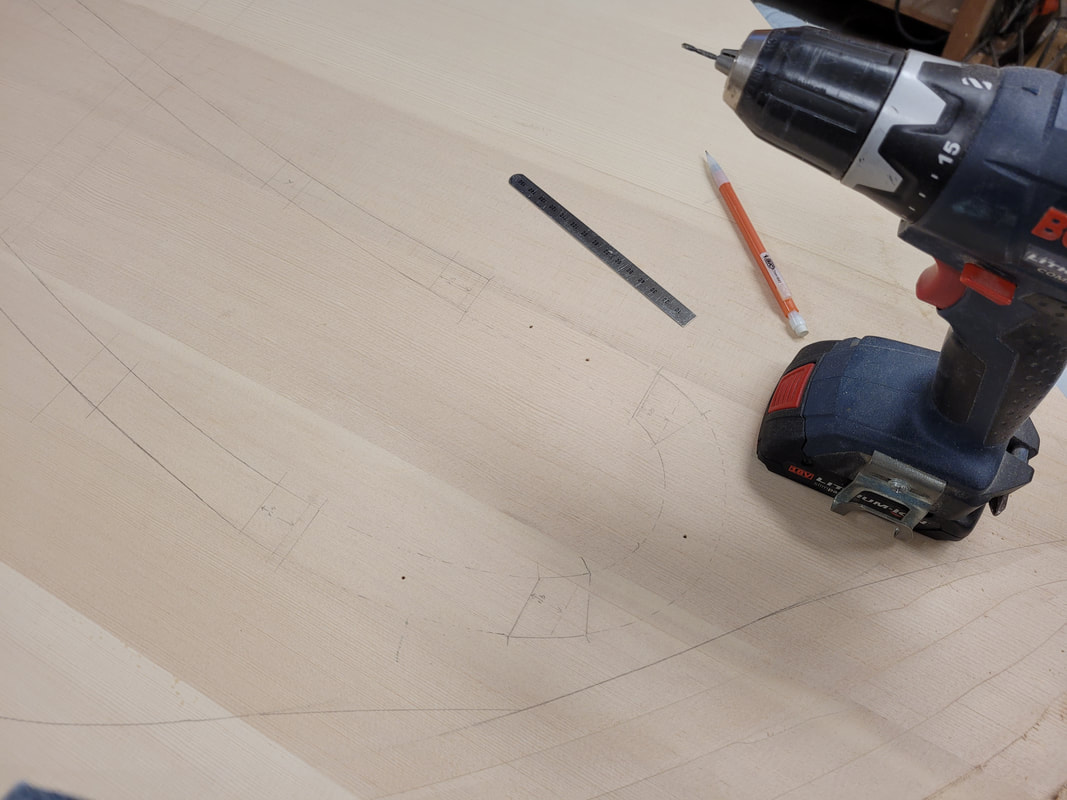
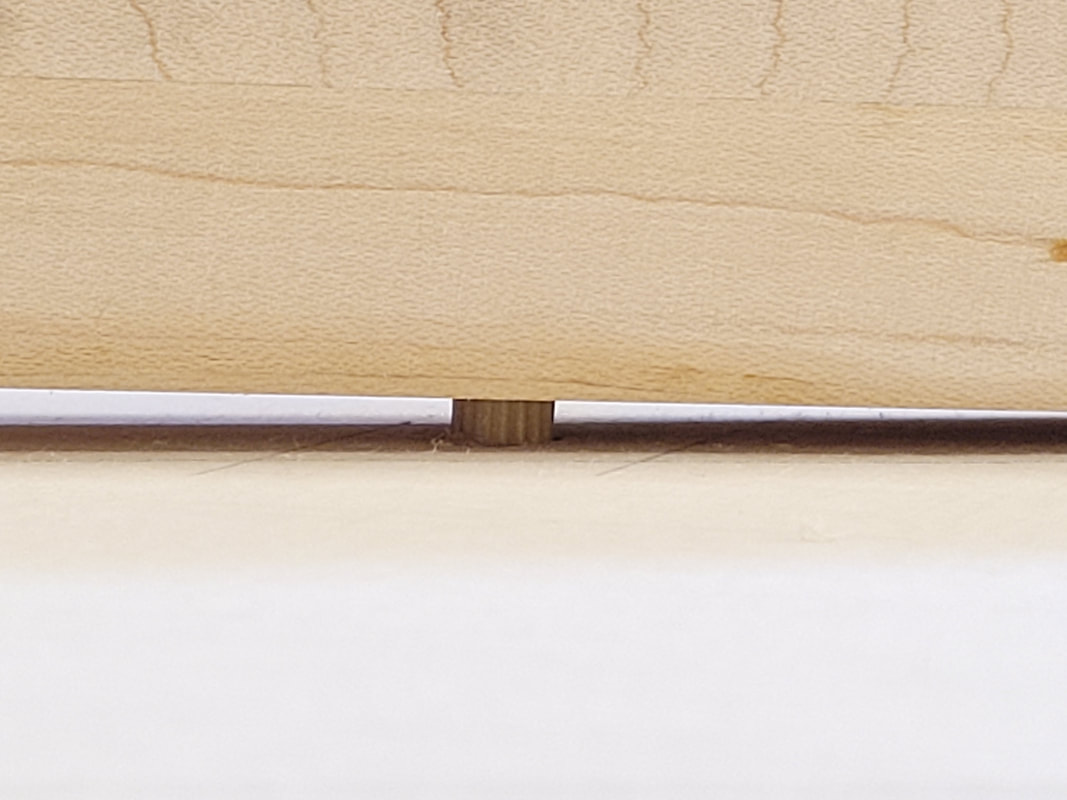
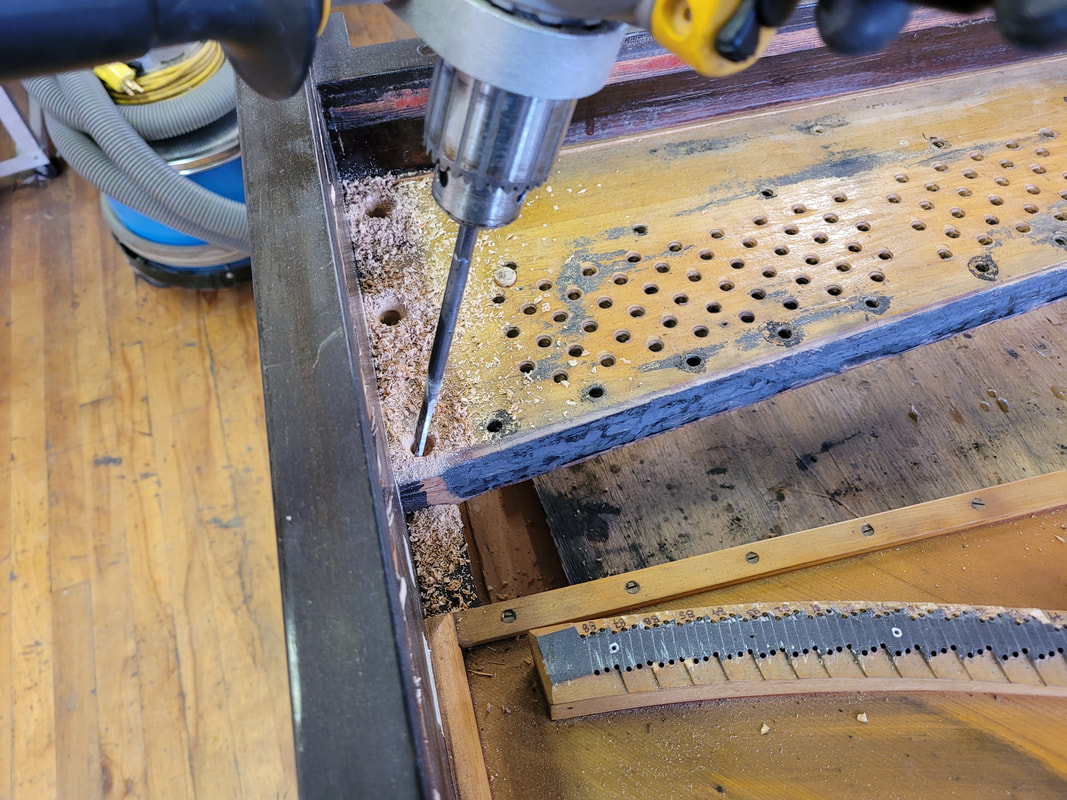
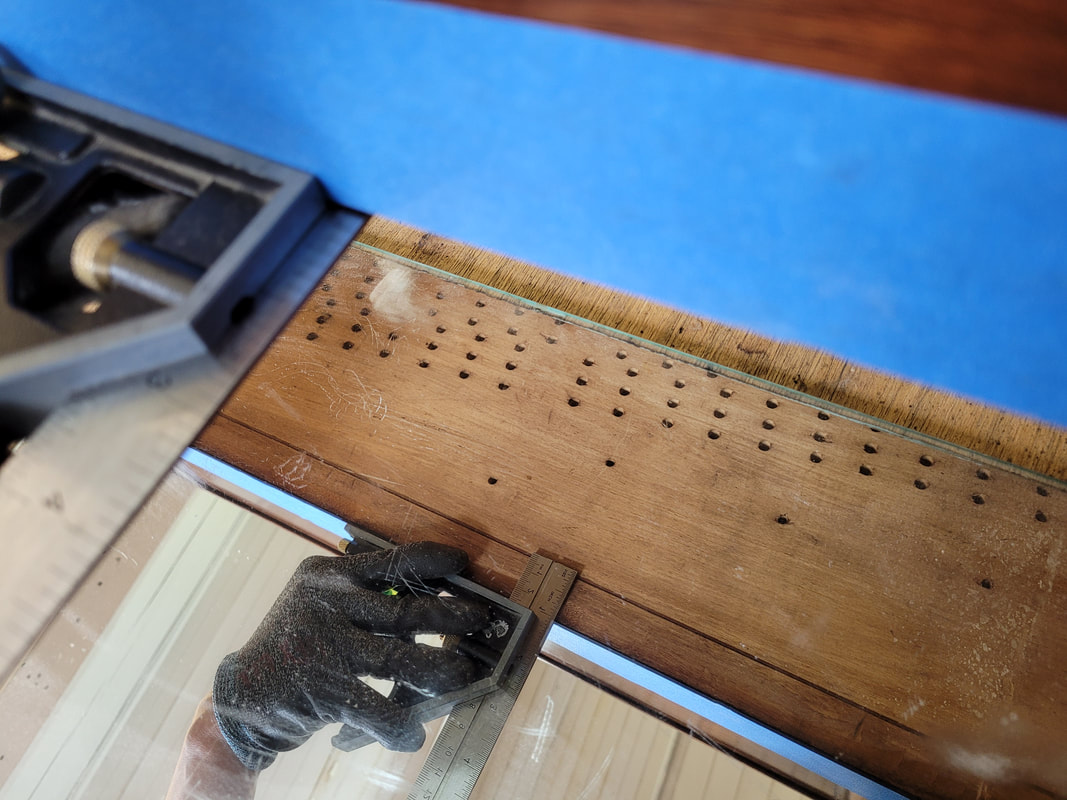
The shop owner Mr. Jude Reveley located where the bridge pins shall be according to string locations, speaking length, and spacing. Mark bridge pins with customized punch. Set drill bit to go in deep enough but leaving 5mm space for bridge pins to stay out of bridge surface. The drilling jig is set at a 17 degree angle. When drilling, make sure the bubble is always staying in the middle of mini level. The front and back row of pins go in at different direction. Double check the direction before drilling. After drilling, sand bridge top with sanding blocks from 150 to 400 grid. Apply graphite (process pictures not shown), notch off wood outside of bridge pin holes (process pictures not shown), then install bridge pins.
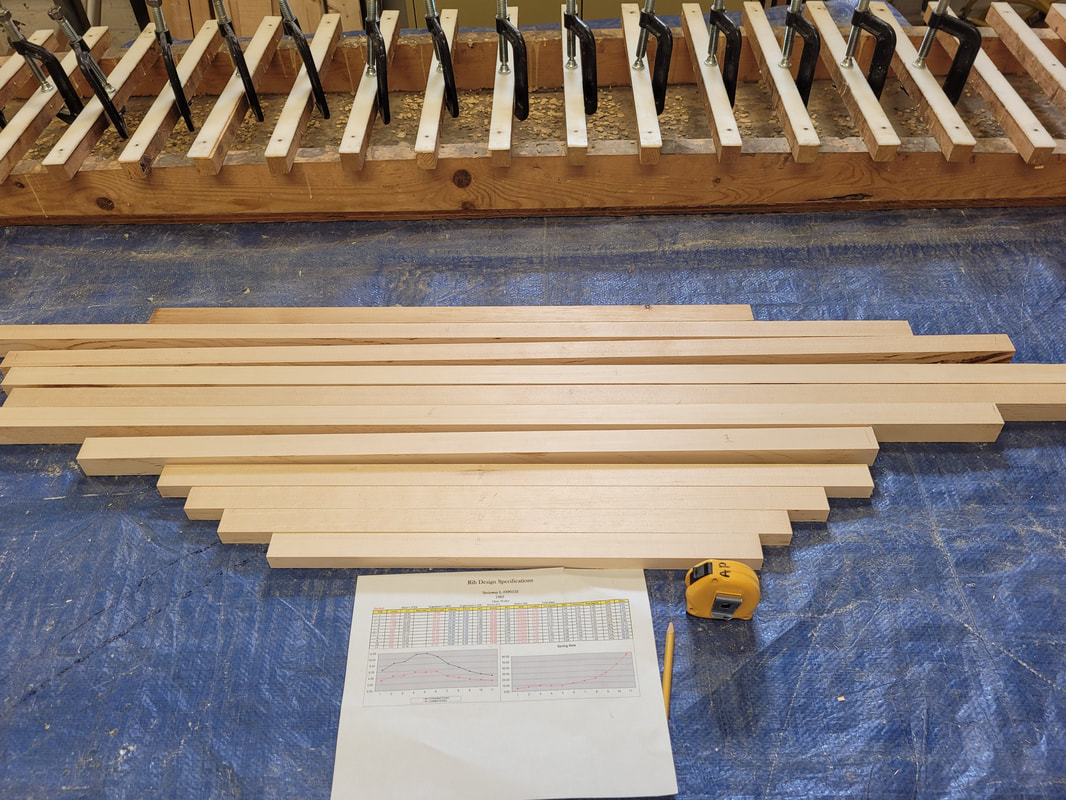
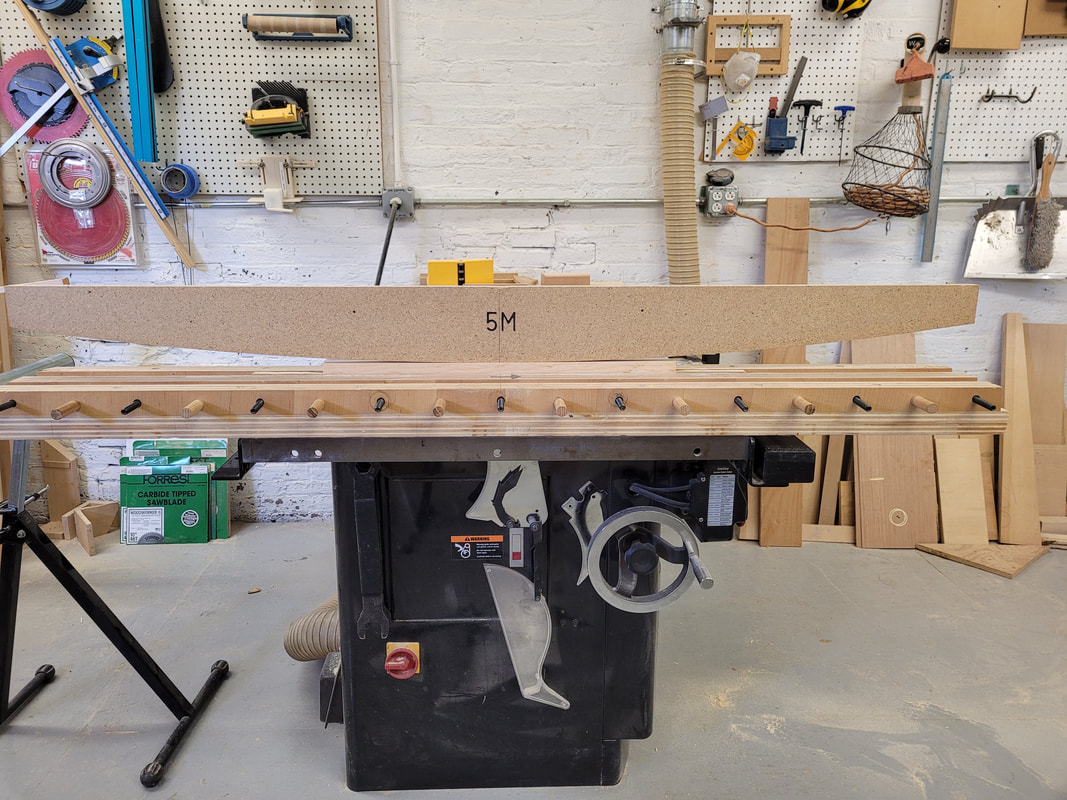
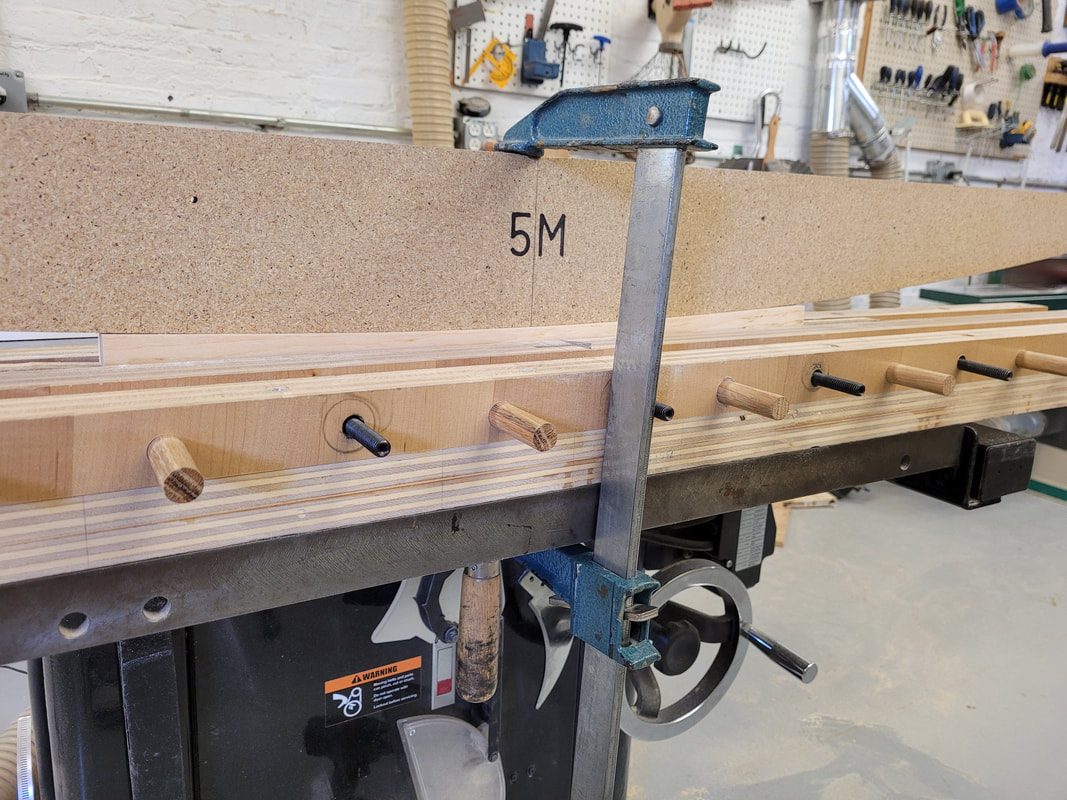
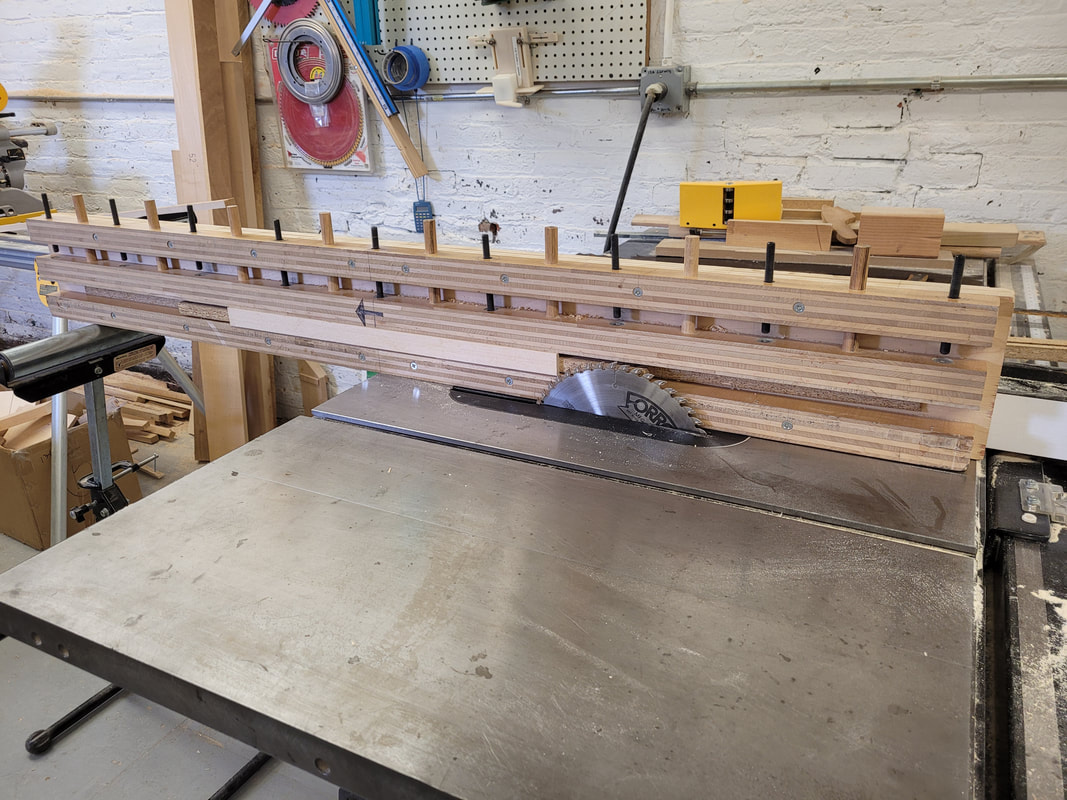
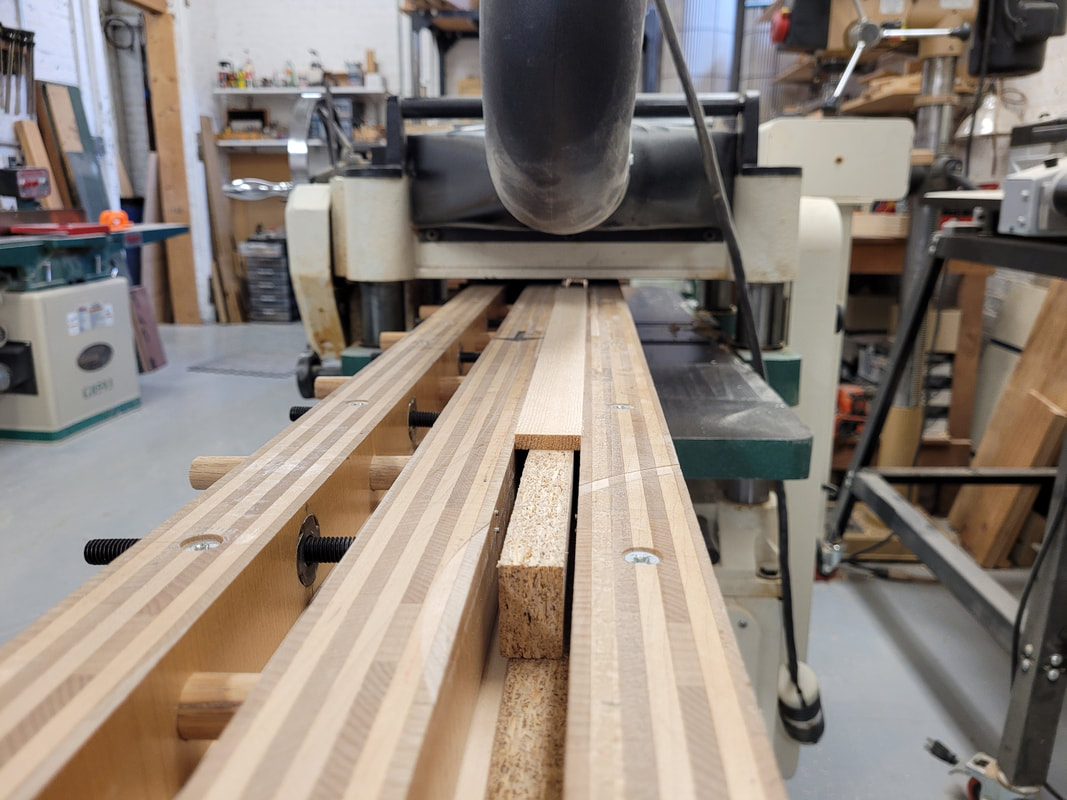
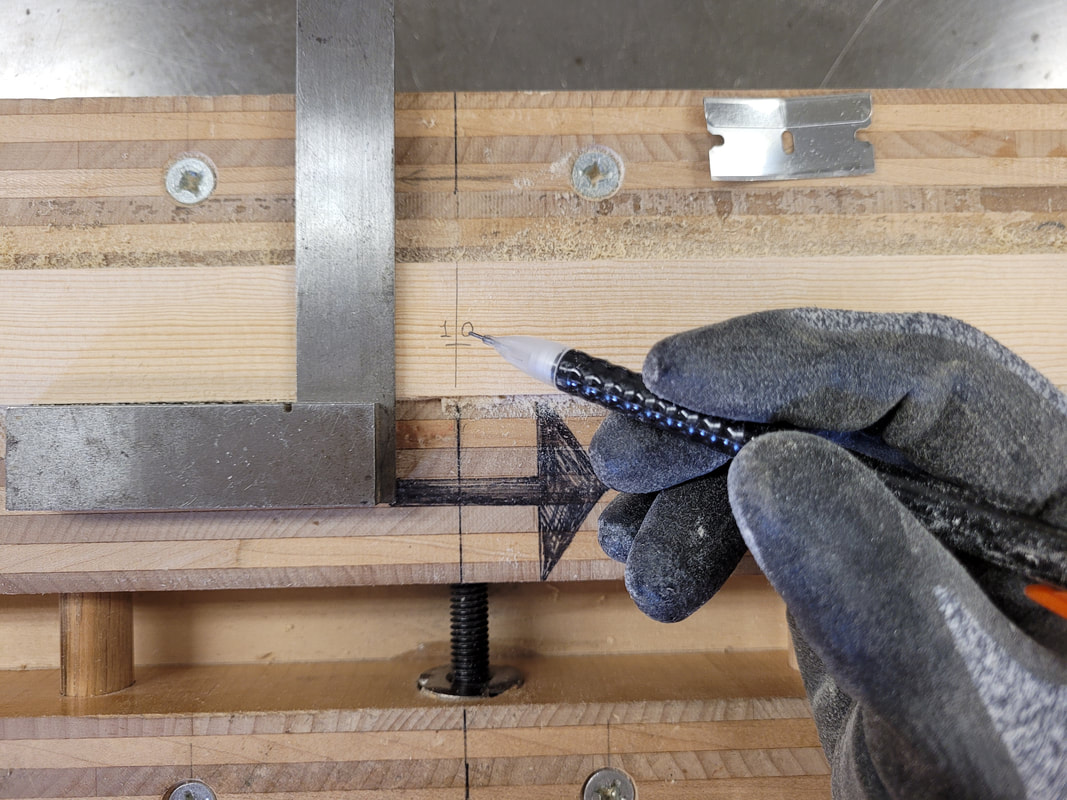
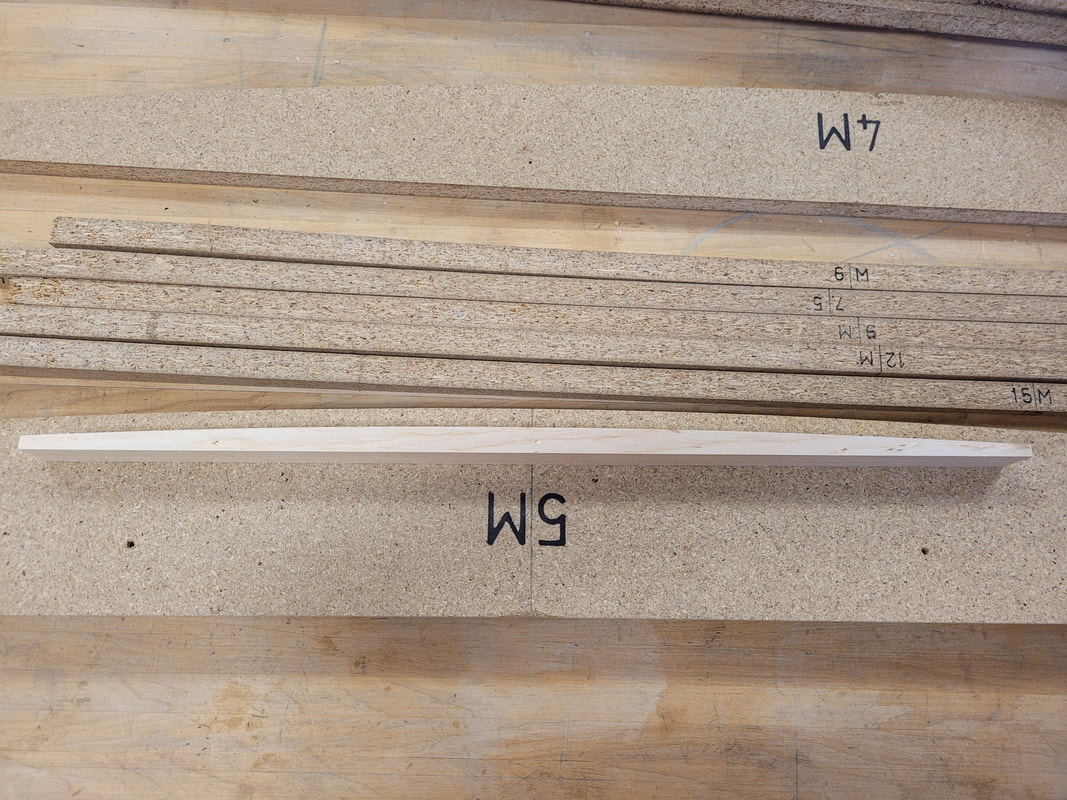
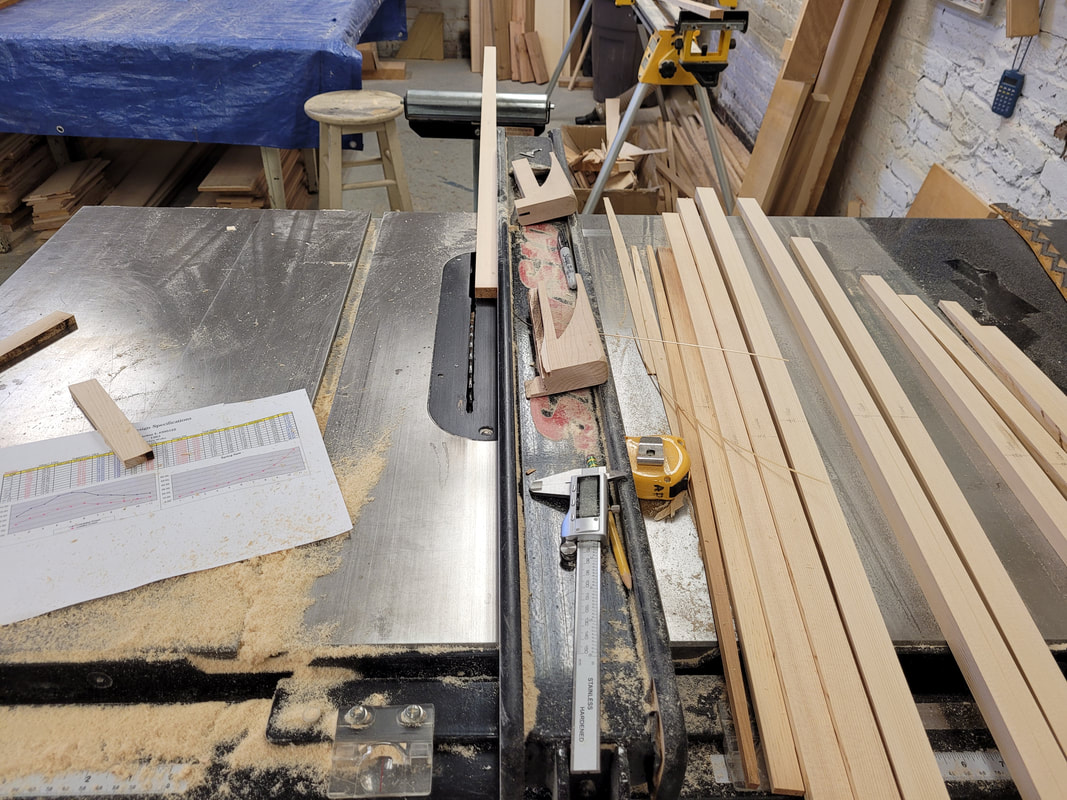
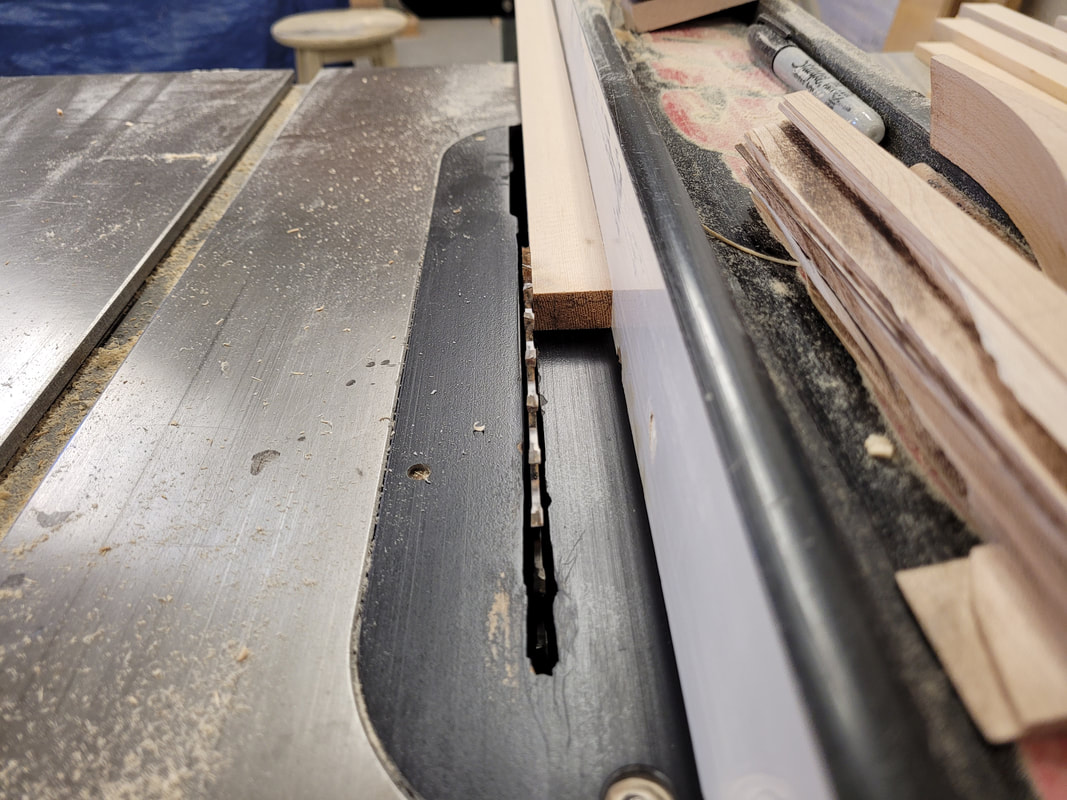
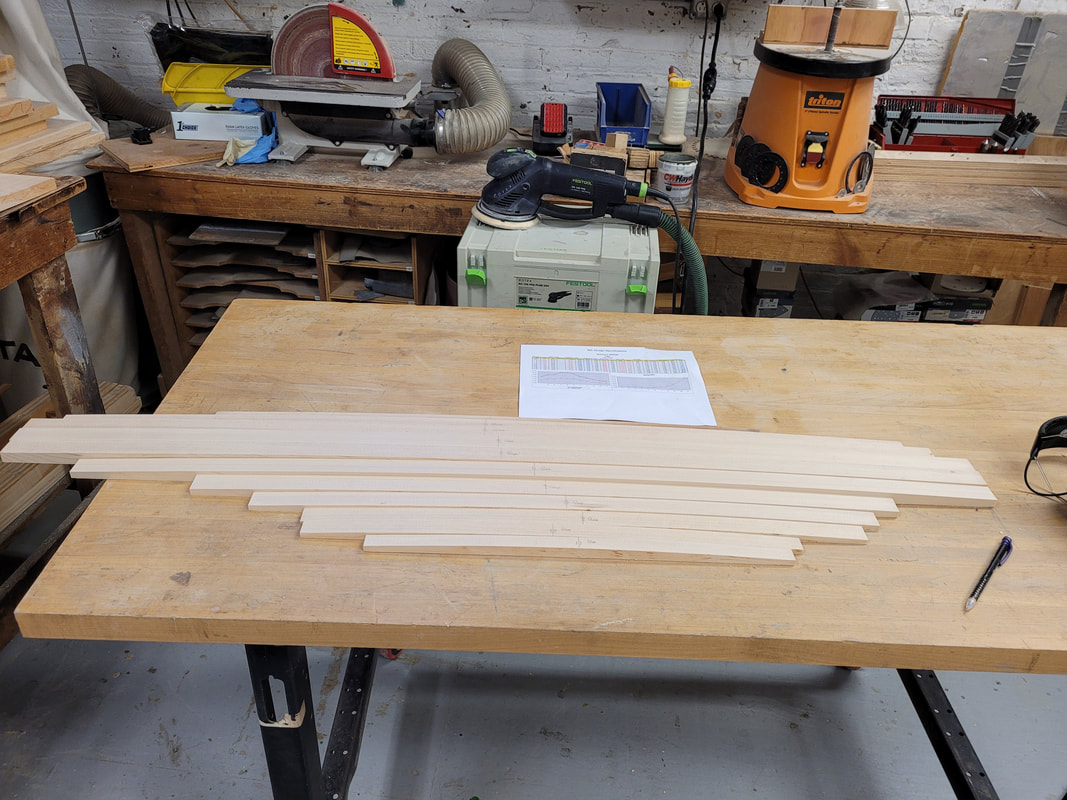
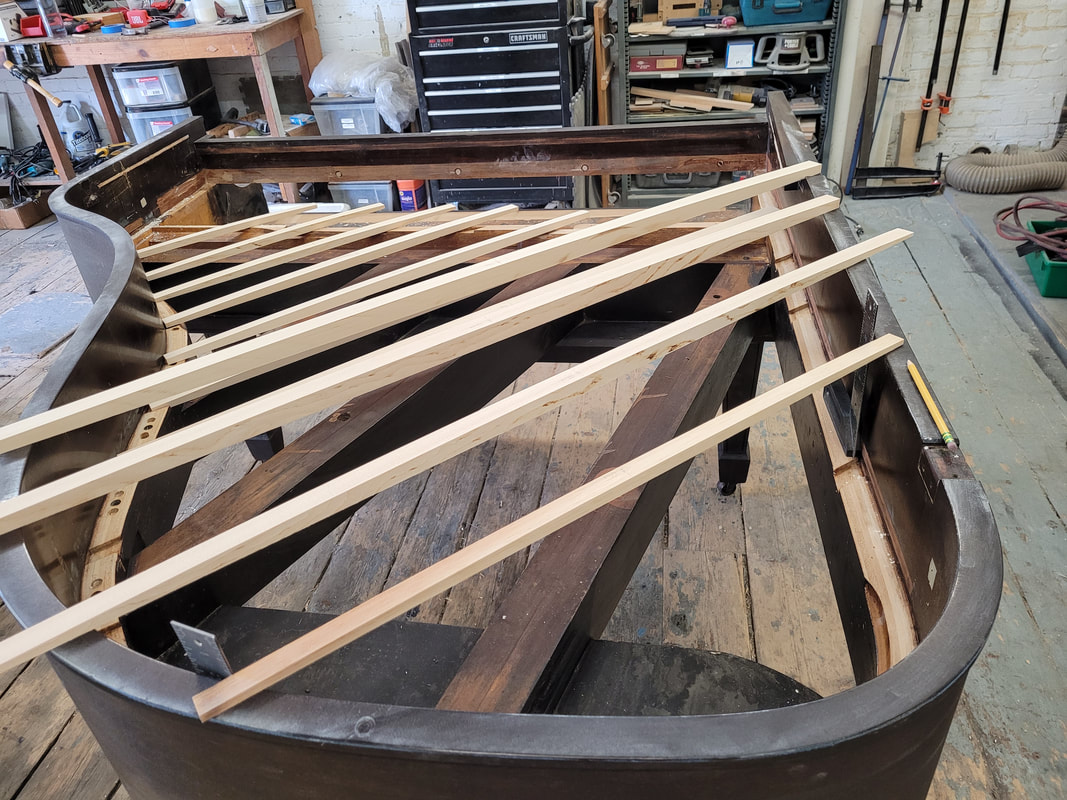
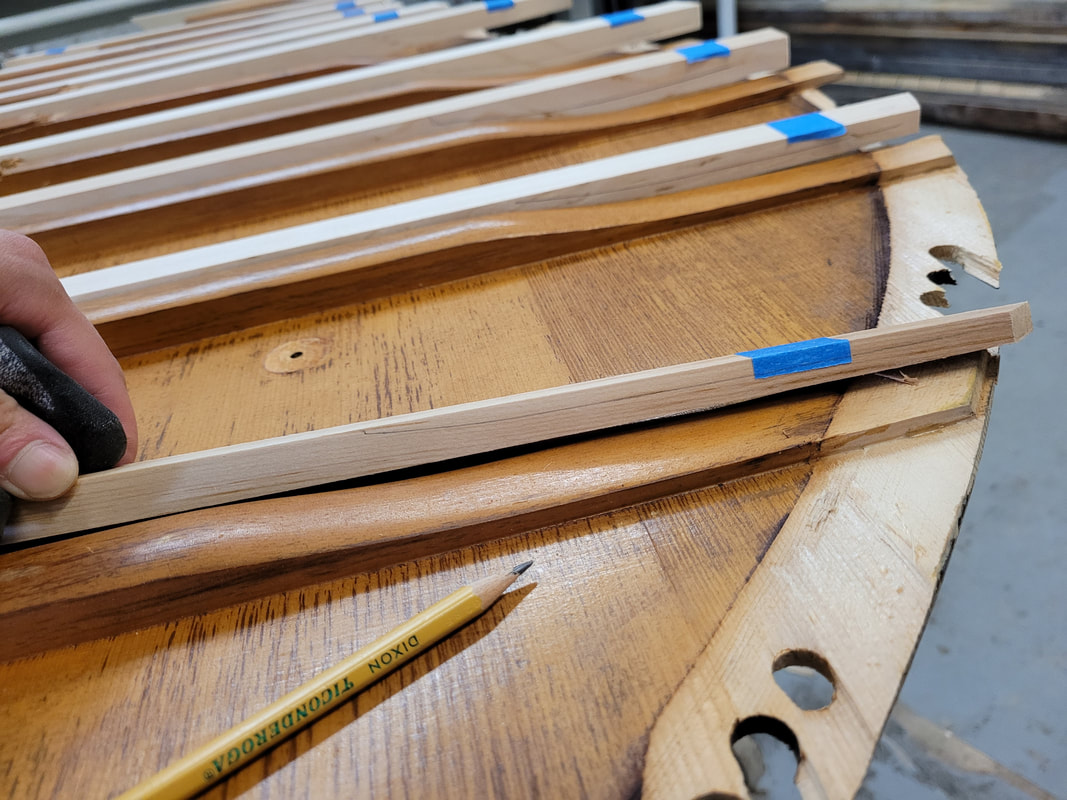
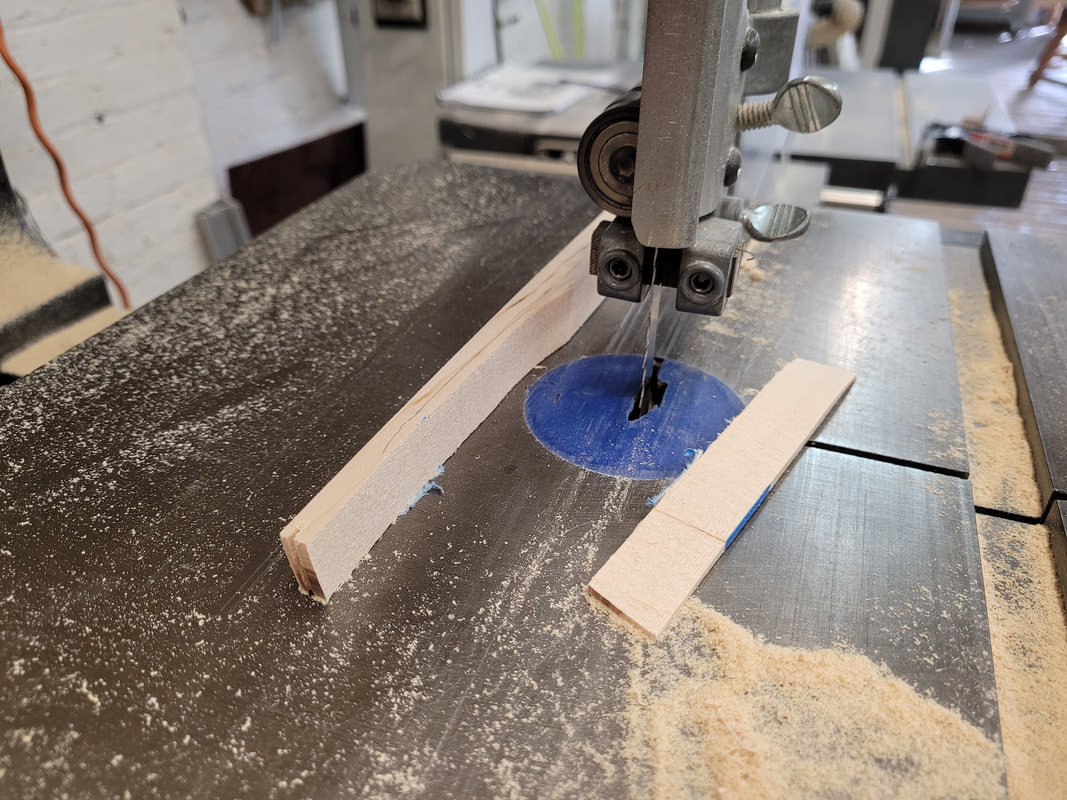
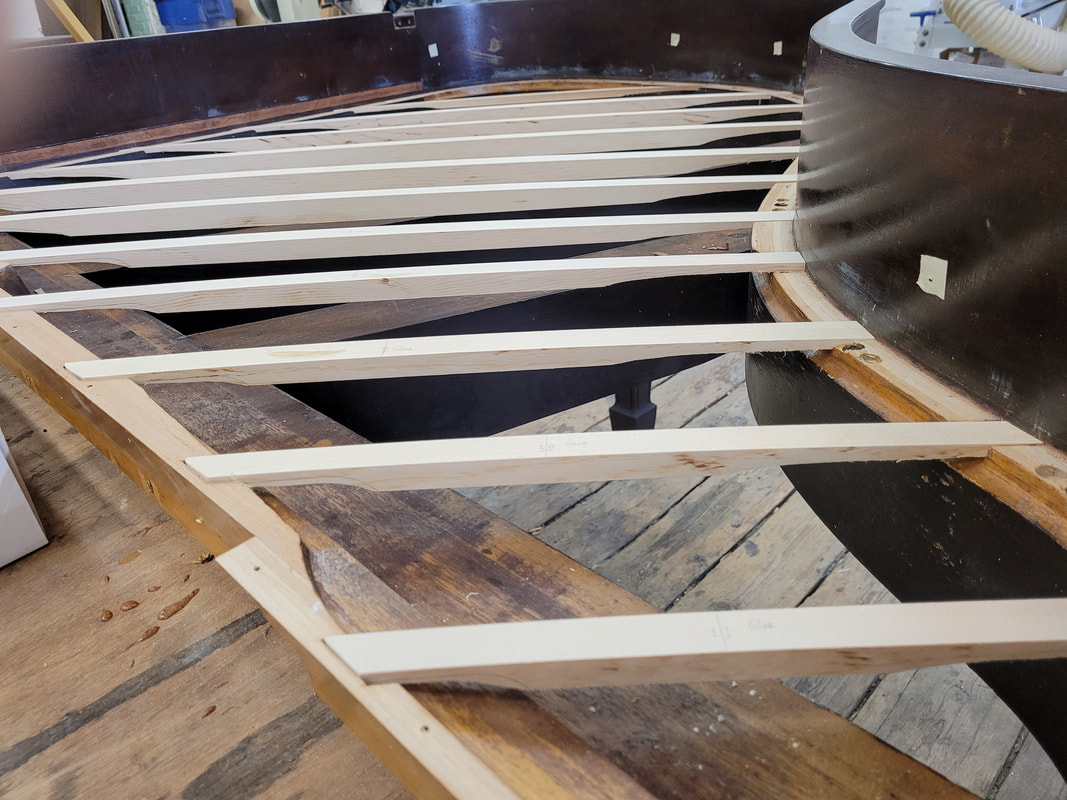
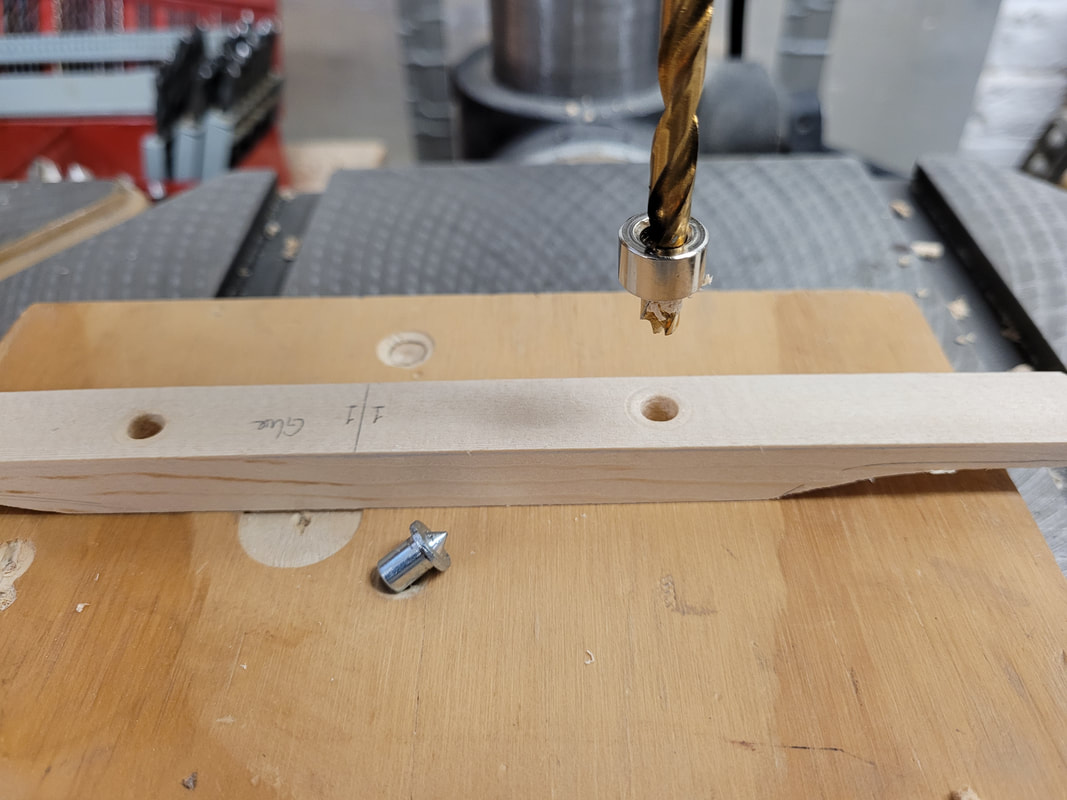
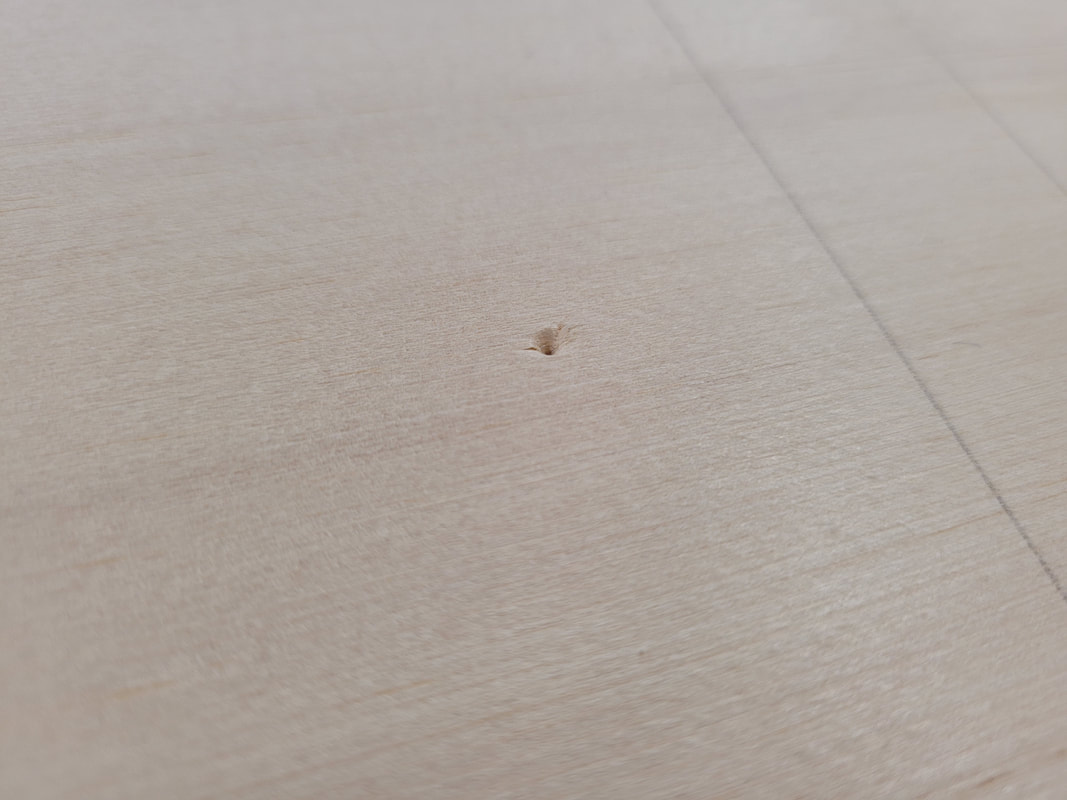
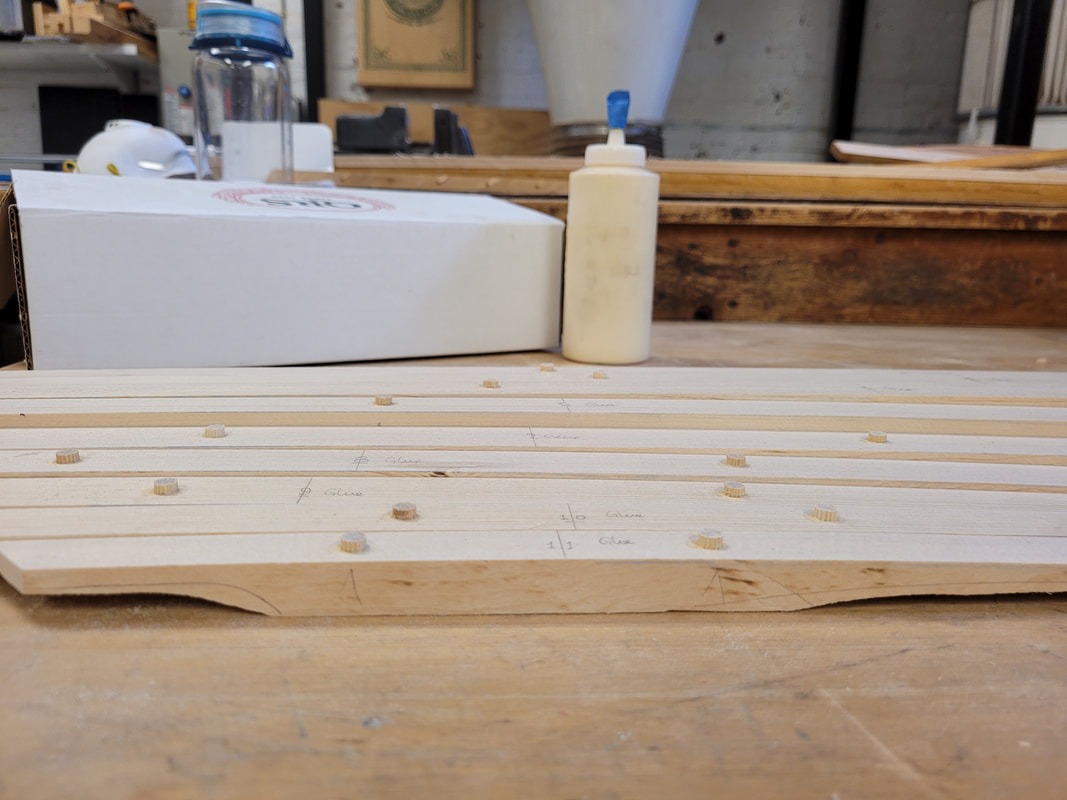
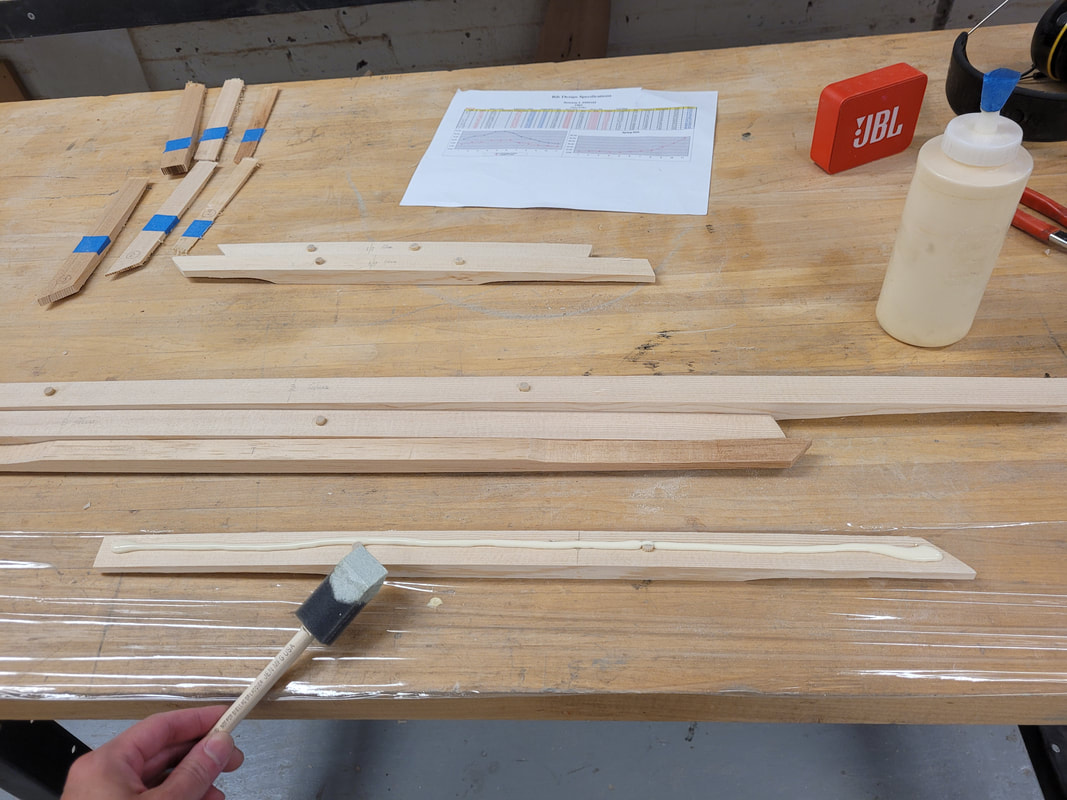
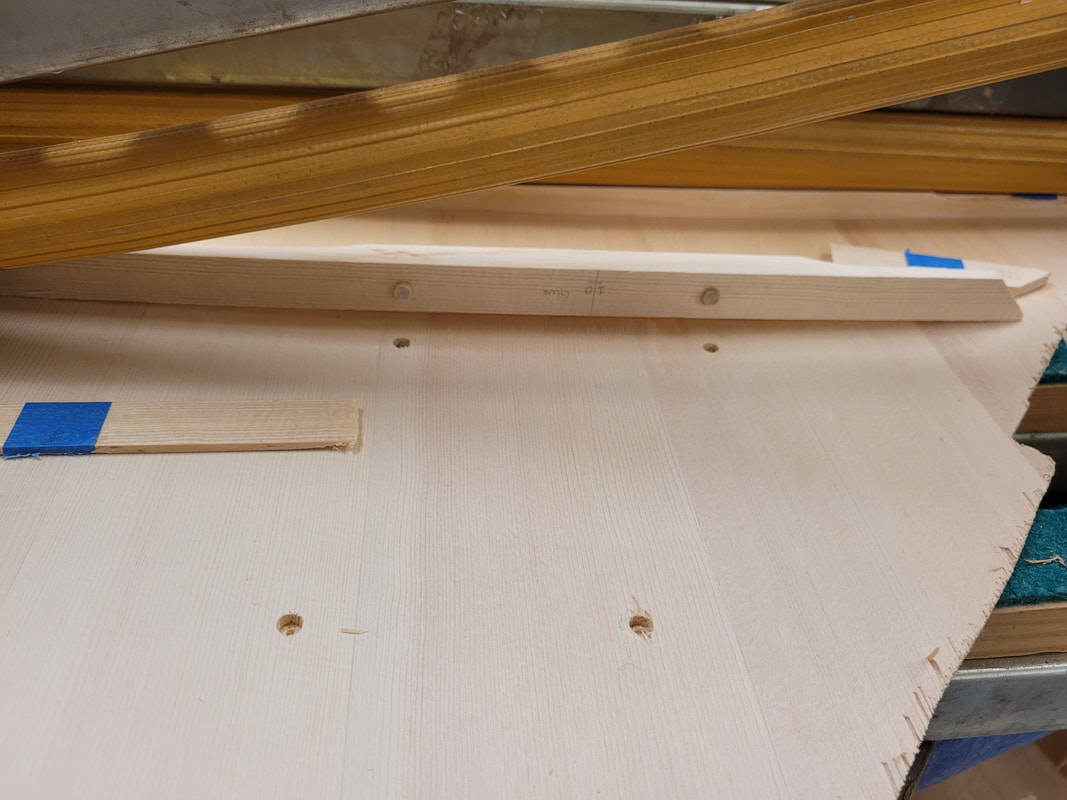
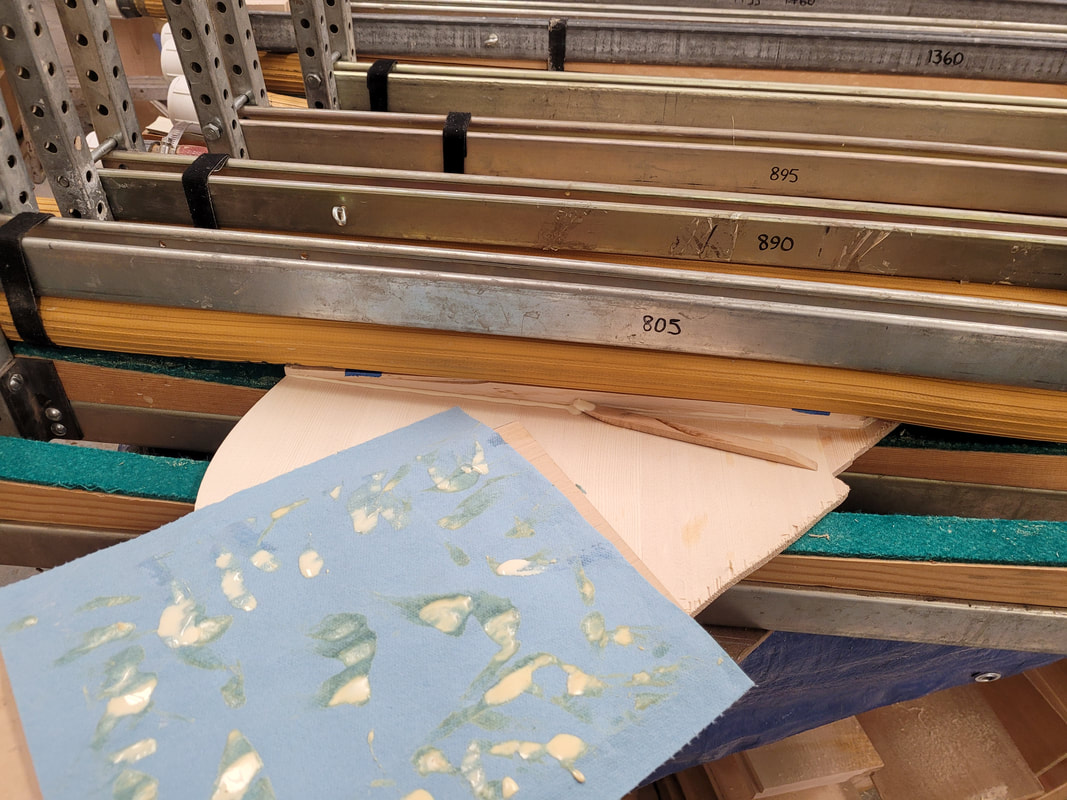
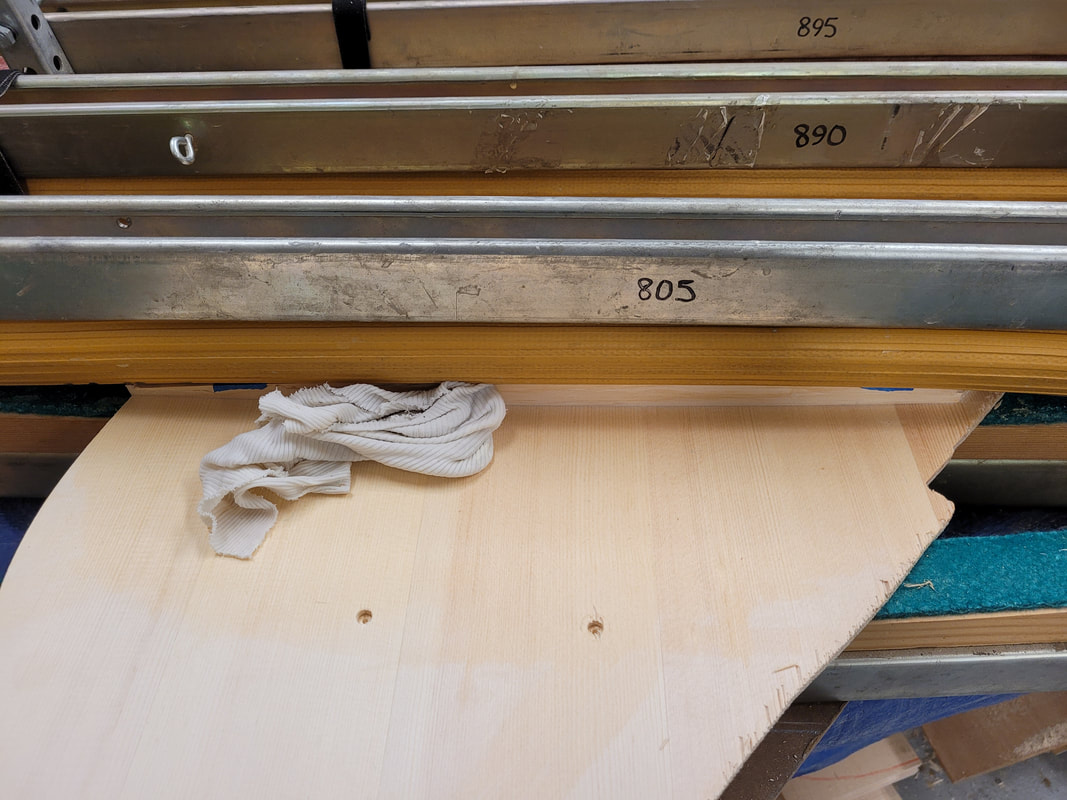
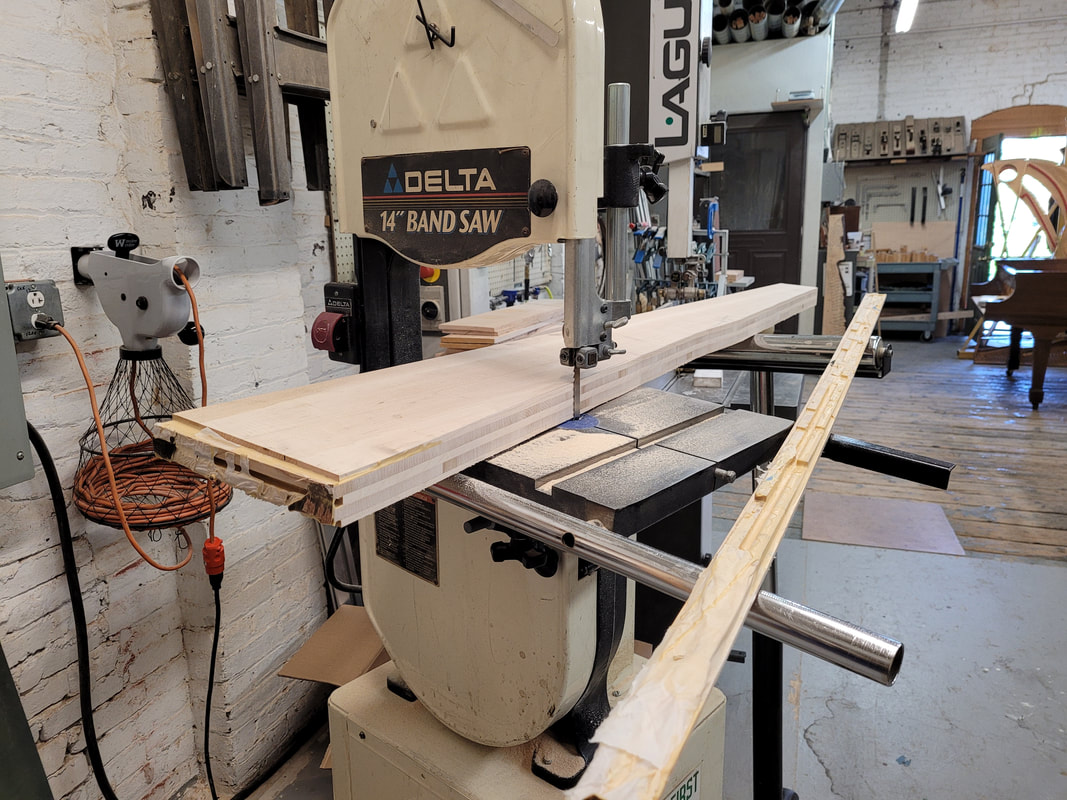
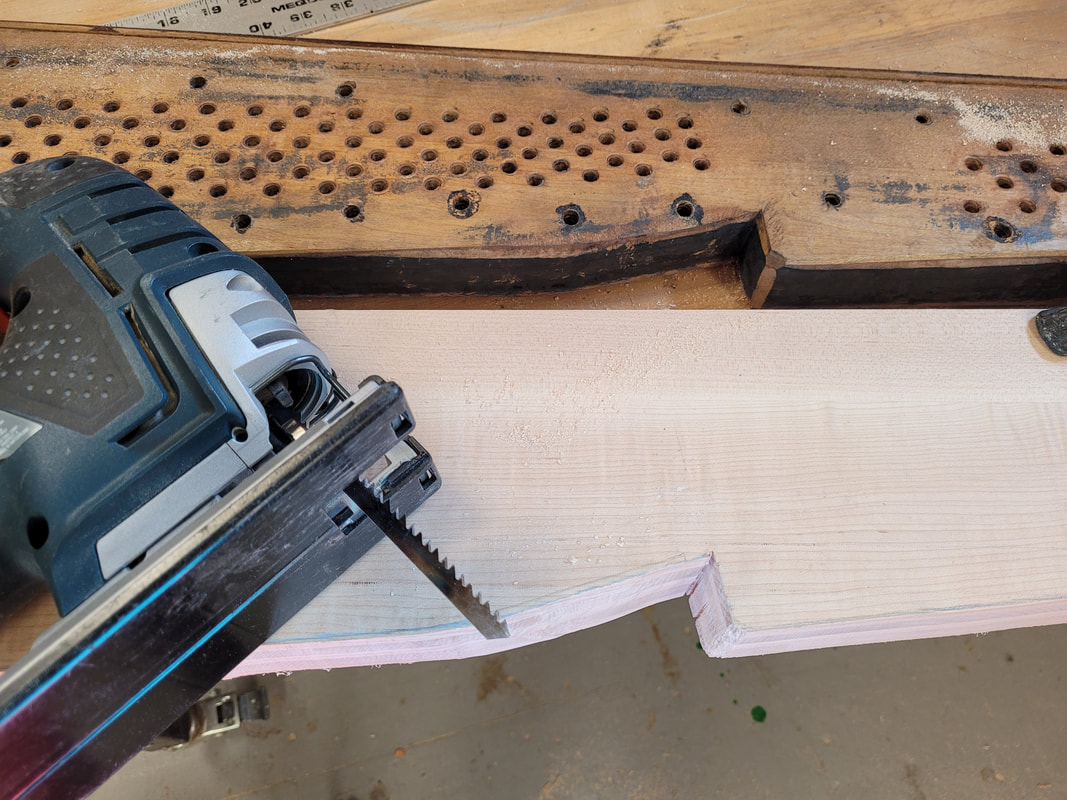
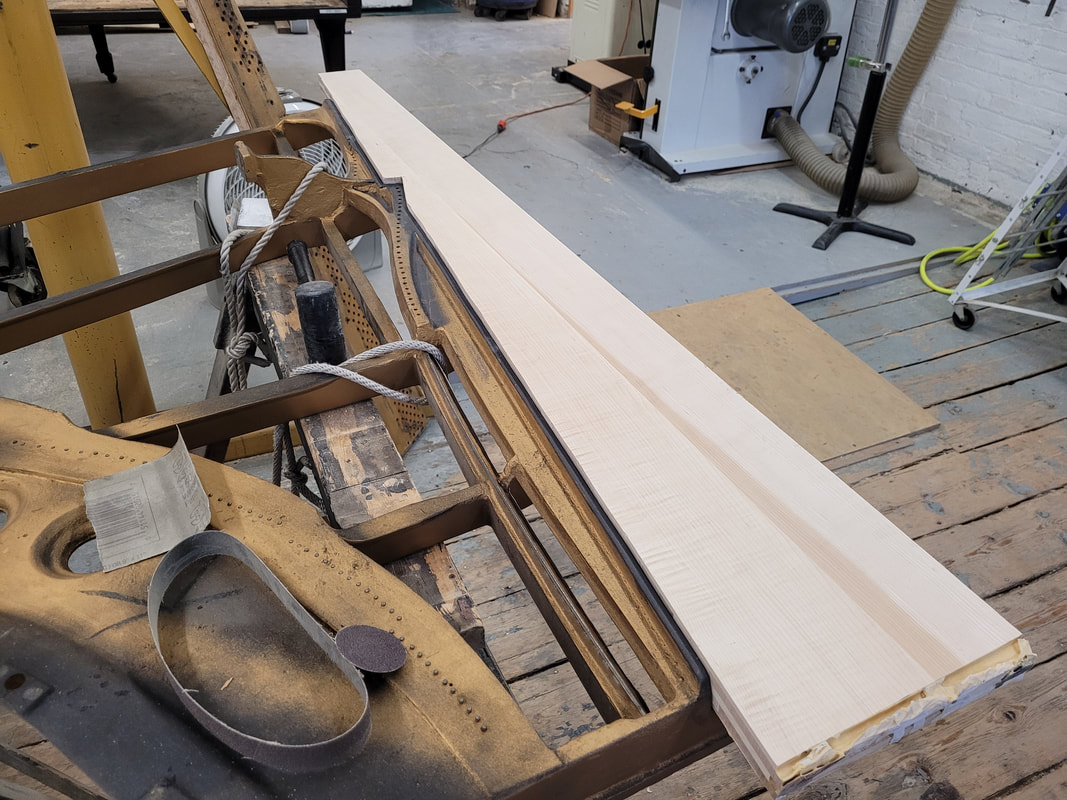
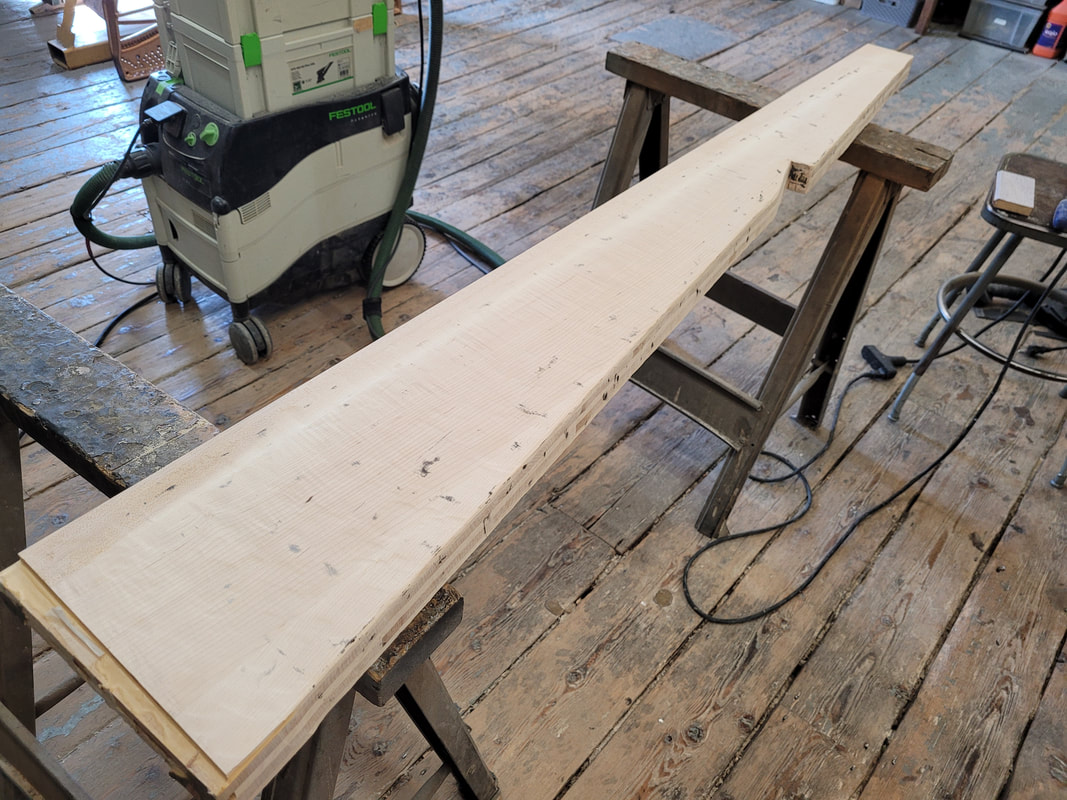
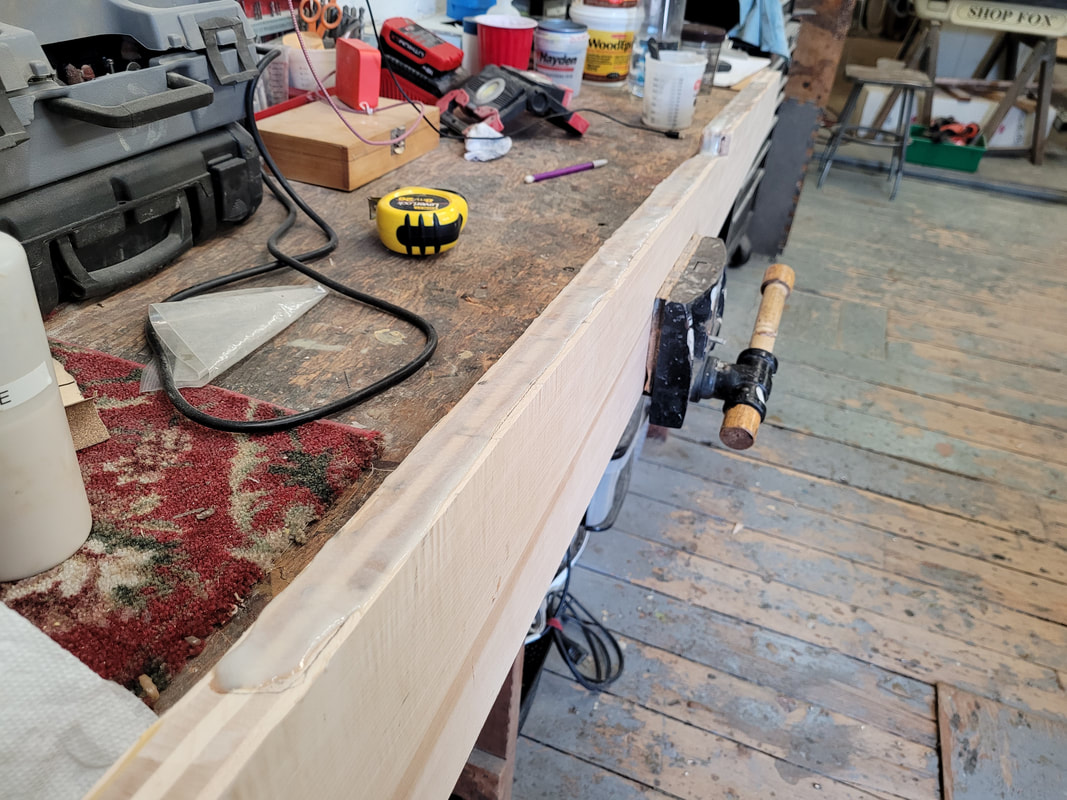
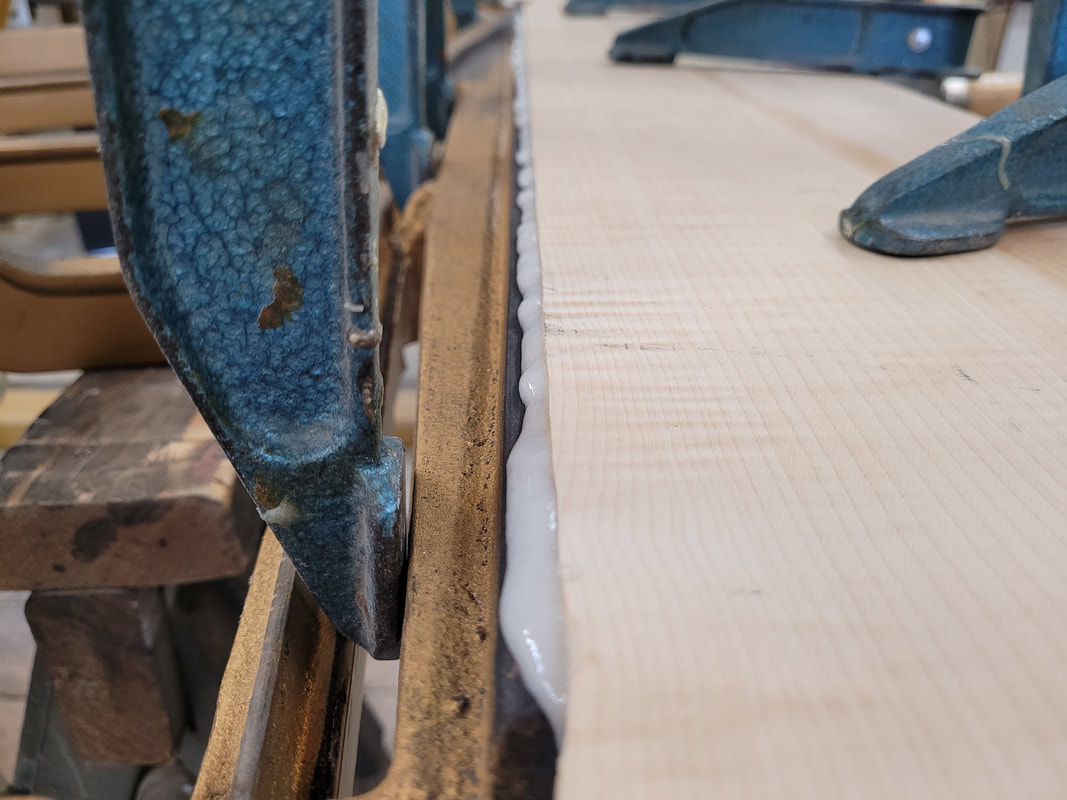
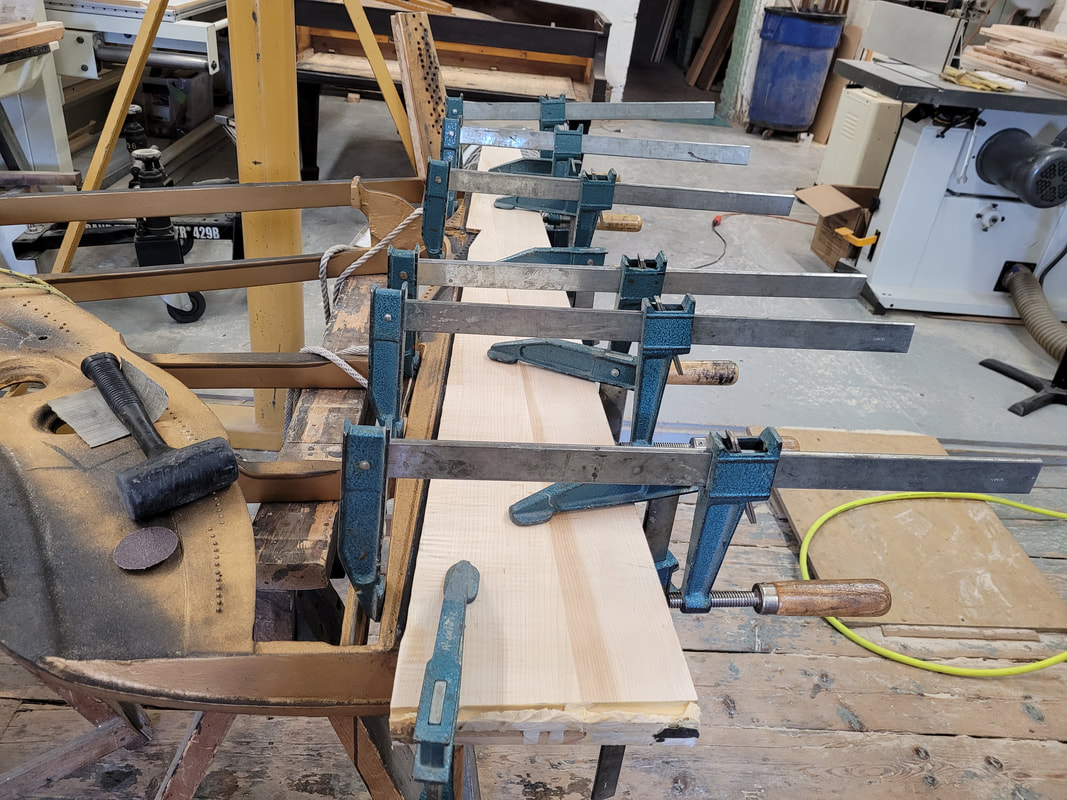
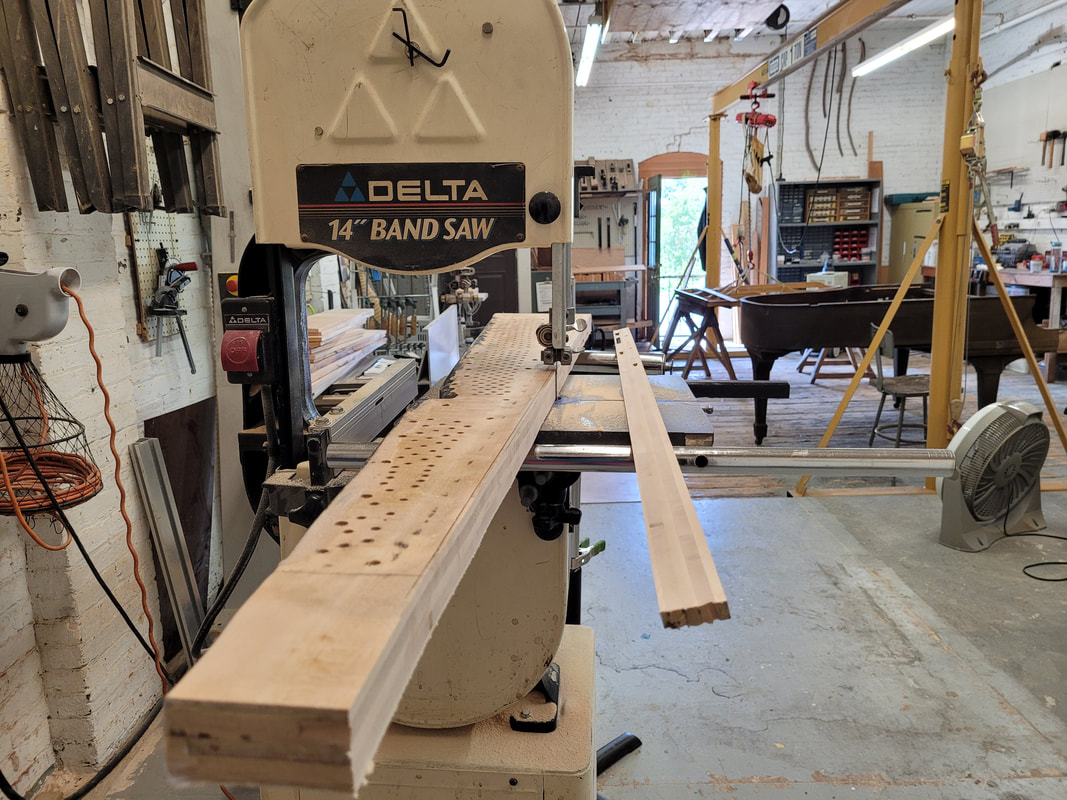
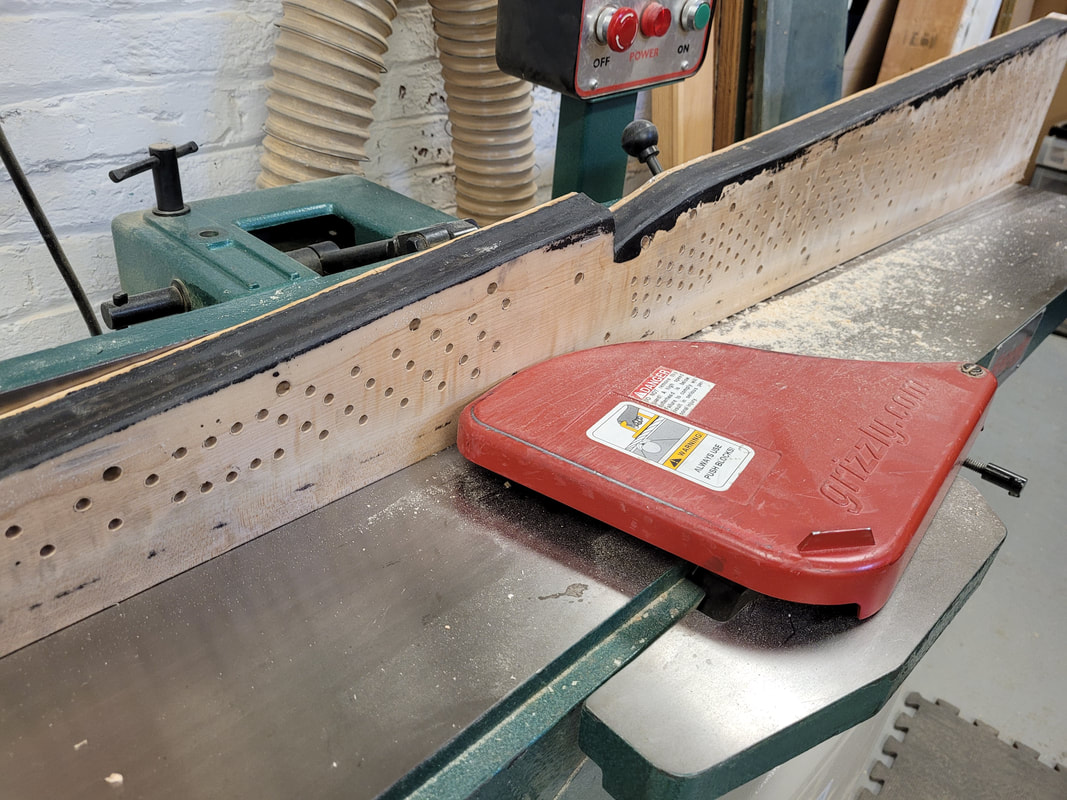
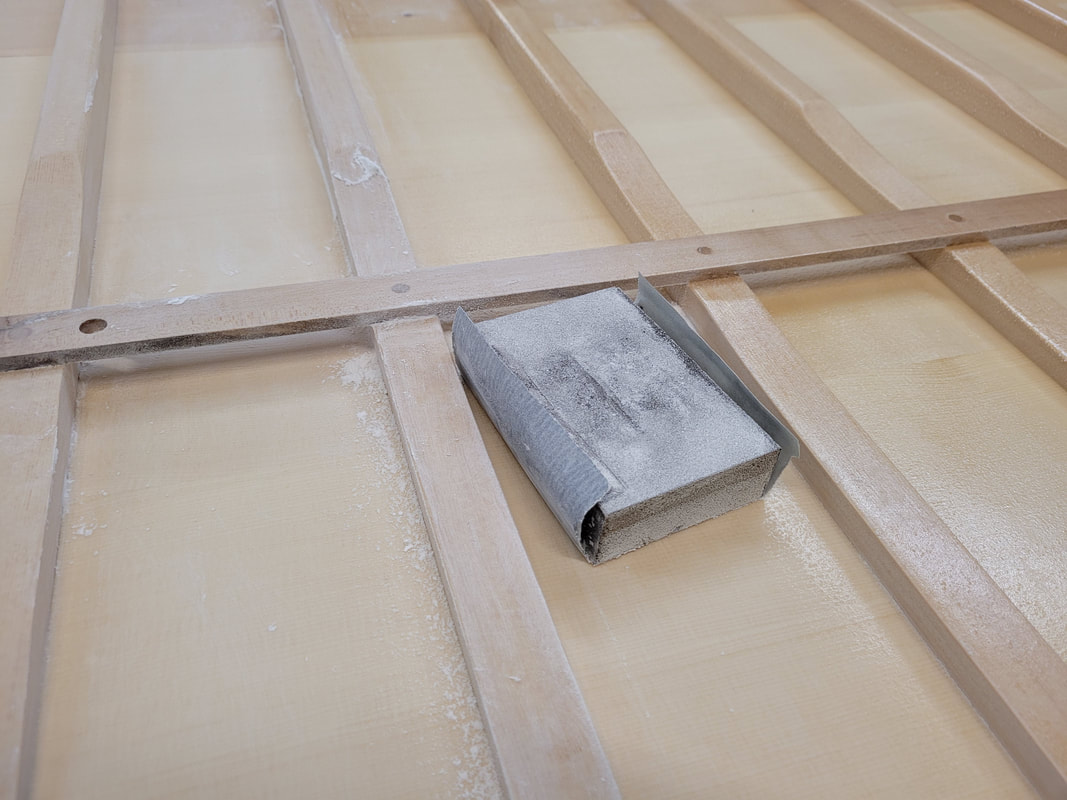
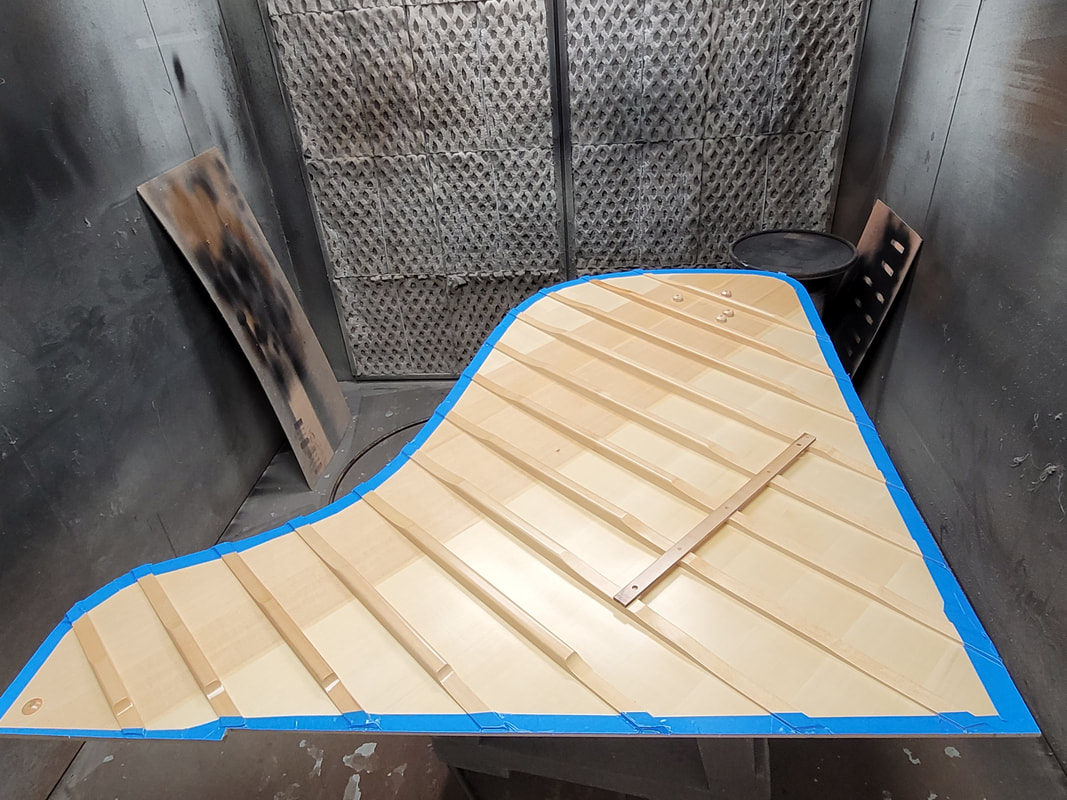
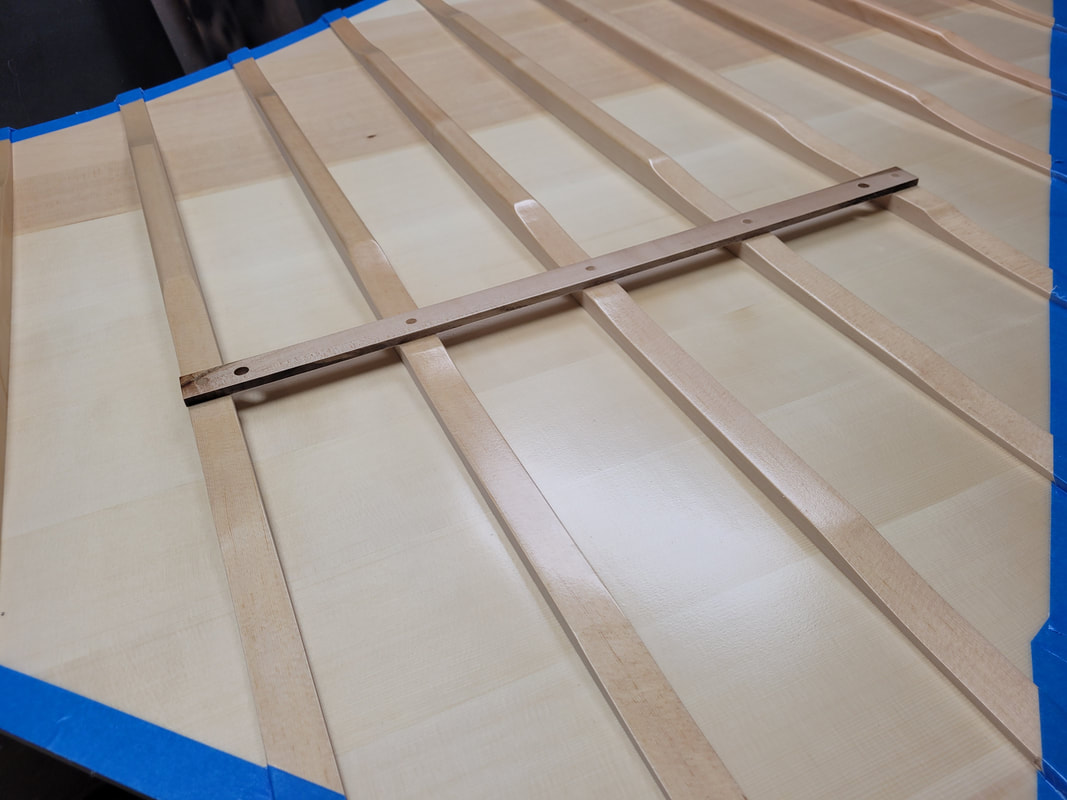
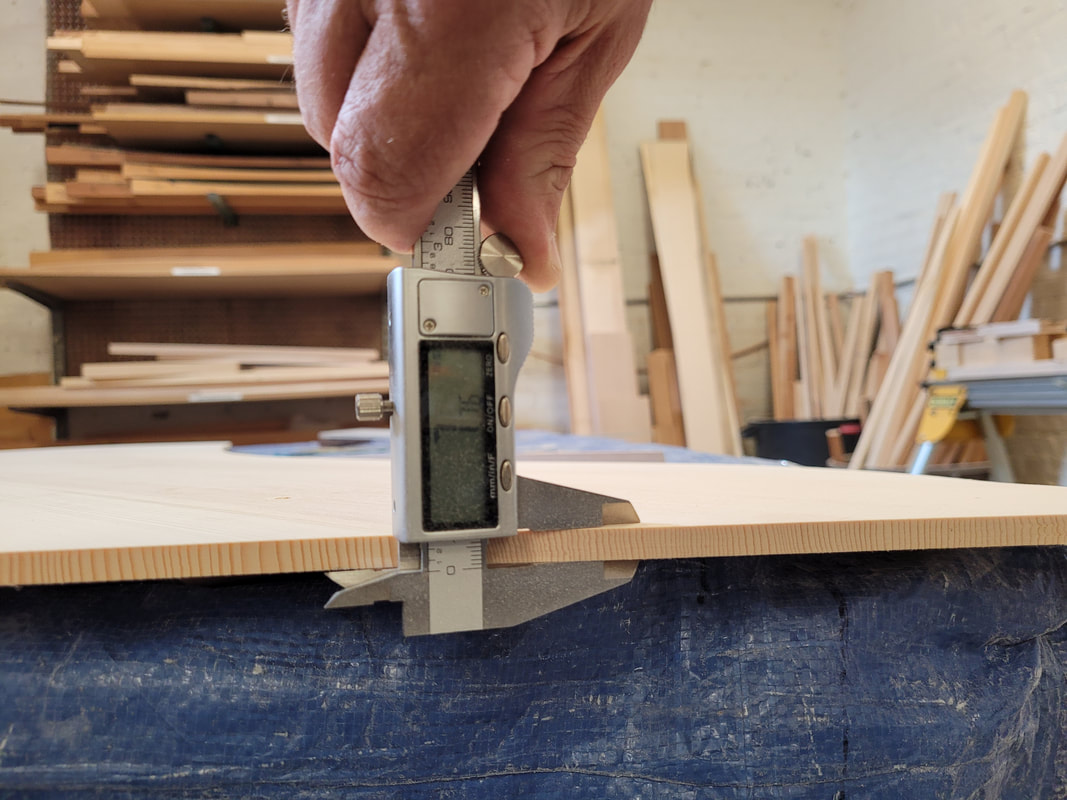
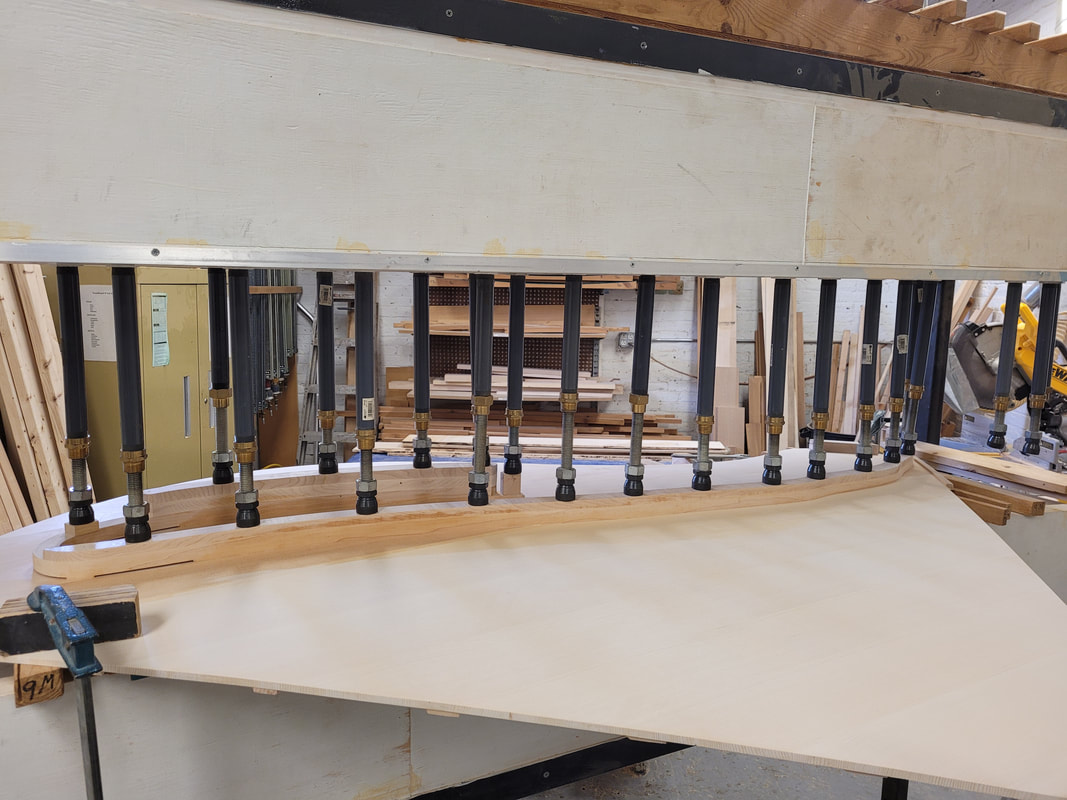
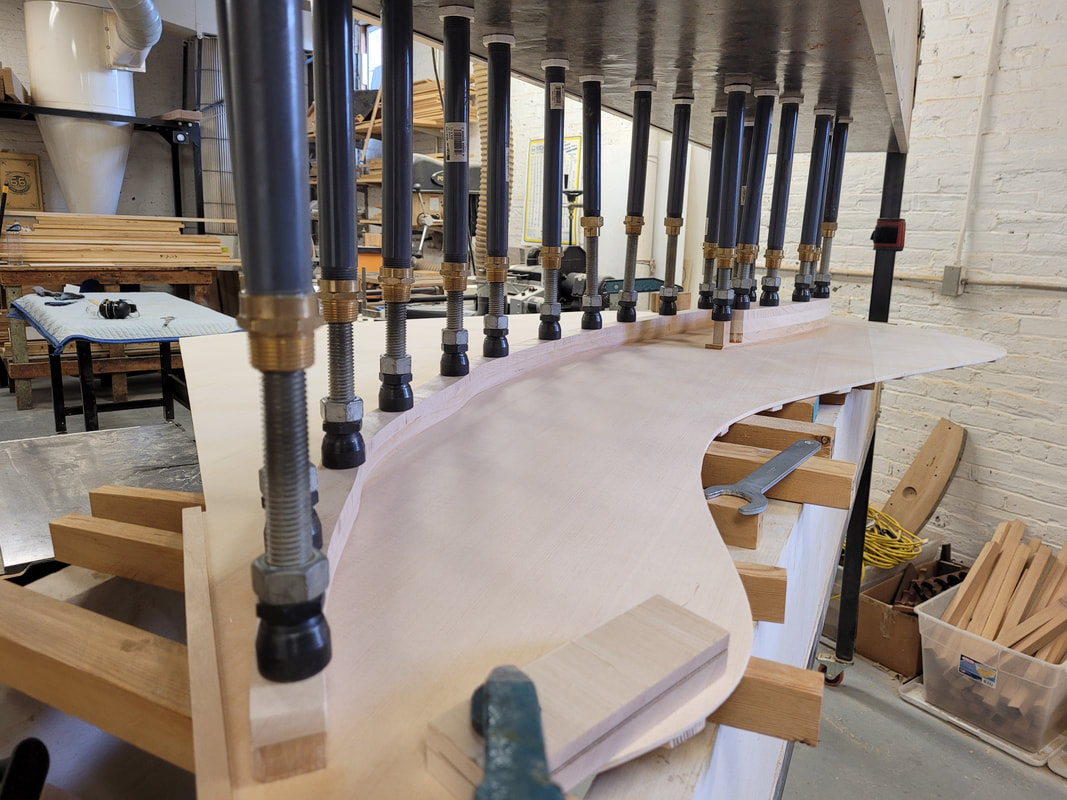
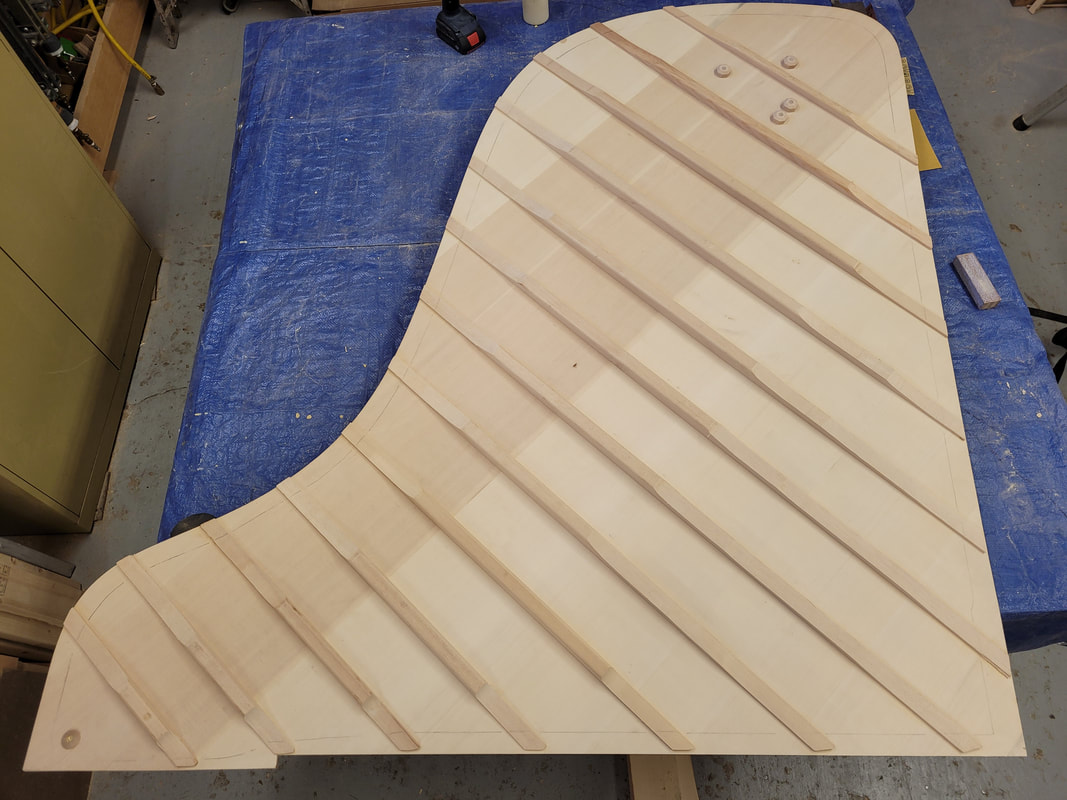
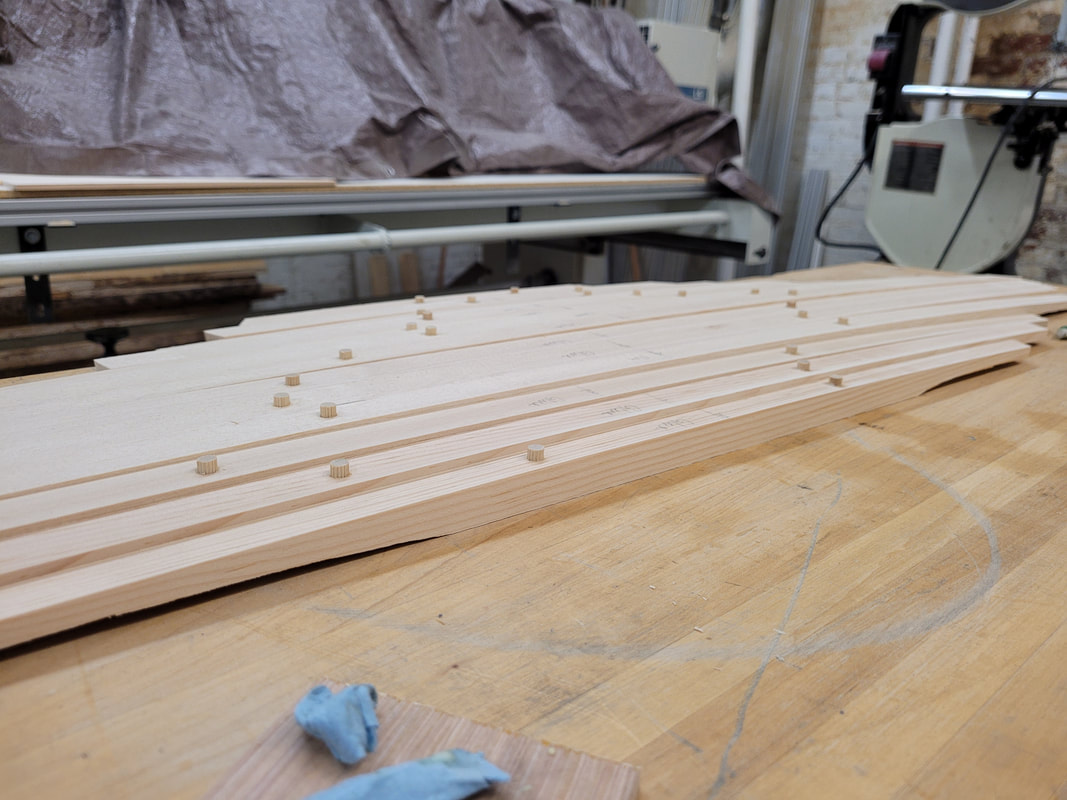
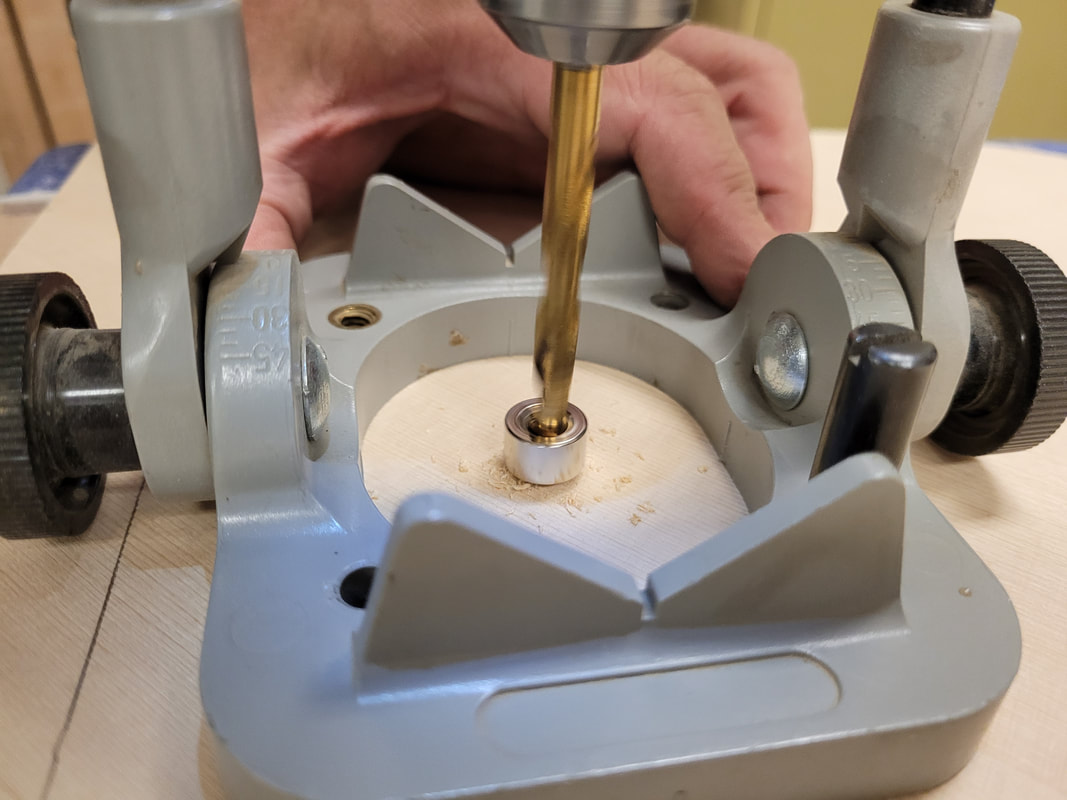
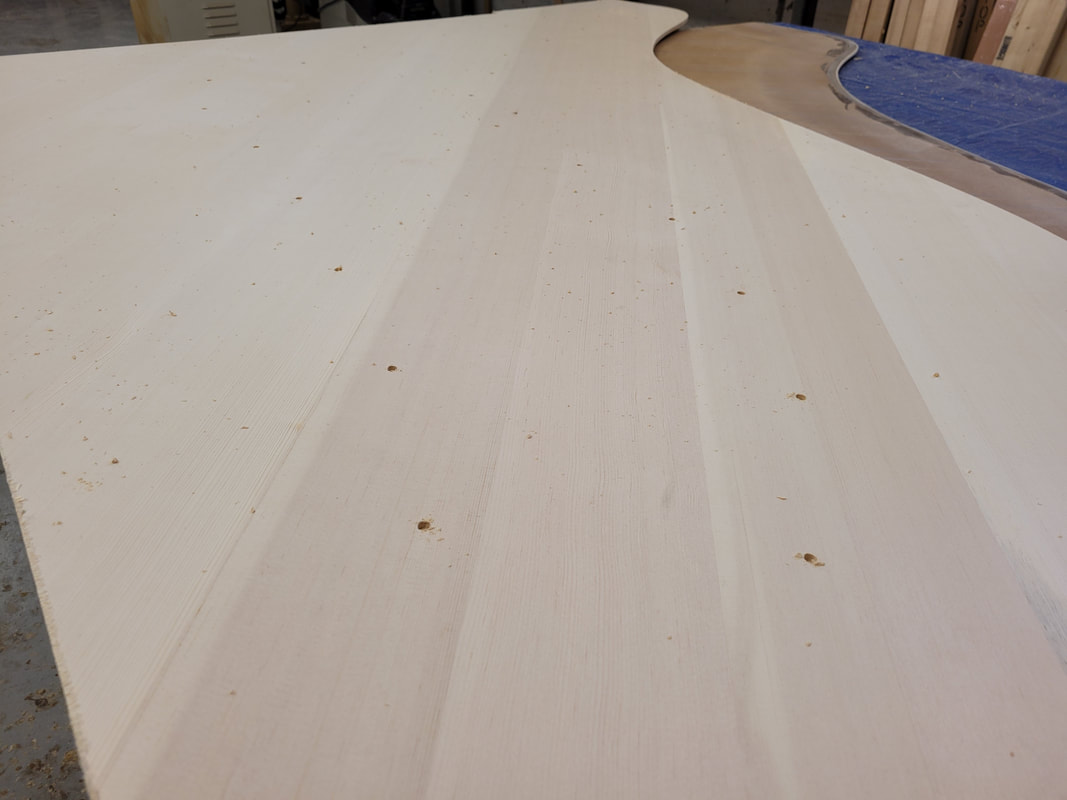
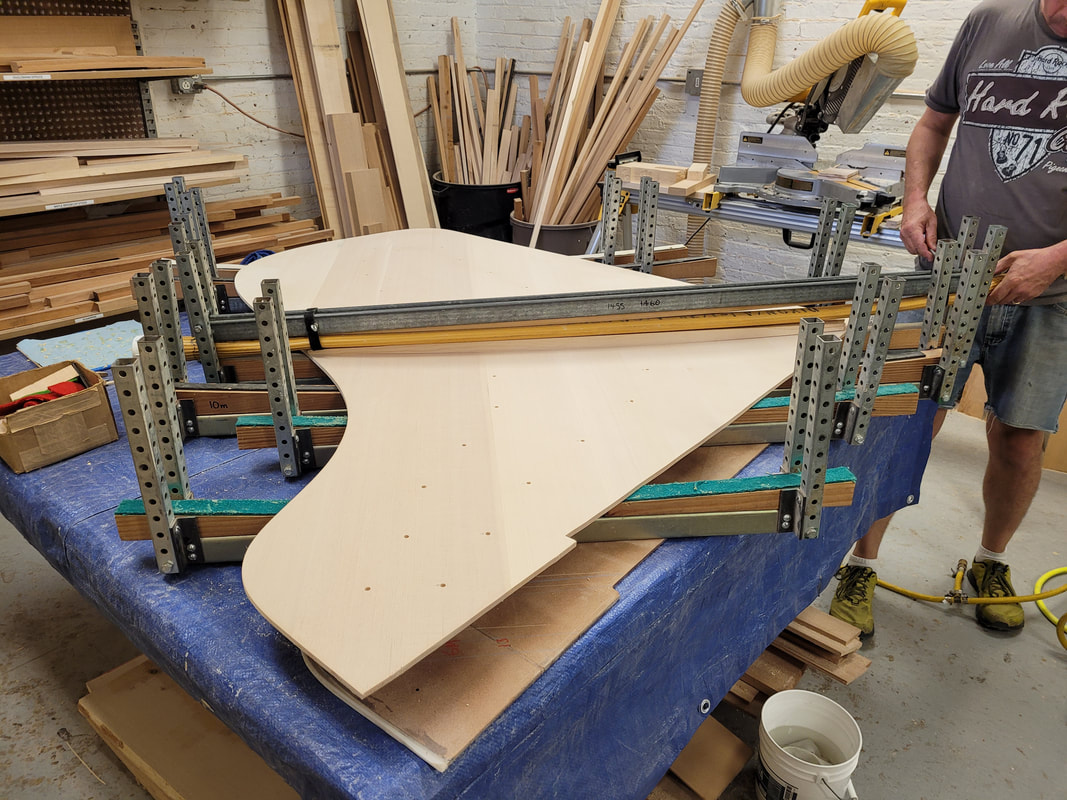
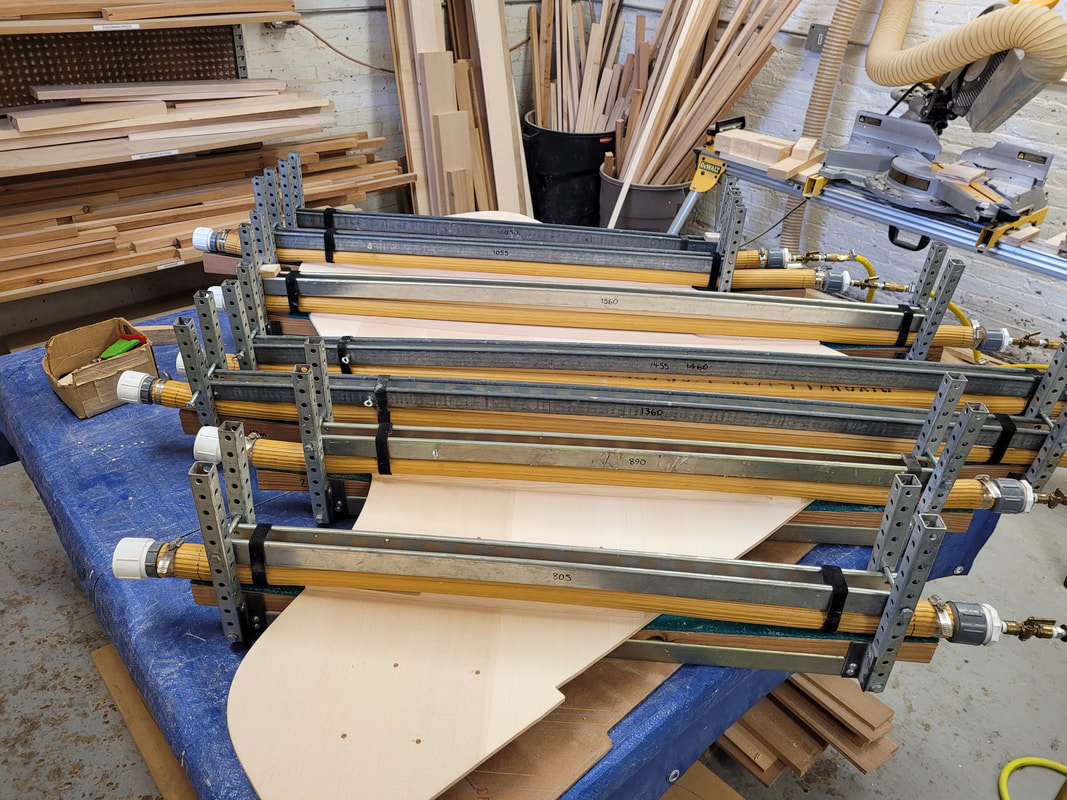
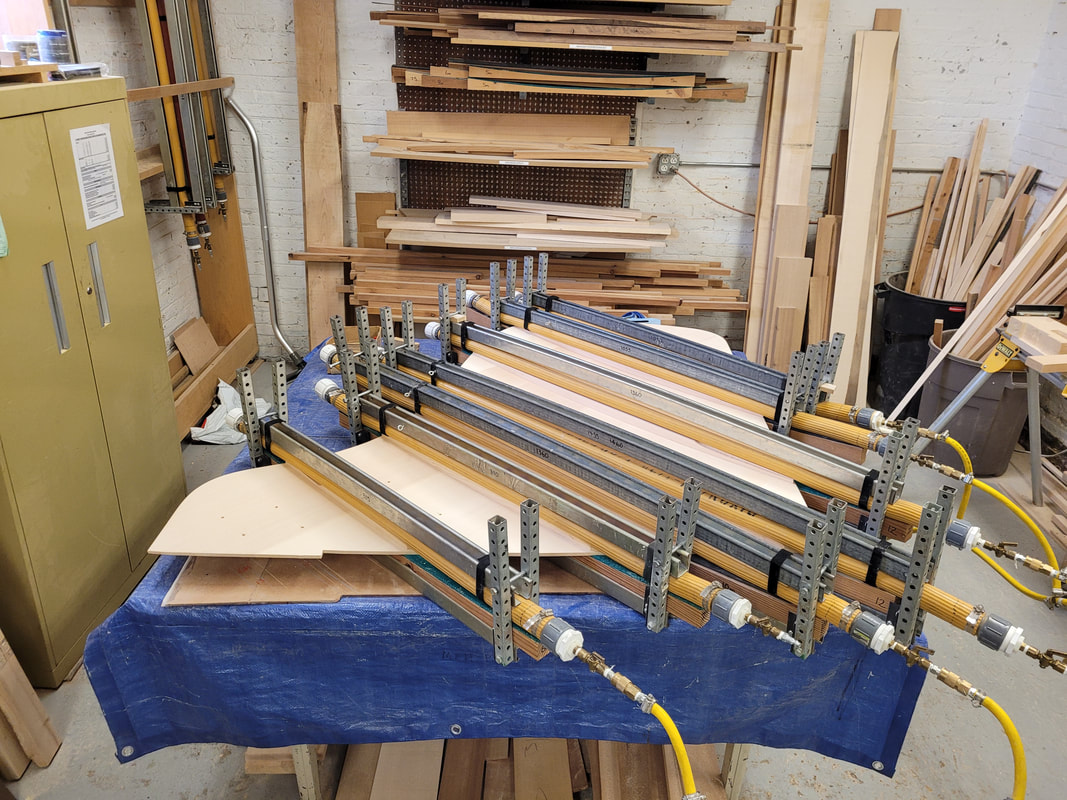
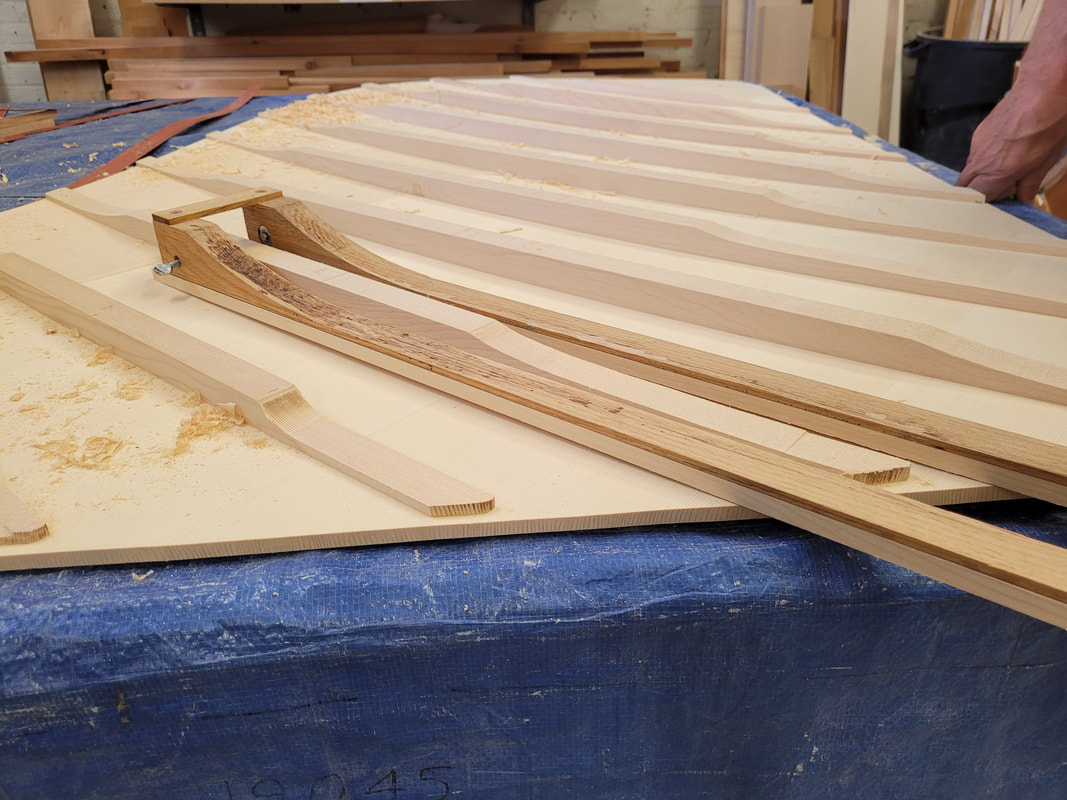
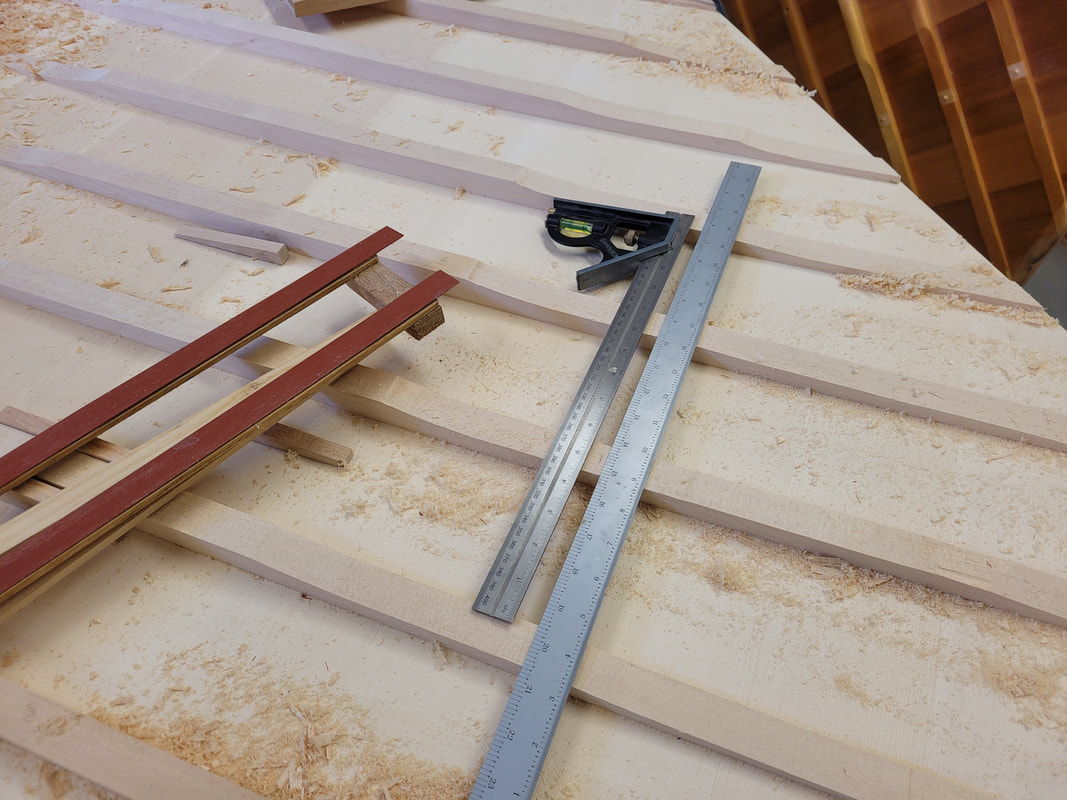
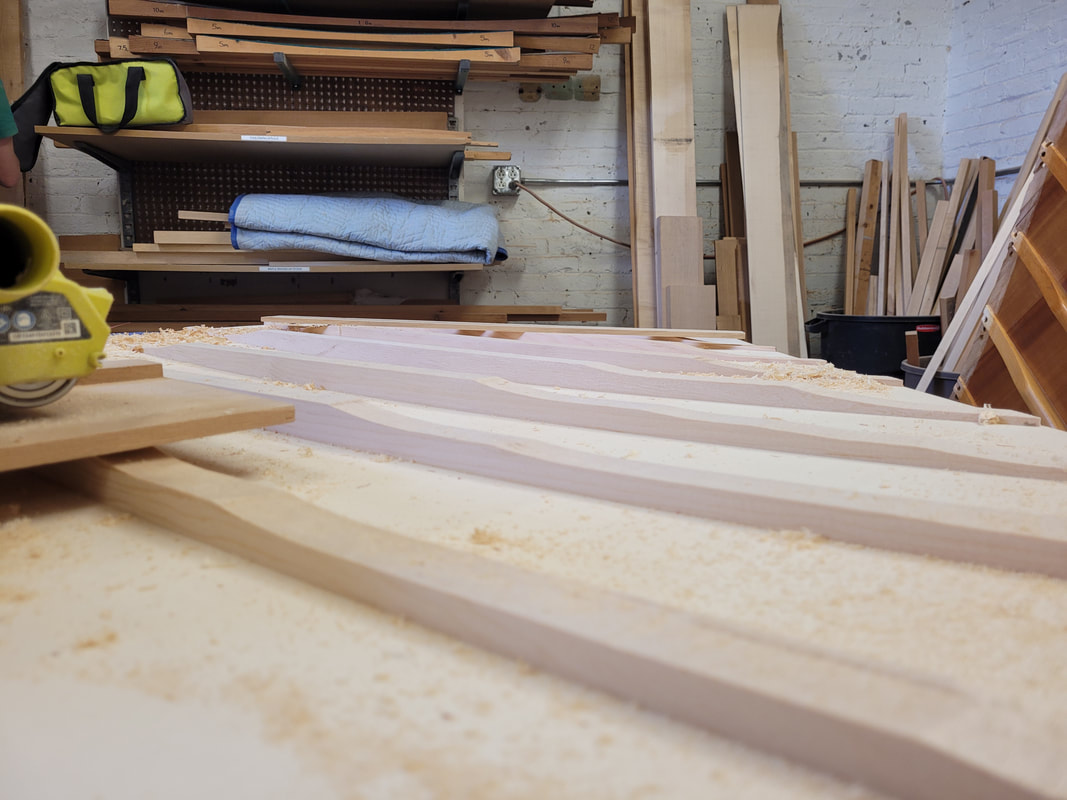
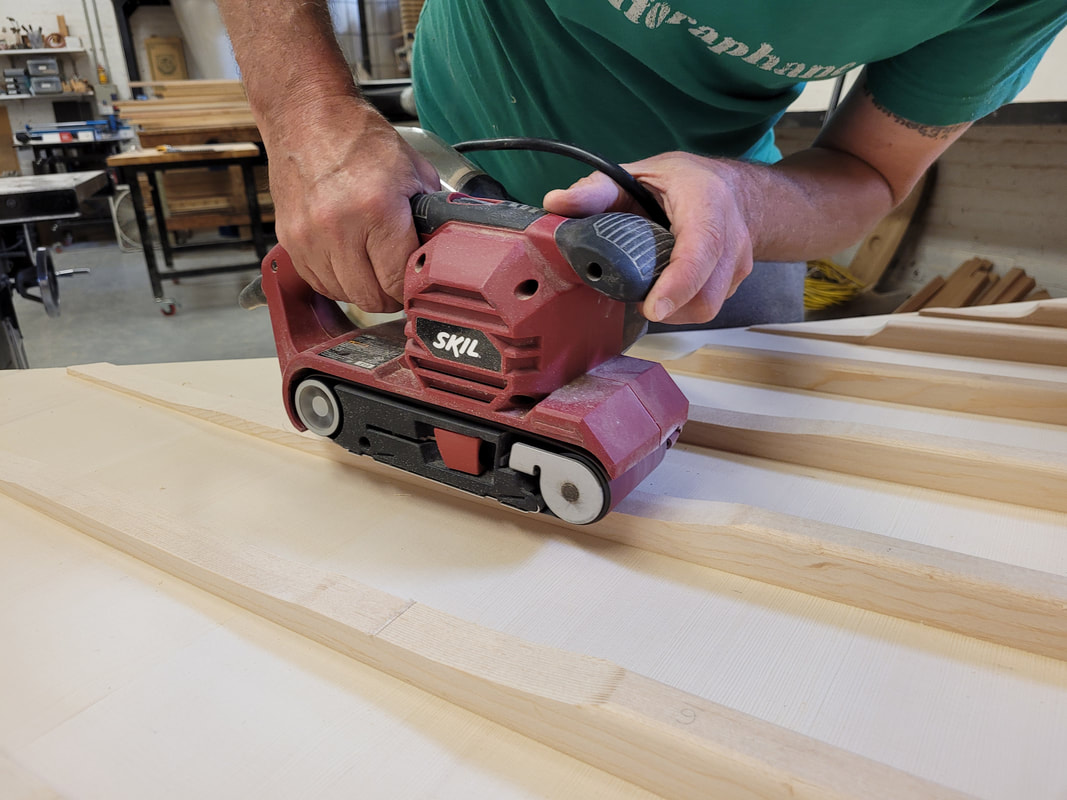
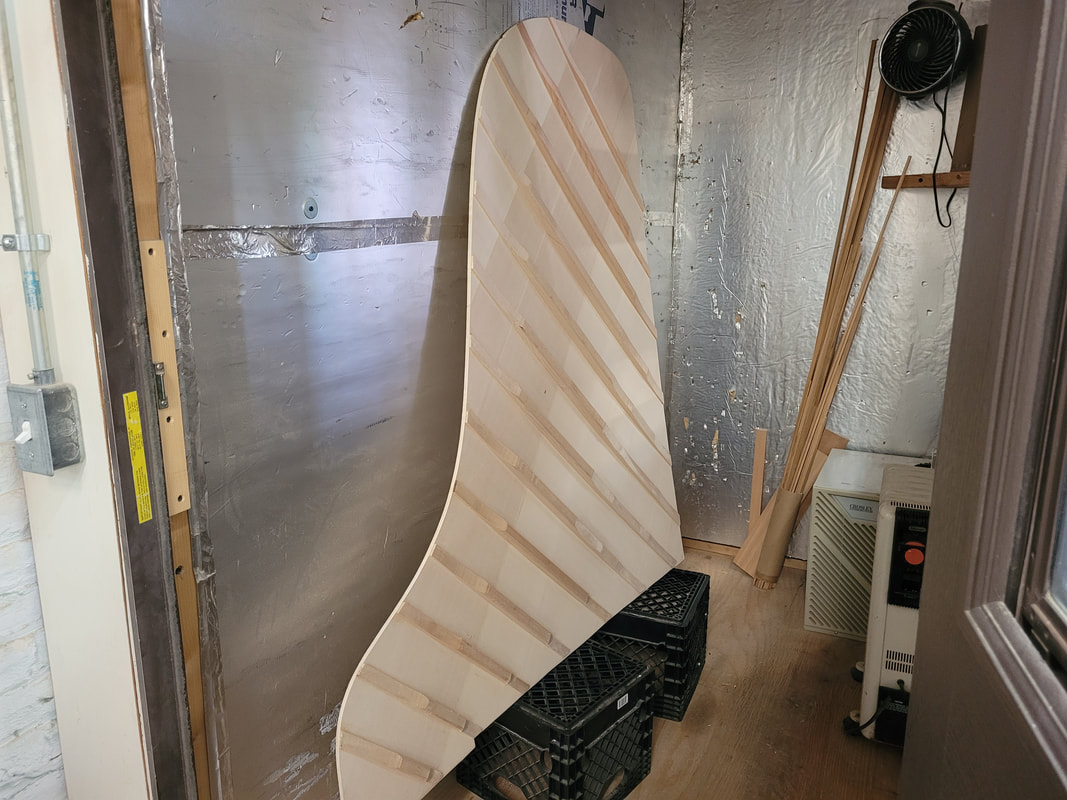
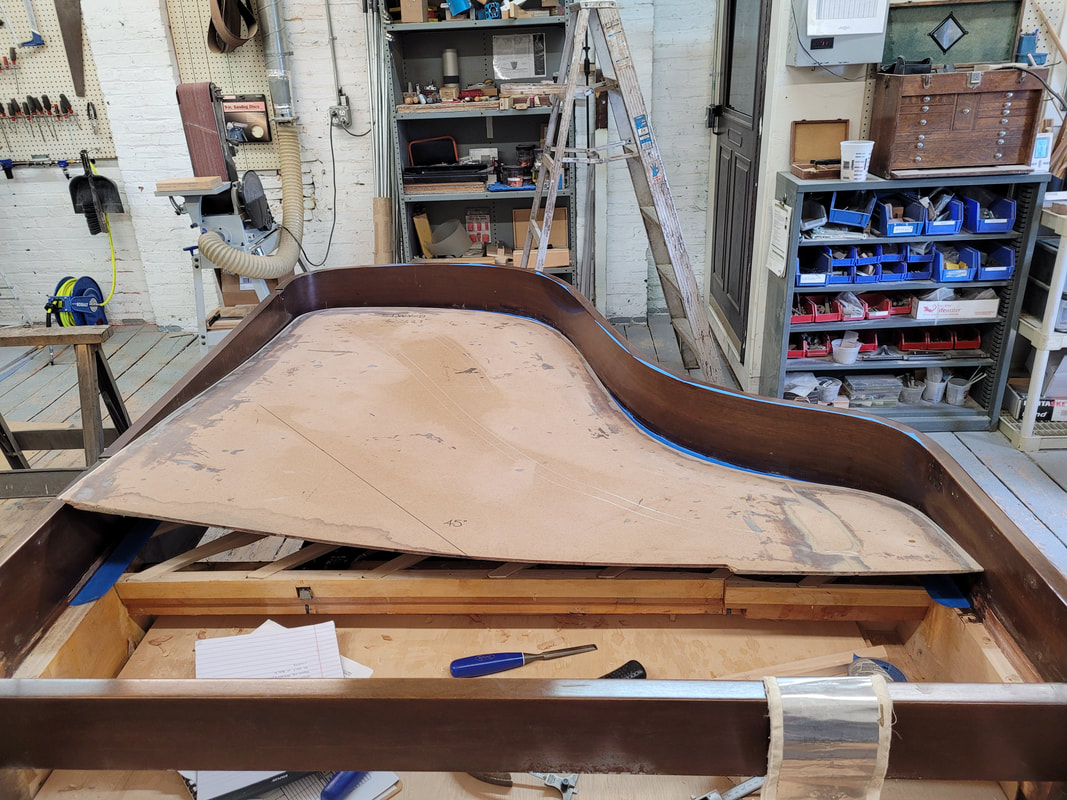
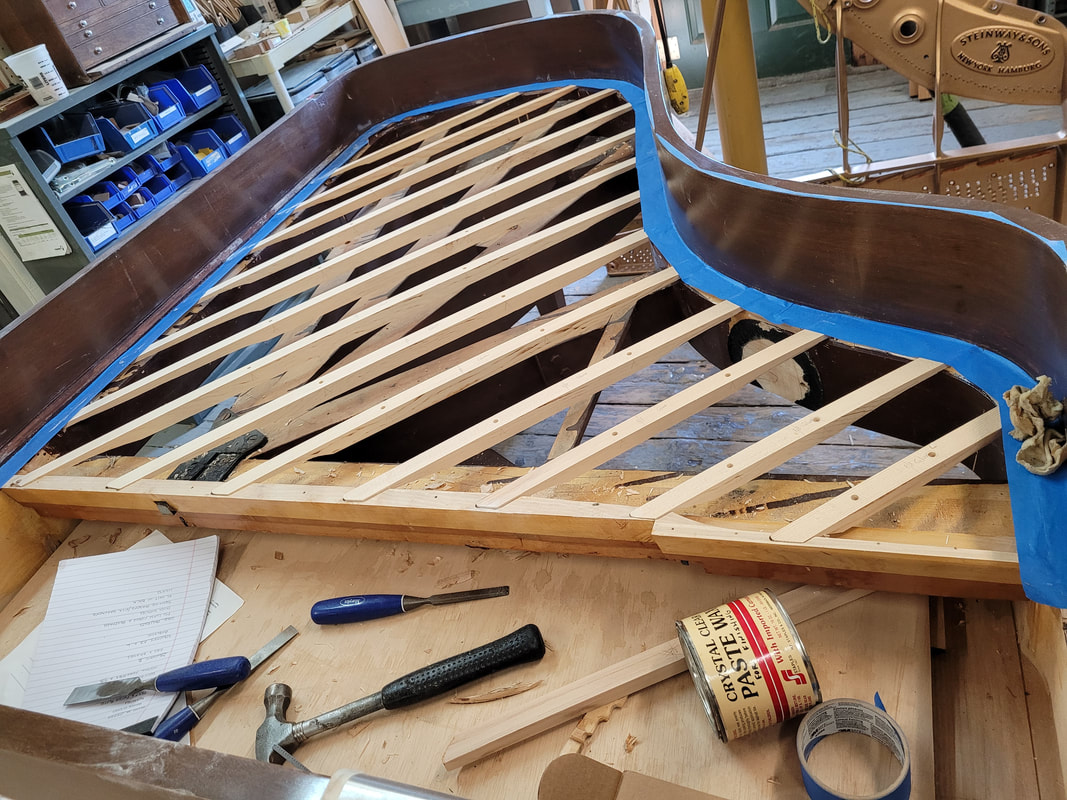
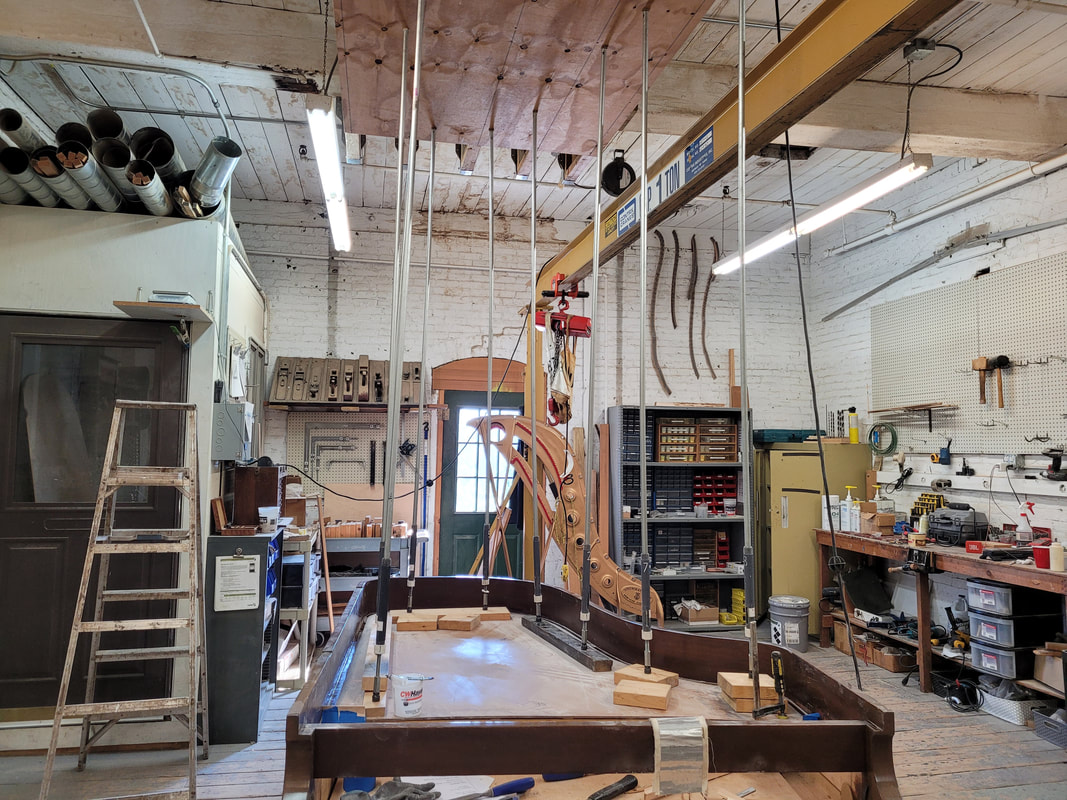
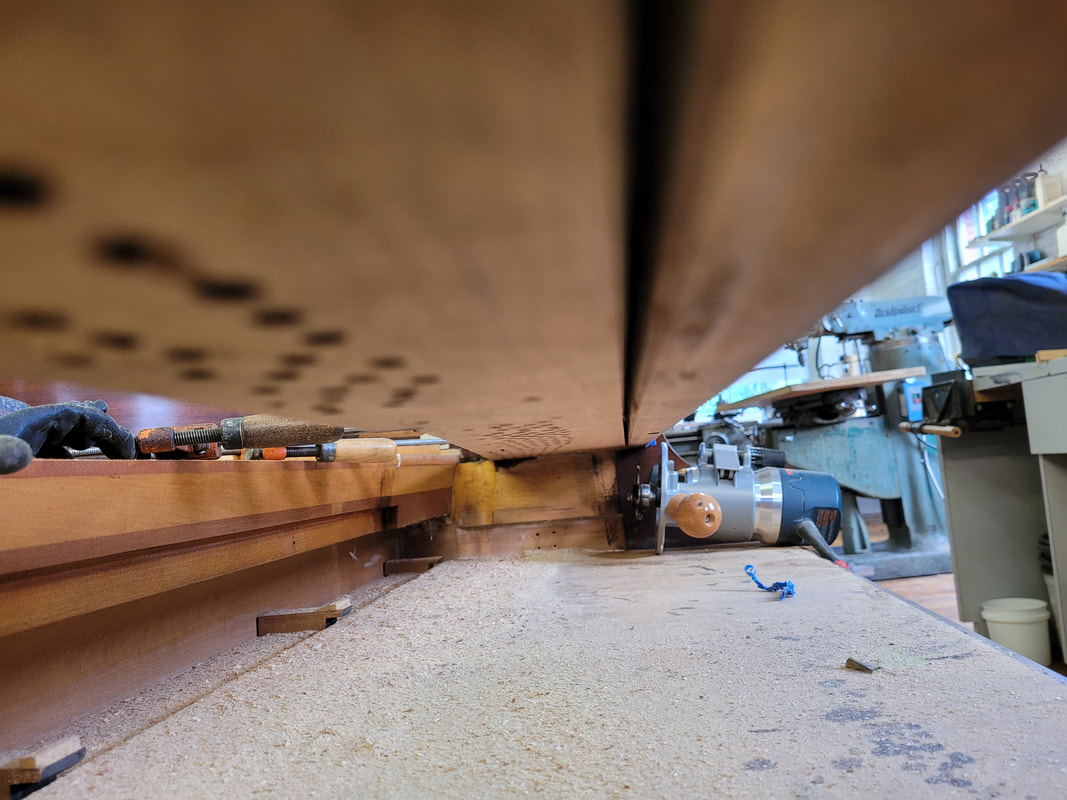
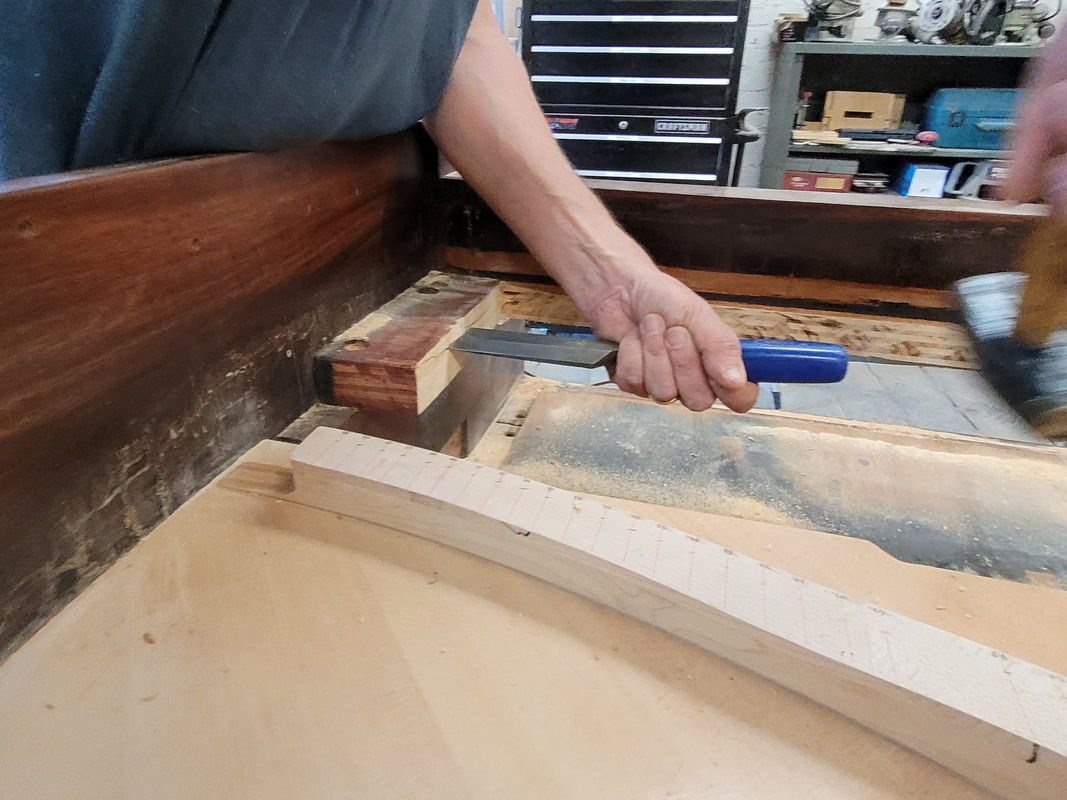
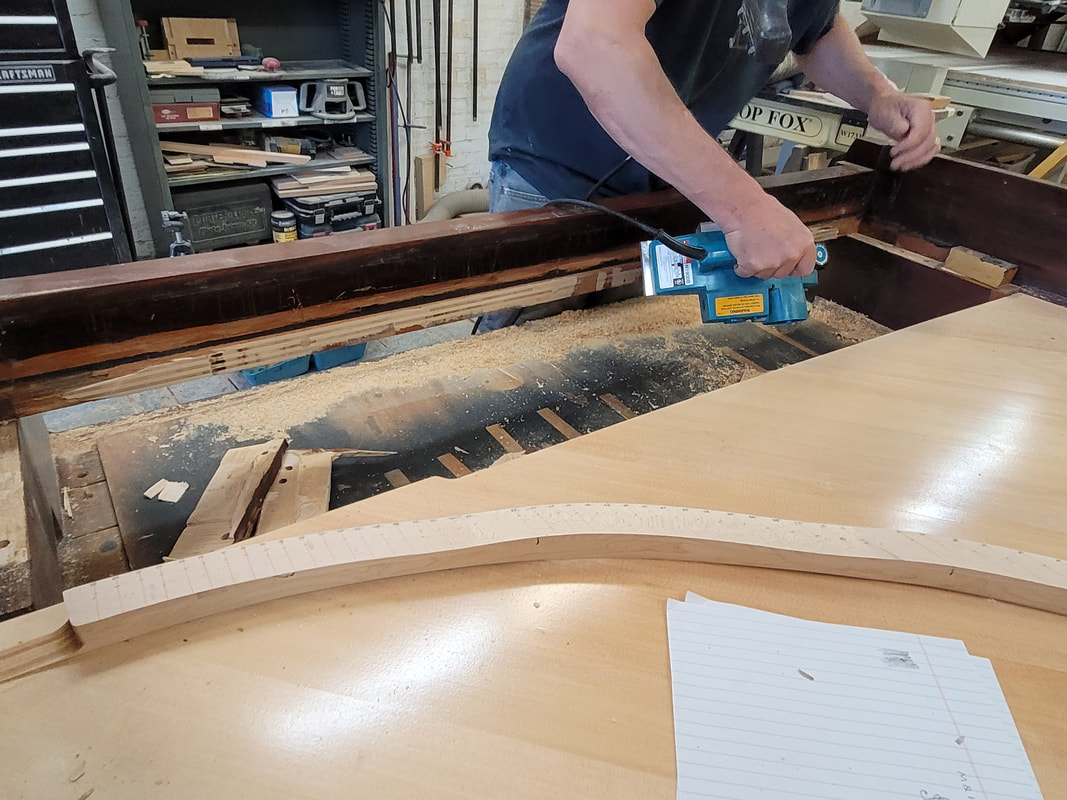
Select wood according to the species, width, and length on the design sheet created by shop owner Jude Reveley. Cut each rib 20cm longer than target length. Place in rib milling jig. Clamp raw rib tightly into jig using caul of target radius. The radius on ribs in one piano at the shop ranges from 4 to 15 meters. The jig is 74 mm thick. Calculate the target rib height and protrusions from jig, give about 2mm room, then saw. Finish rib height by going through plainer. The top side will be the glue surface to soundboard. Scrape a smiling face with razer blade to hold glue. Mark number of rib, release from jig, compare radius with caul. This one looks ok. Trim each rib to target width. Everyone is slightly different. Clean inner rim and rib slots. Place ribs and saw to target length. If ribs wider than original slots, chop and trim slots to fit ribs from the new design. Trace feathers according to the original ribs, saw 2mm+ outside trace line, and fit into piano again. Mark two places for locator dowels on each rib. Use the jig. Drill locator holes with 1/4" bit. Insert locator pins on ribs, place new soundboard in, press down with go bars, press ribs hard on soundboard to transfer pin marks. Release soundboard, check that all rib location marking pins did their job. Remove pins from ribs, insert 1/4" dowels, trim to uniform length. Drill locator holes on soundboard with straight jig, be careful not to drill through the board. Sand the surface with 220 grid sandpaper. Set up air clamps, dry fit each rib before gluing on. Clean glue squeeze outs using a wood stick or something not very sharp. Finish cleaning with a hot wet rag. A thorough cleaning makes sanding much easier later on. We use Titebond 50 for this job. Clamping time is 30 min. With limited amount of clamps, one rib is pressed for more than 30 minutes, then the clamp is moved to glue the neighbor rib. Small shop.
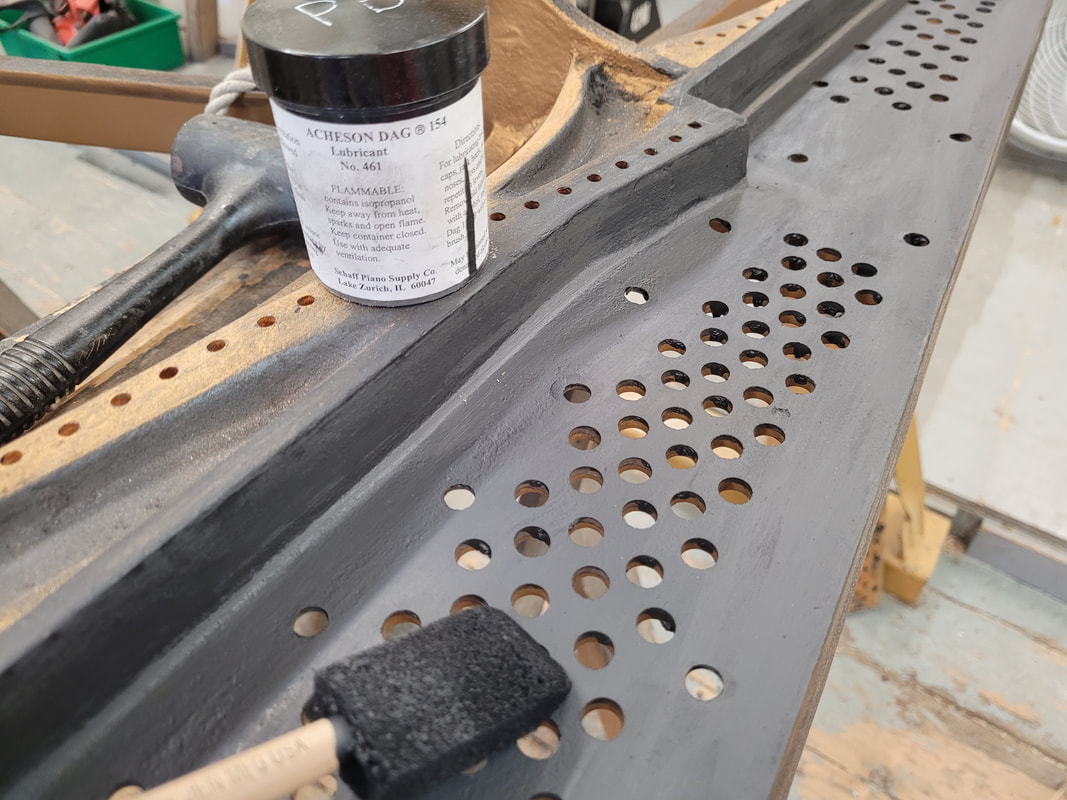
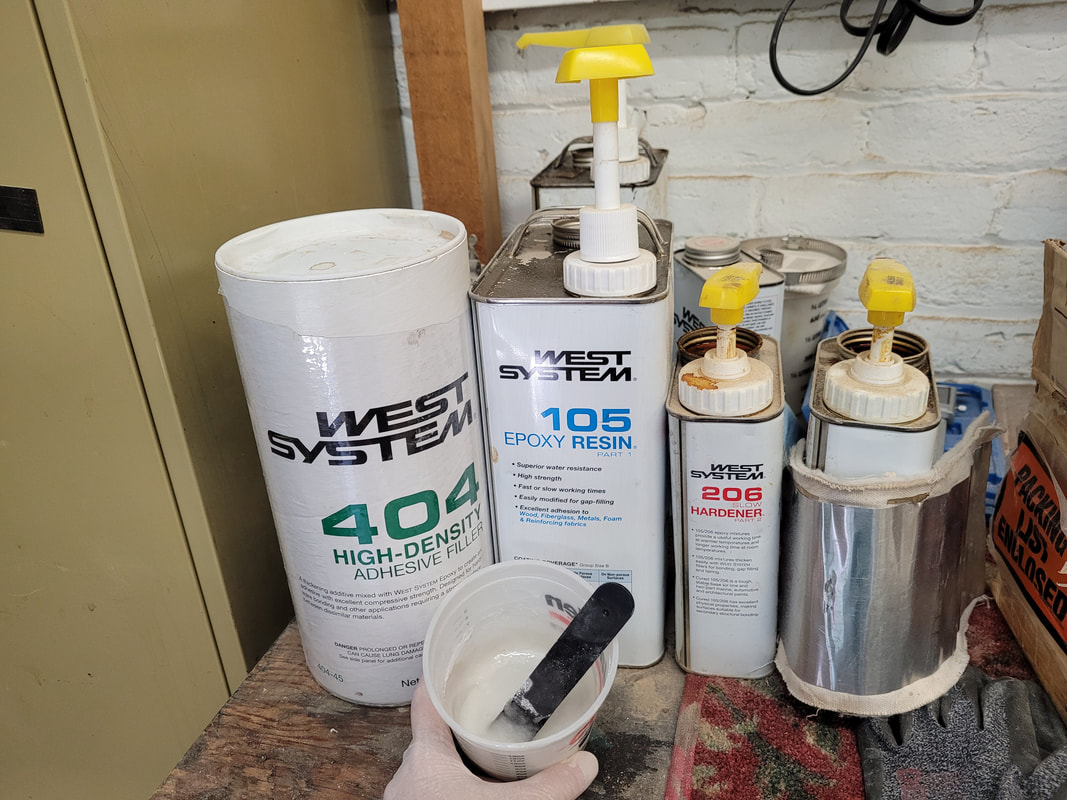
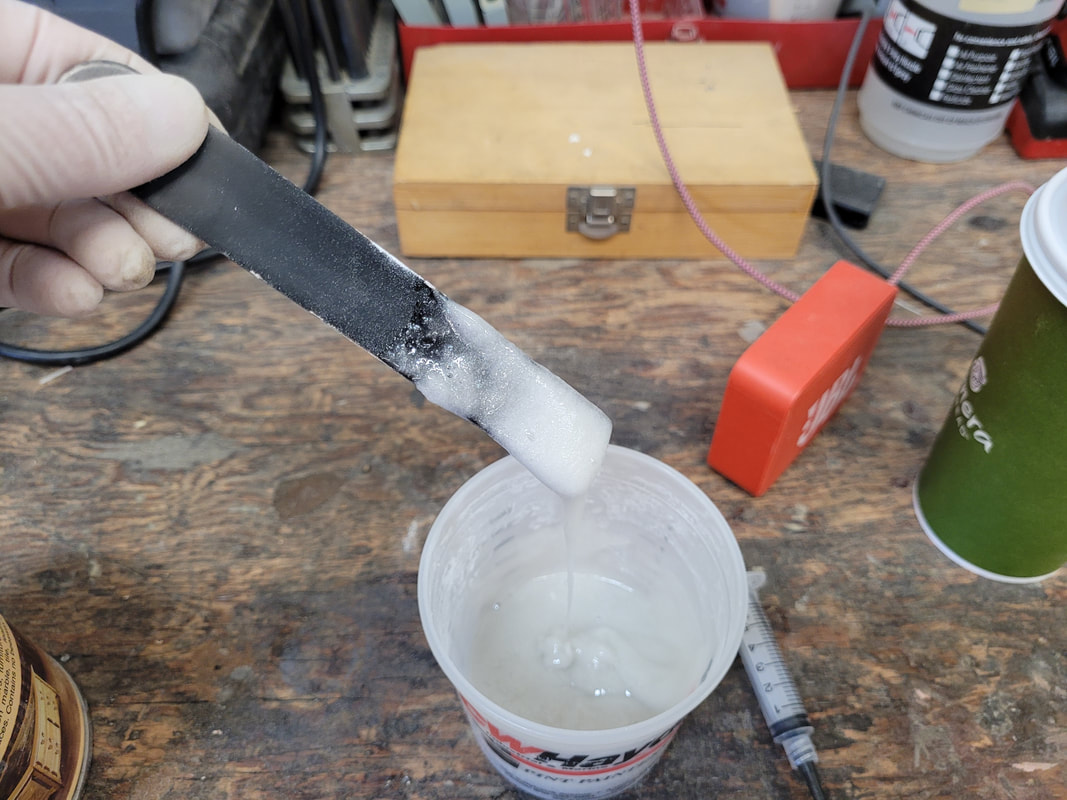
We have some 5 layer maple pinblock (P/B) stock made a while ago. Steinway L P/B is small. So pick a smaller size stock, save the large ones for other pianos. First, trace the bevel side line on to new stock where it butts against plate flange. Adjust bandsaw blade angle to match the old P/B, cut new P/B, skip the divot part. Cut the divot part with a jigsaw, blade angle matching the old block. Check on plate. Brush graphite on plate webbing area, put P/B on, and press/hammer everywhere. At the spot where the plate contacts the P/B, there will be black marks. This is the high spot on new P/B, needs to be sanded off to lower it. Repeat this fit and sand process till marks are everywhere on the P/B. Trace a line where the wood is contacting the plate, mix epoxy with filler till a consistency of mayo, pour under that pencil line, clamp onto plate. Clean up epoxy squeeze out, let dry till the next day. On the next day, sand off excessive epoxy, clamp P/B to plate again to check if there is a gap anywhere. Mark for tuning pins. After drilling for tuing pin holes, mill the new P/B to match the old one When chopping the new P/B for length, leave a little room for it to shift left to right in piano to adjust itself. Double check plate height, then done.
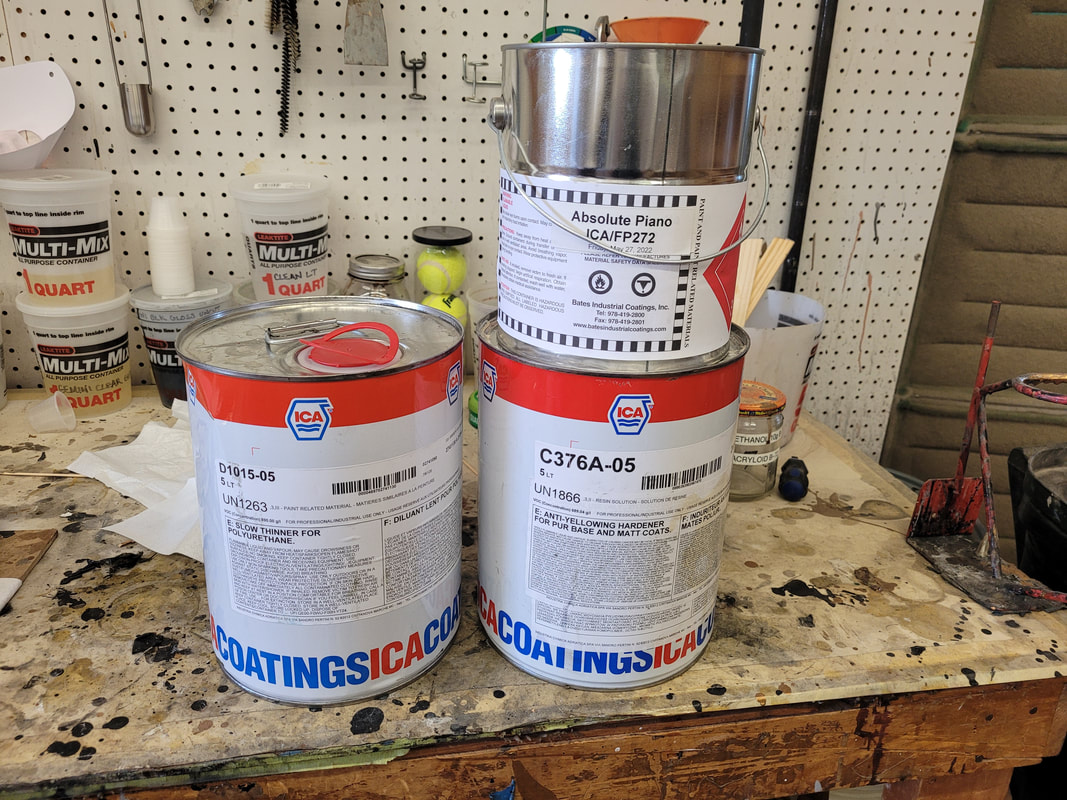
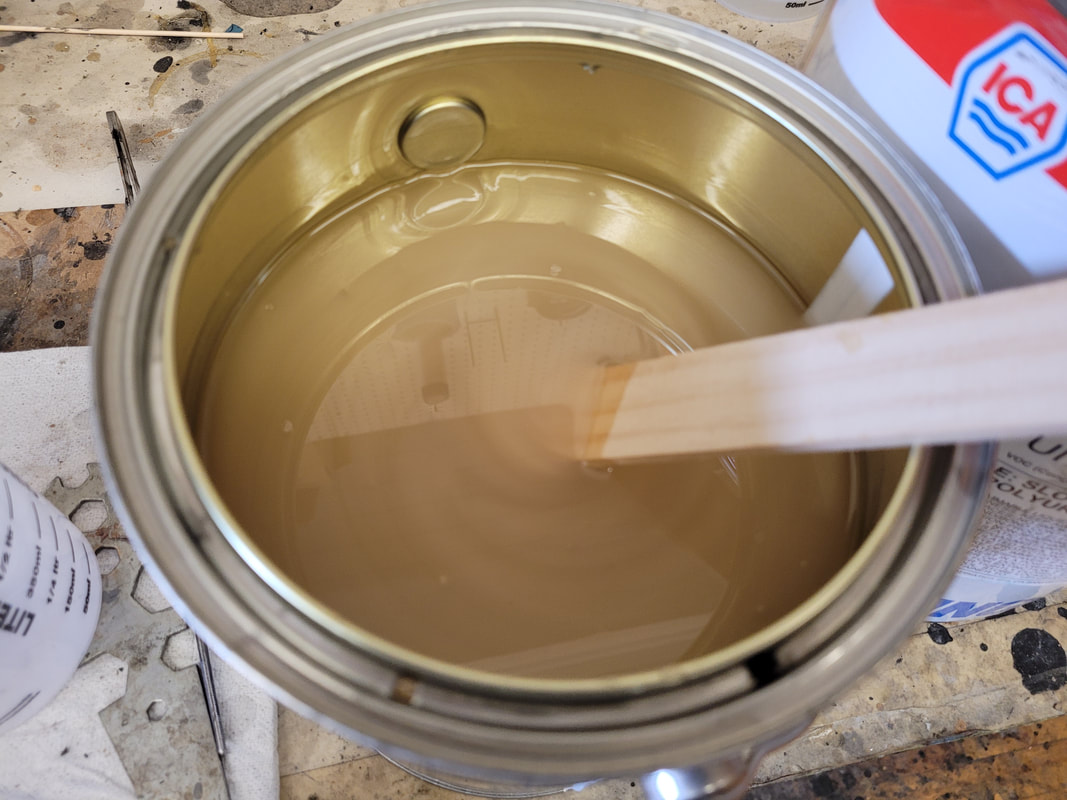
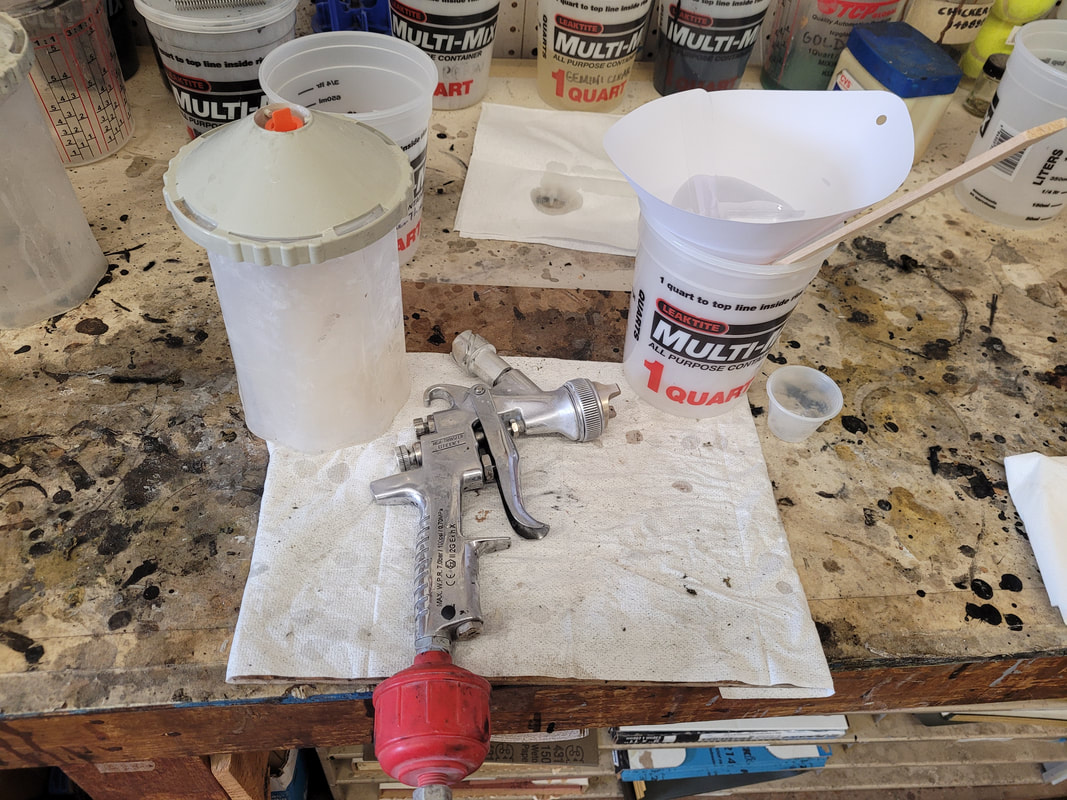
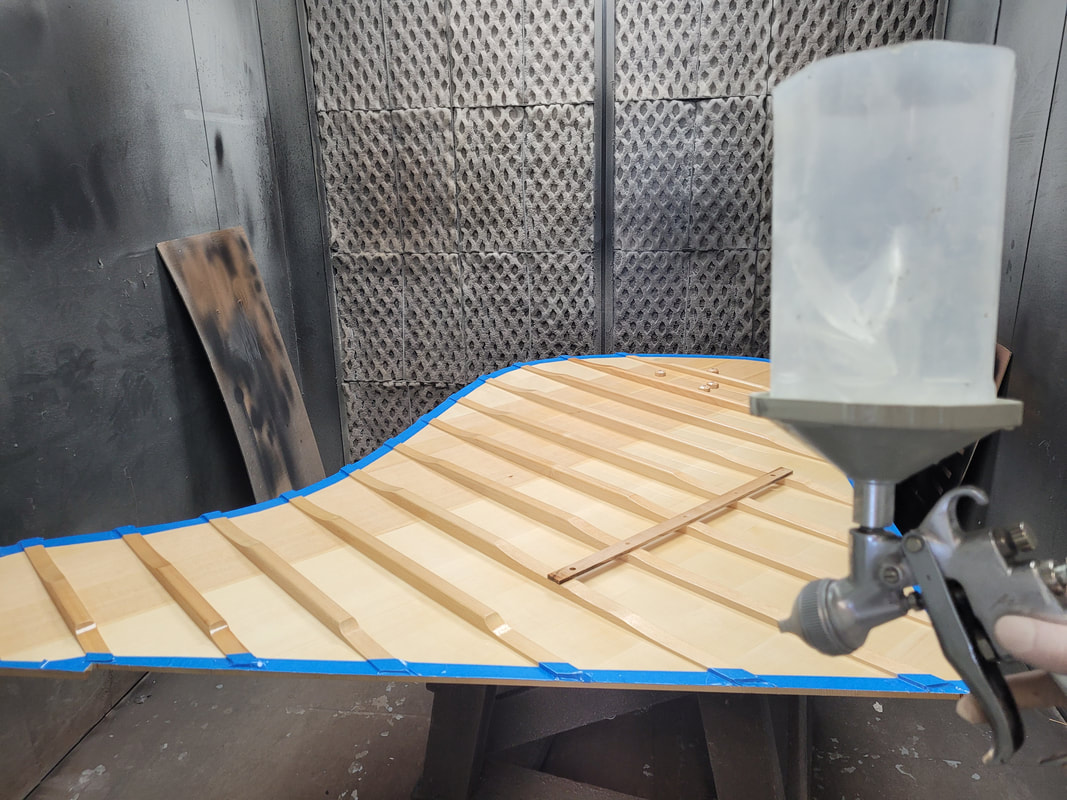
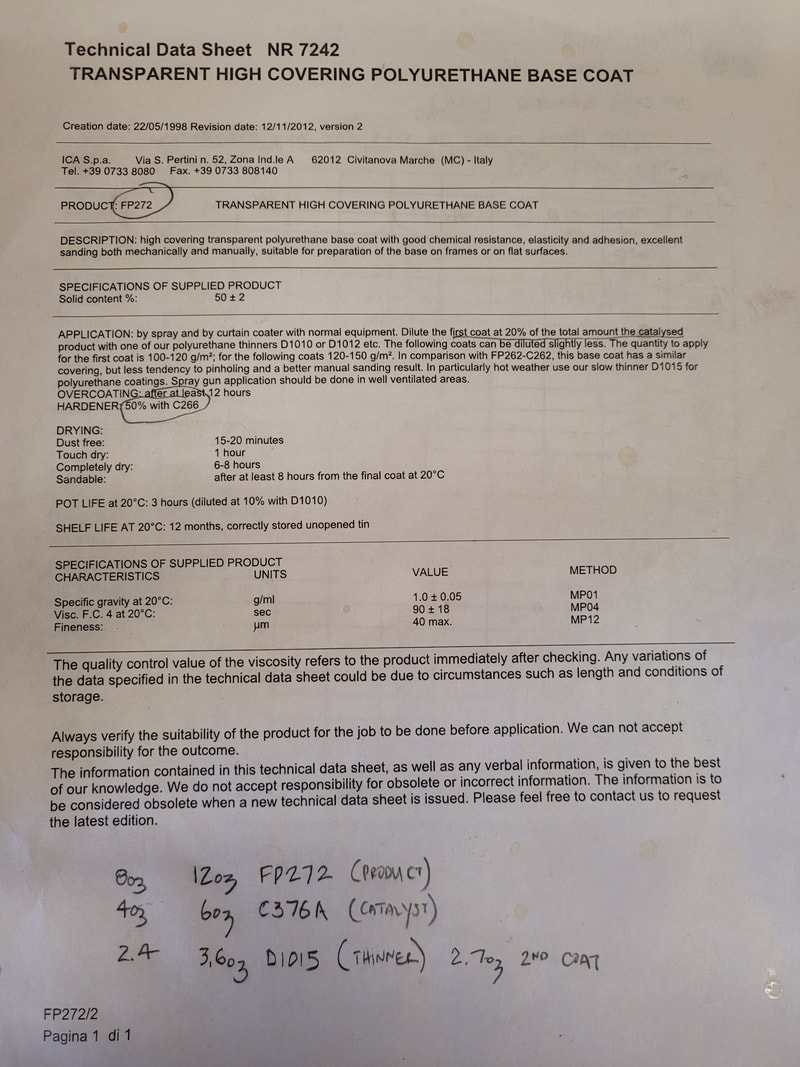
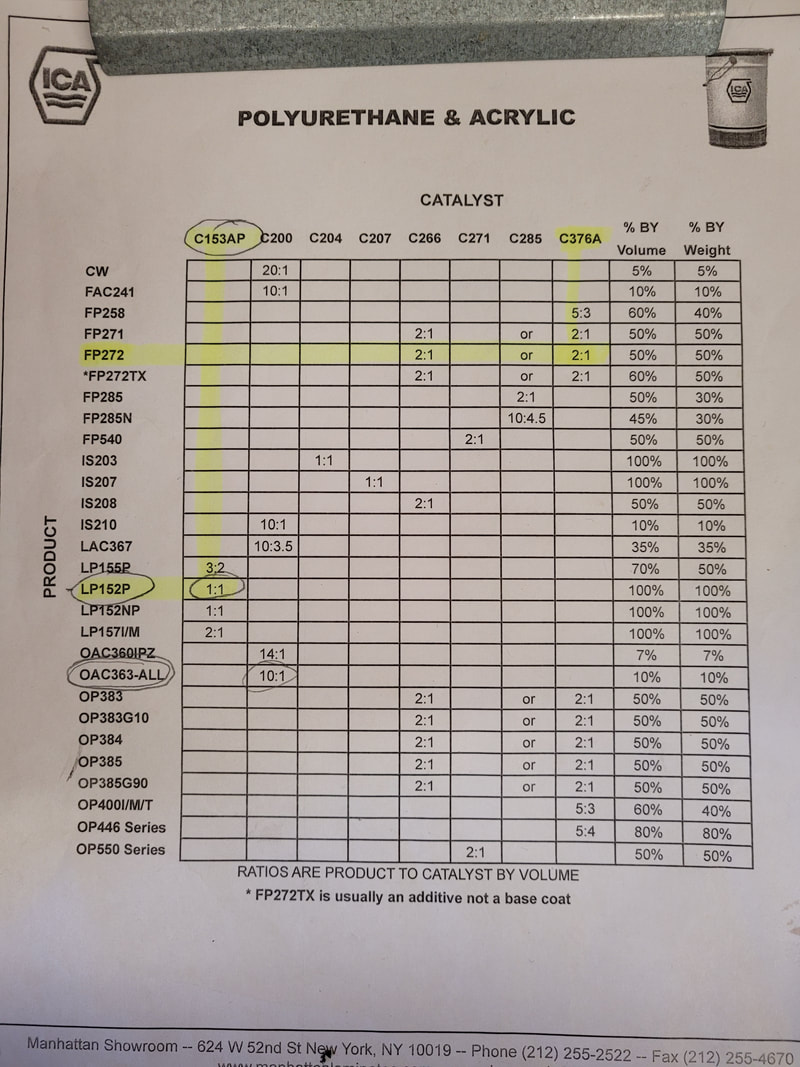
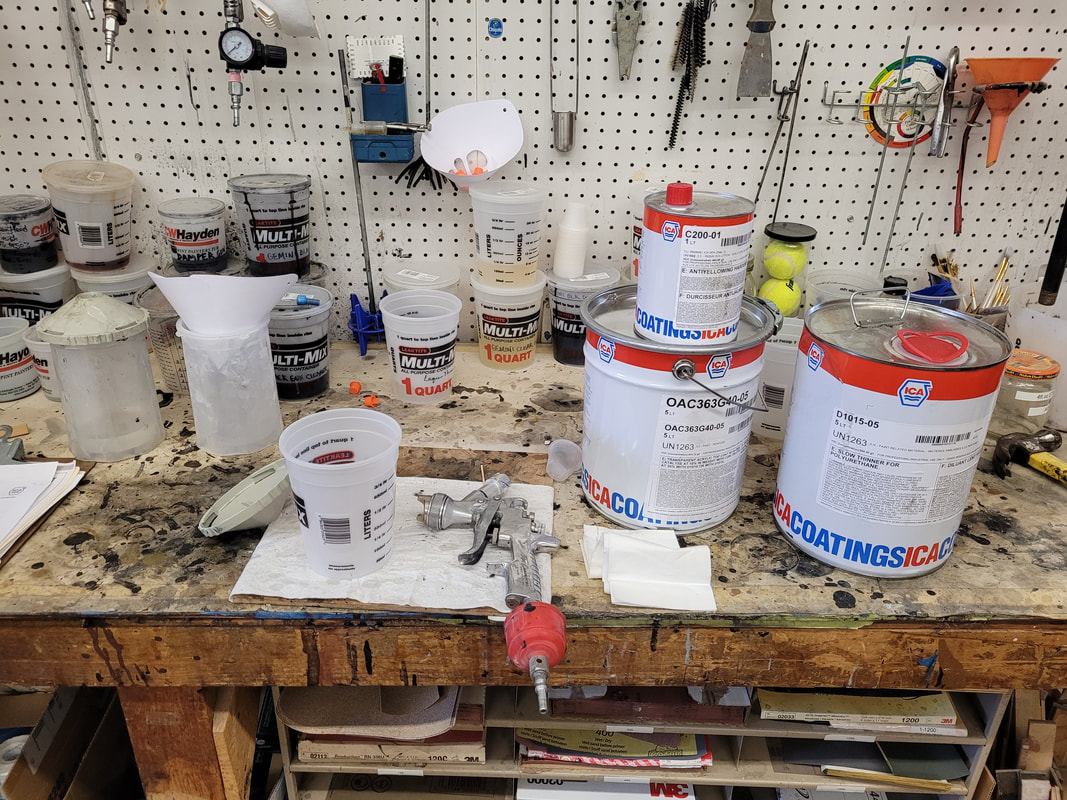
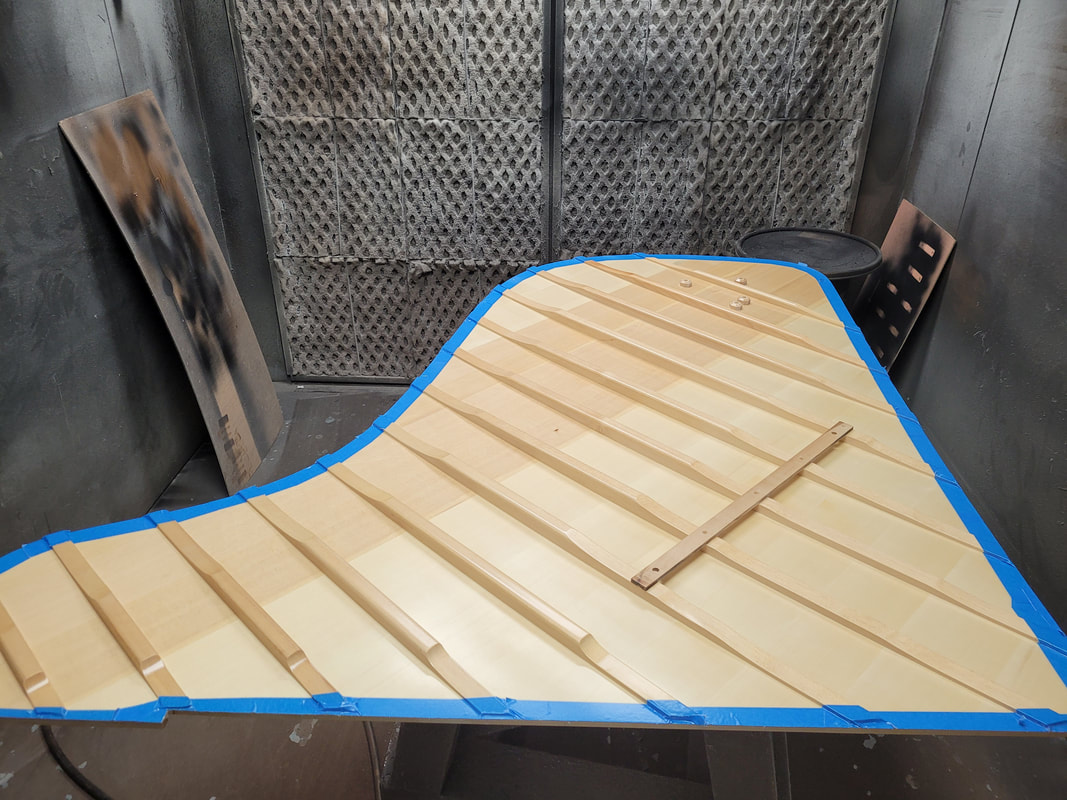
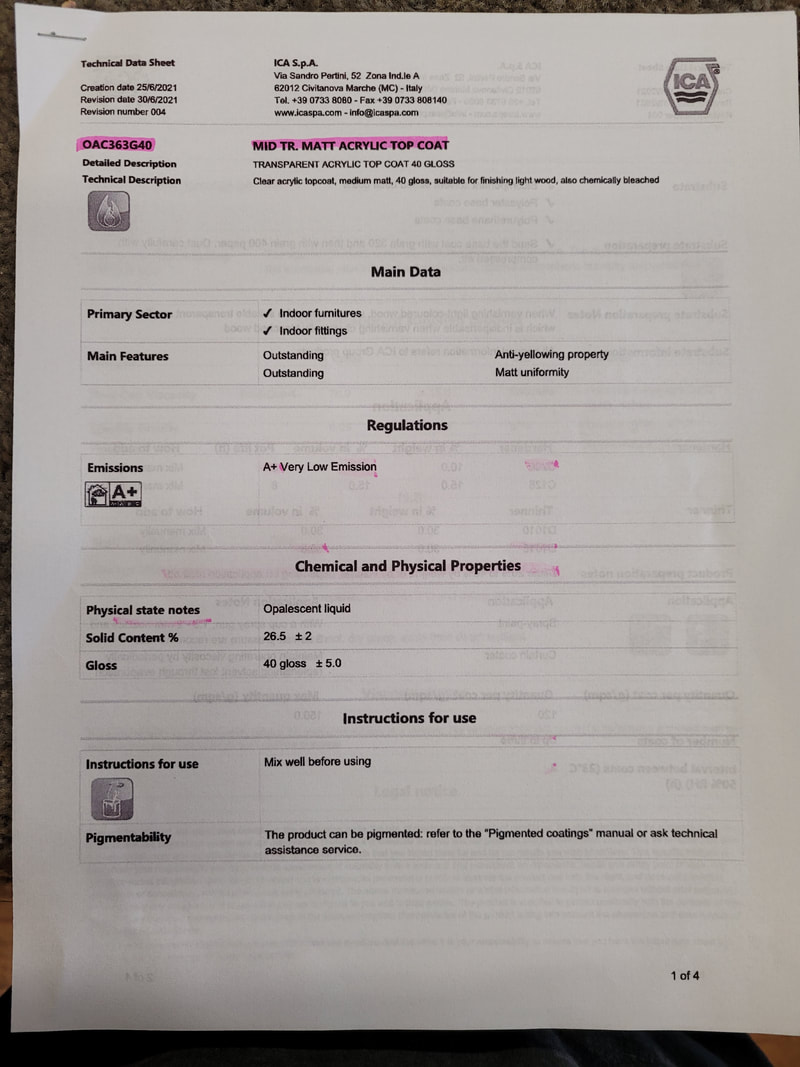
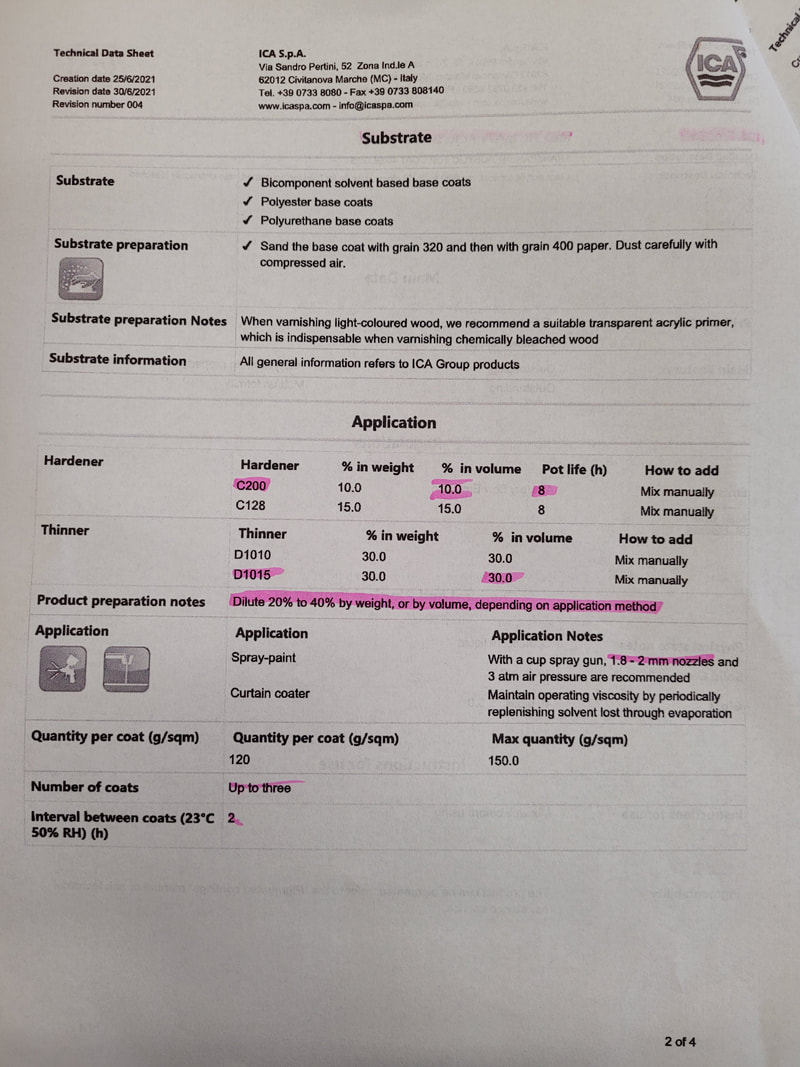
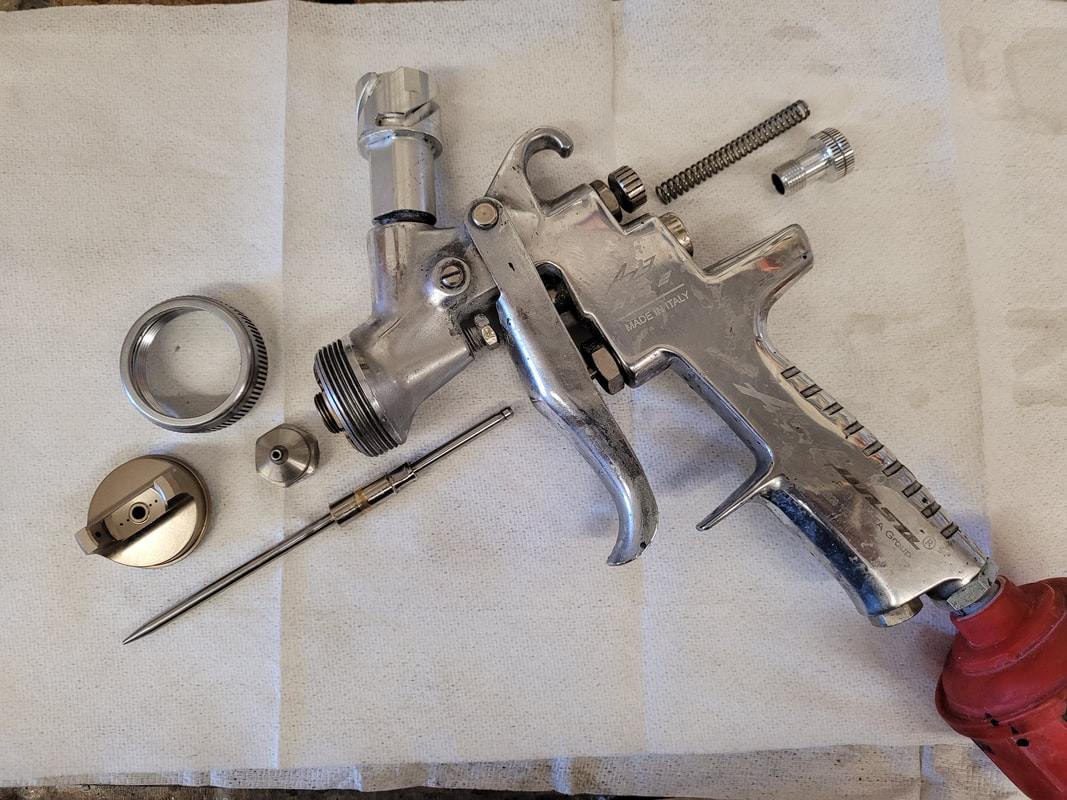
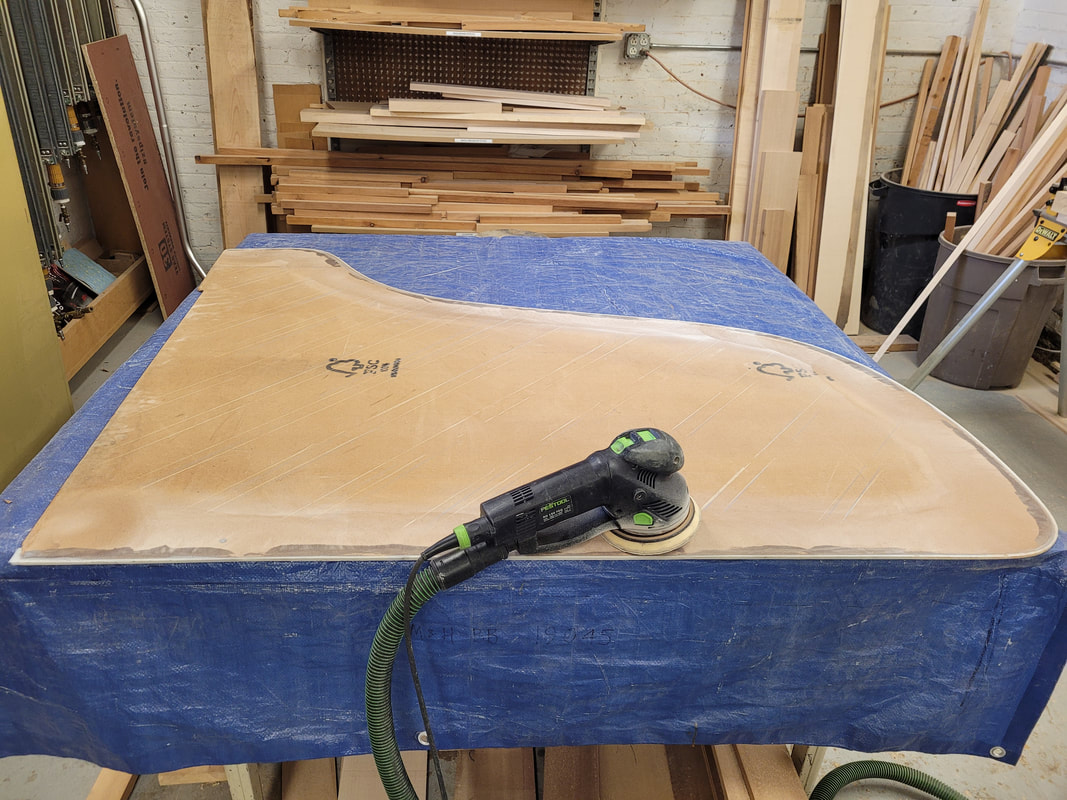
This is at the beginning of spray paint learning curve. My hands were shaking, arms stiff, but recording this anyways. Get to start somewhere. The first step in to spray sanding sealer, 2 coats, 1/2 hour interval. The sealer is made of solid, hardener, and thinner. The D-1015 thinner is for humid weather. D-1010 will be used in dry weather. Before pouring out the solid, stir it well until texture is even, then pour into measurement cup. Shake hardener container to even it up a bit, add hardener to measurement cup, stir thoroughly to combine. The last is to add thinner. Stir all well together. Fill in spray gun container, Adjust fluid and air force, spray evenly. When sealer dries, sand with 320 then 400 grid sand paper followed by scotch bright for a even surface. The top coat here is acrylic, made out of solid, hardener, and thinner again. 2 coats, 2 hour interval between coats. This is after the first coat. No sanding between coats. Instruction for the top coat. 20 oz of solid works just right. Make sure no dust comes in spray booth between coats. Clean gun really well afterwards. A couple hours after the second coat of acrylic, make sure finish is dry, untape the gluing edge, glue the soundboard in piano. Thanks to Ellie's help gluing the big board in. First time spray and glue the board on the same day. Gratitude to our boss and Ellie's support.
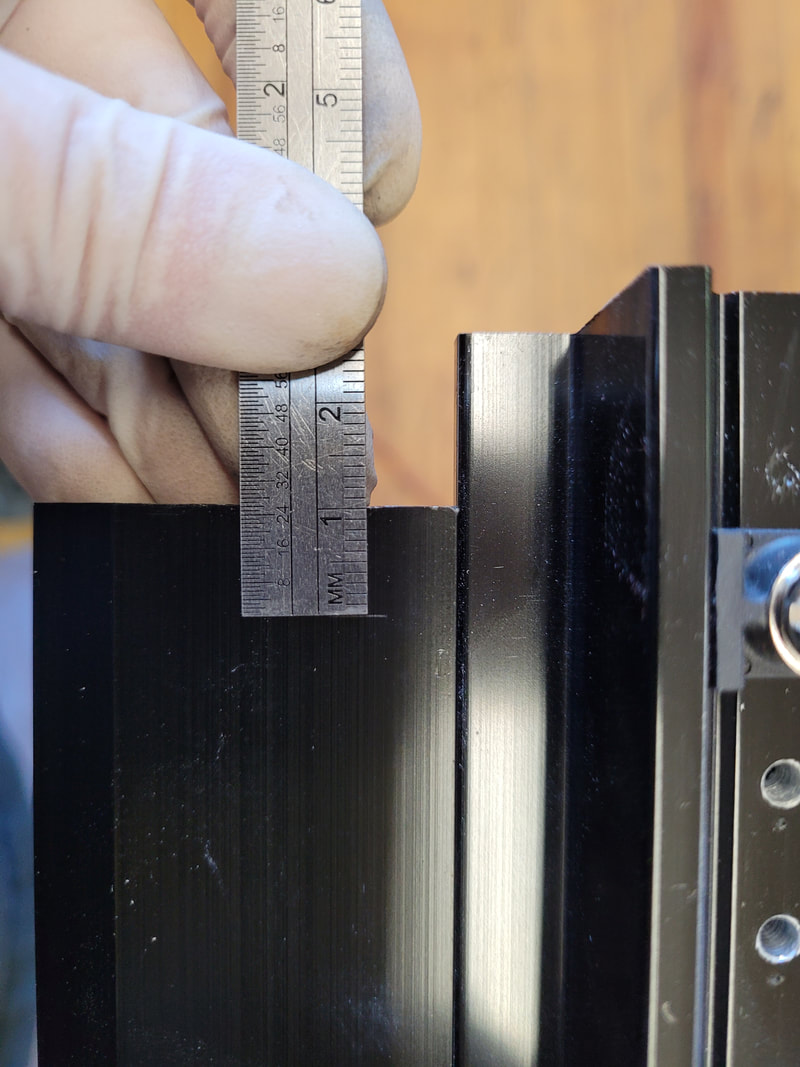
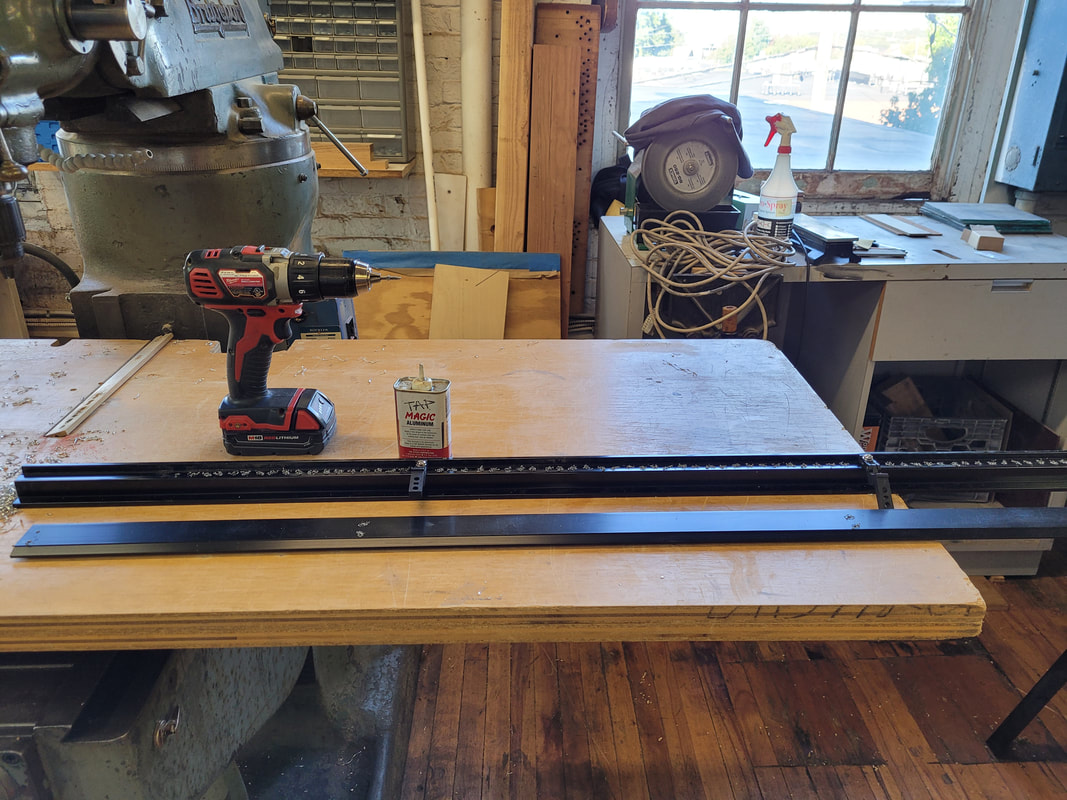
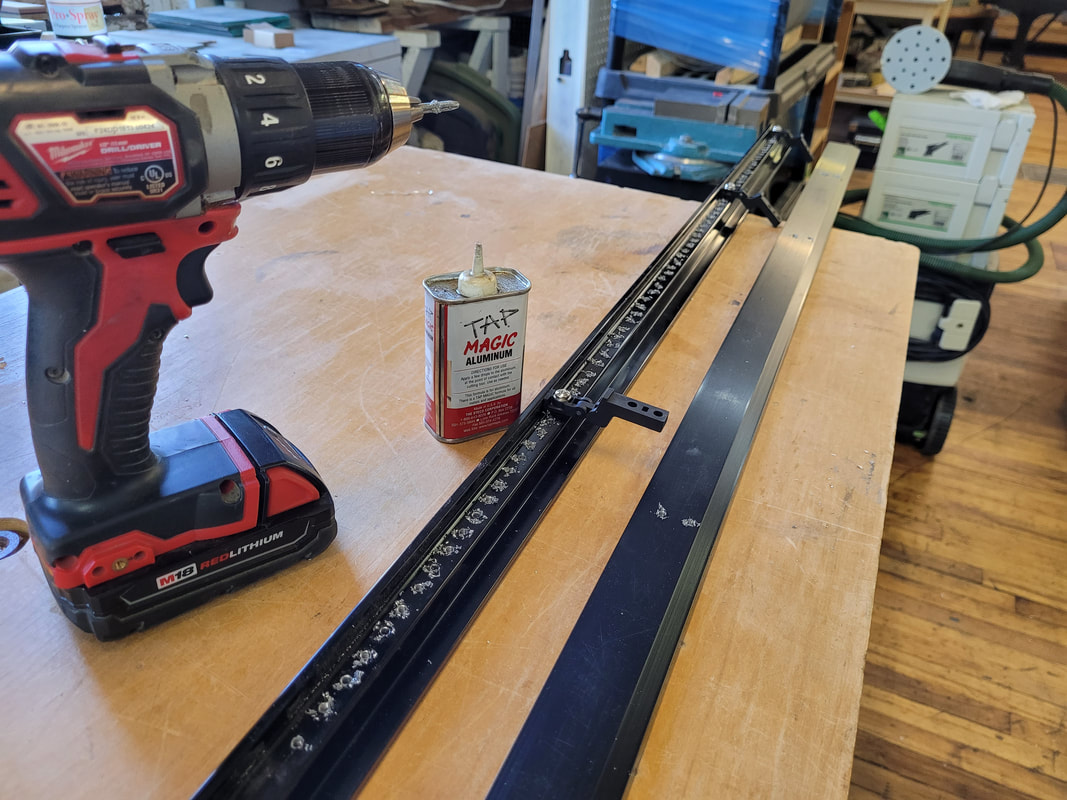
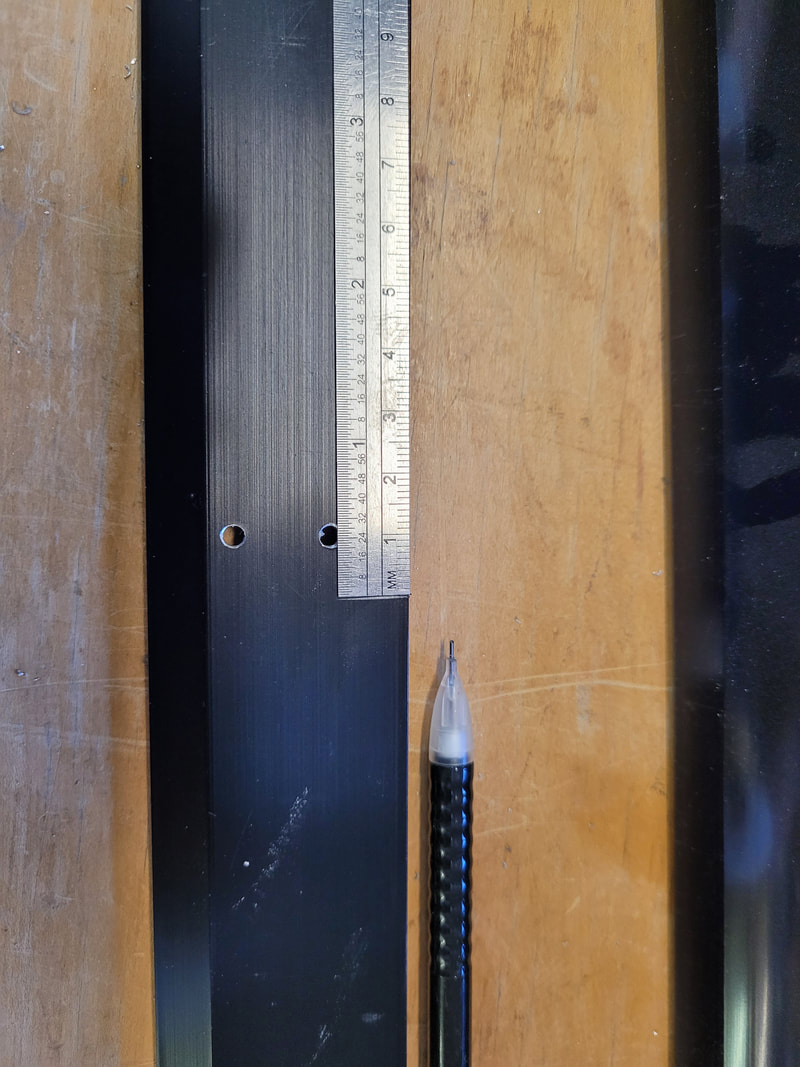
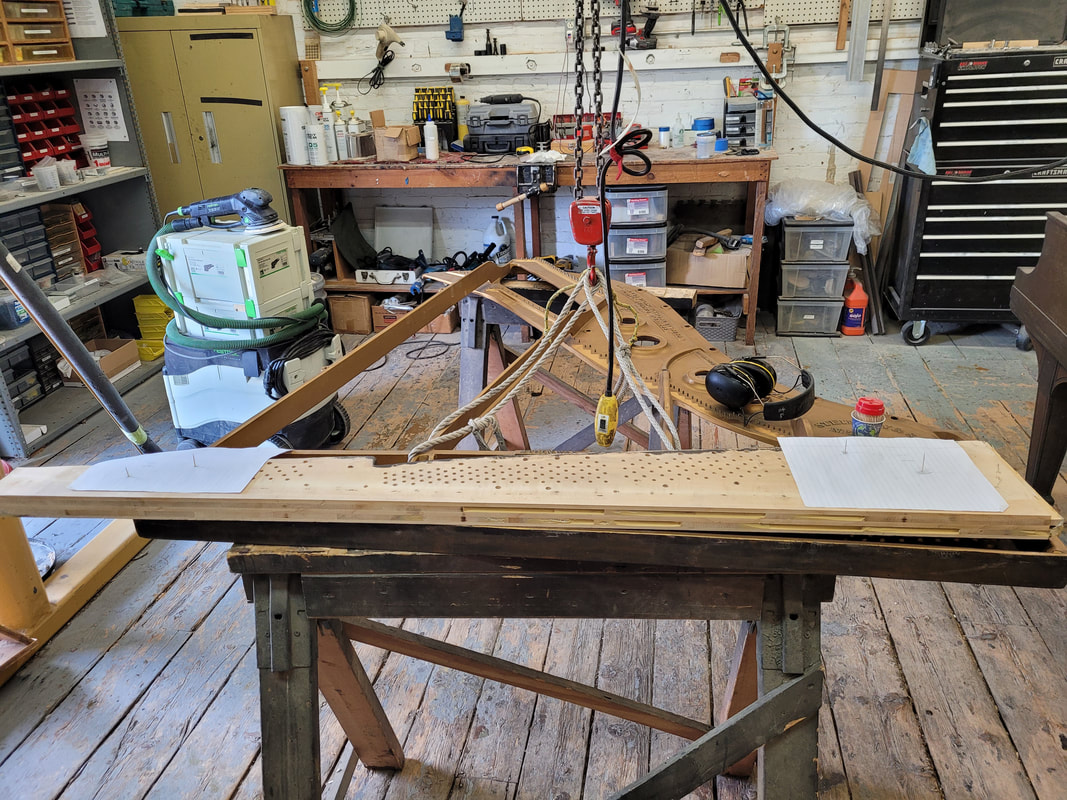
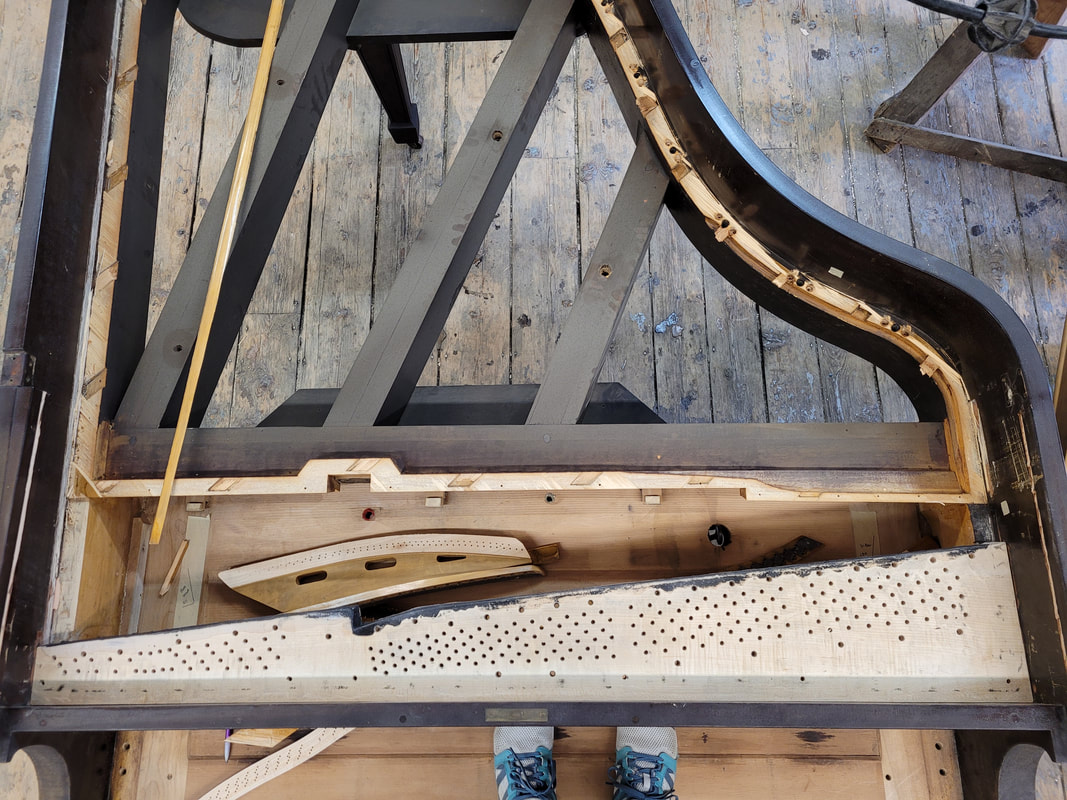
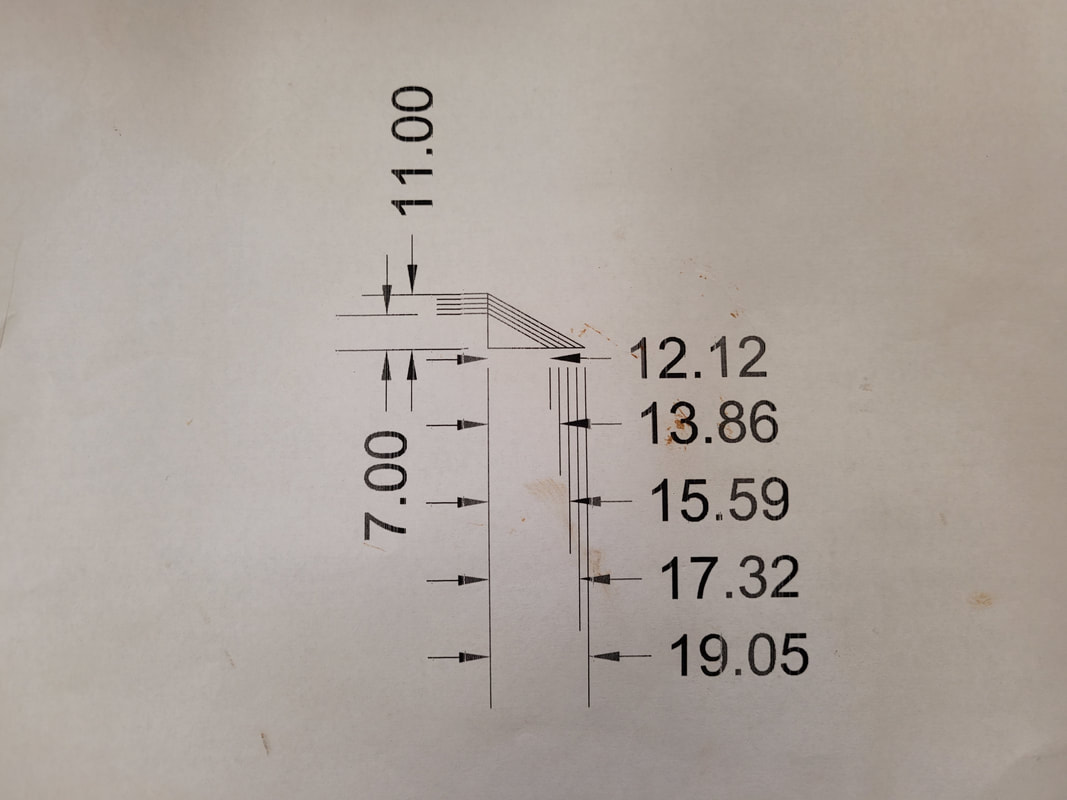
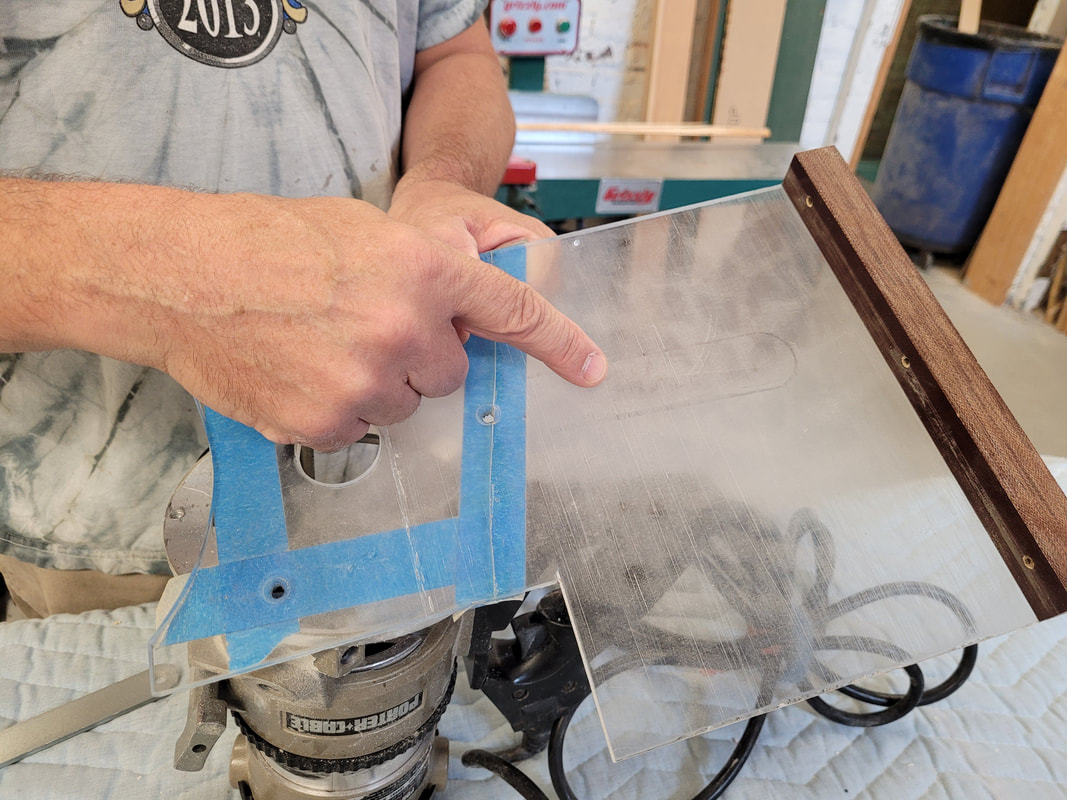
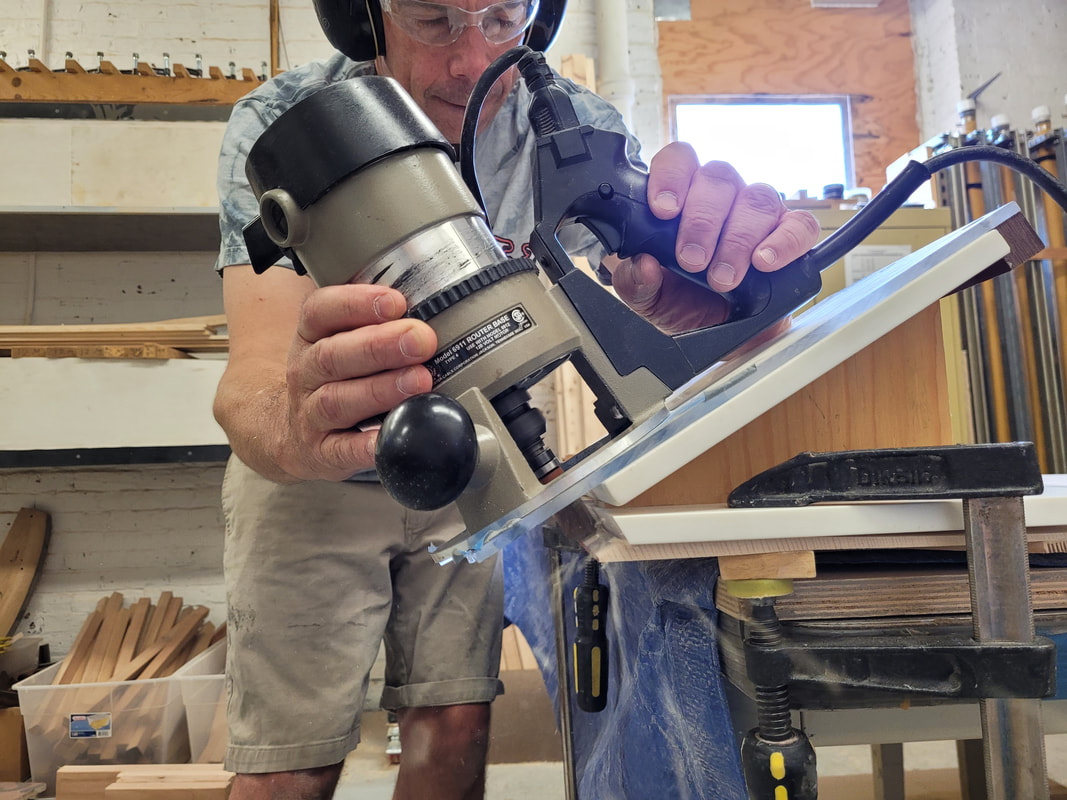
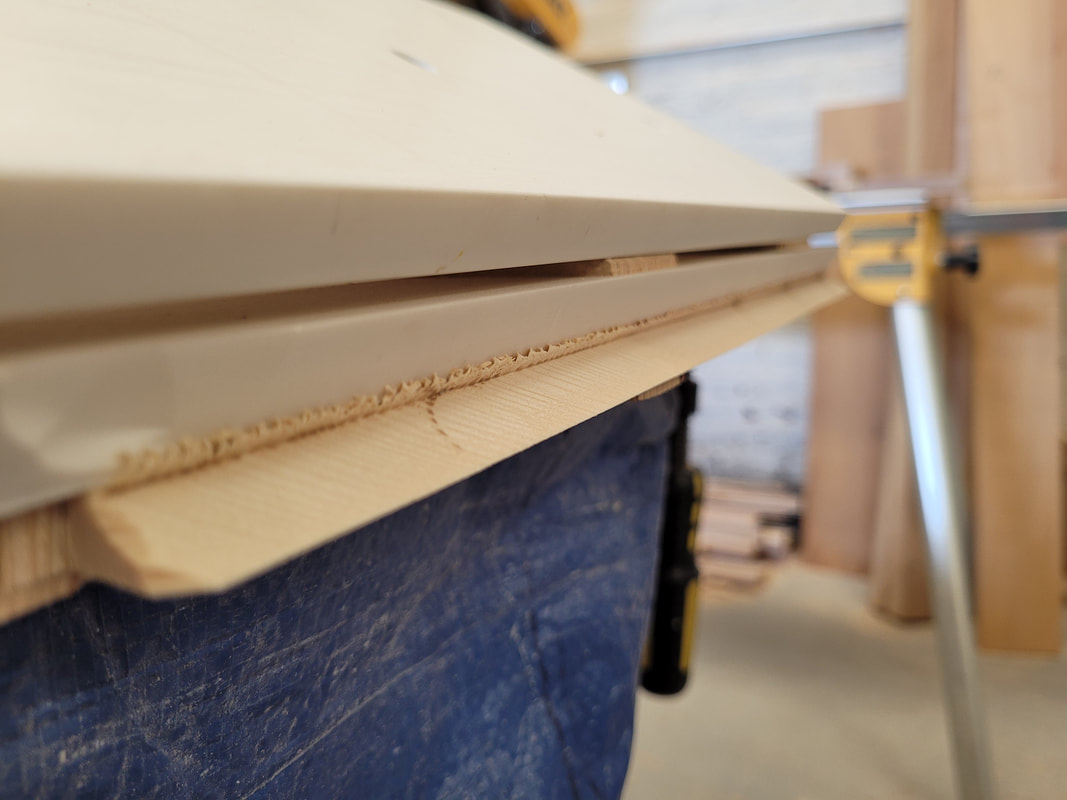
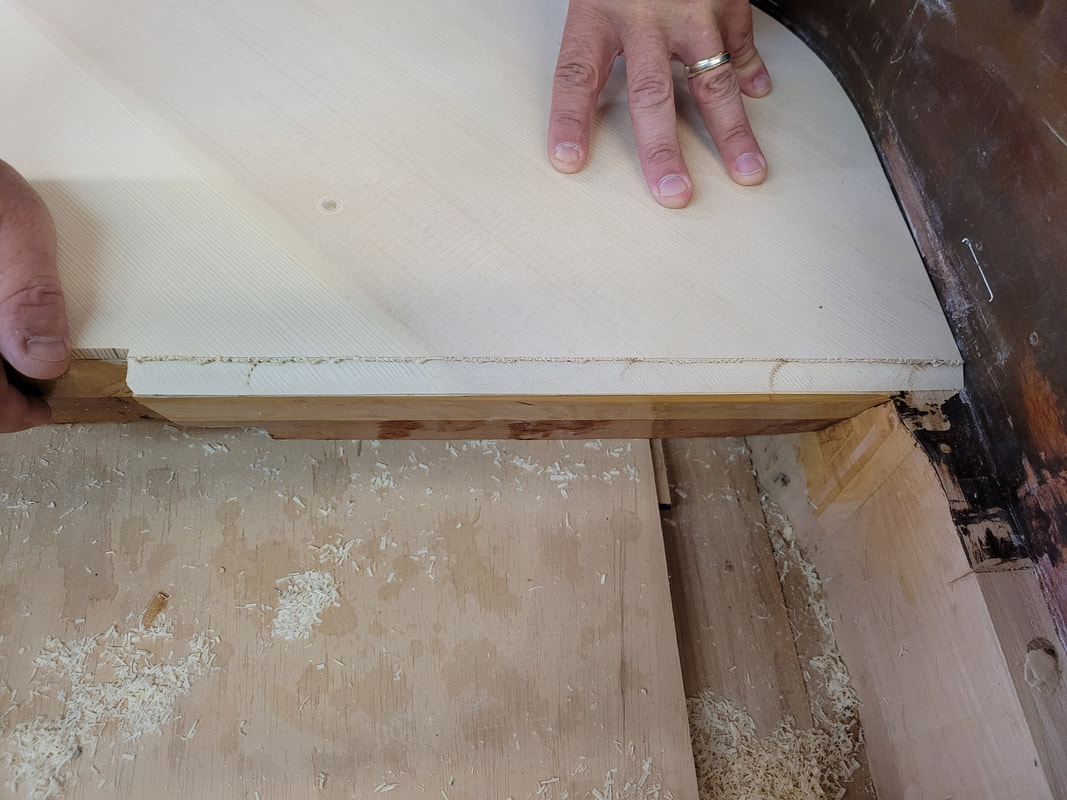
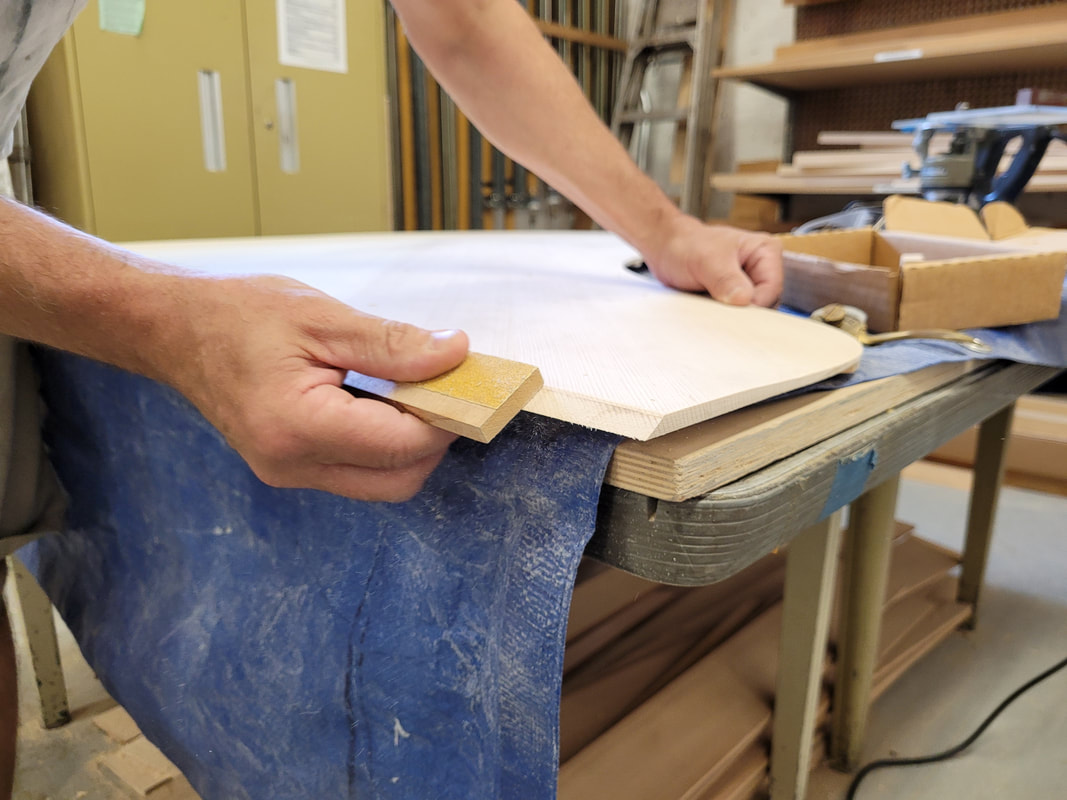
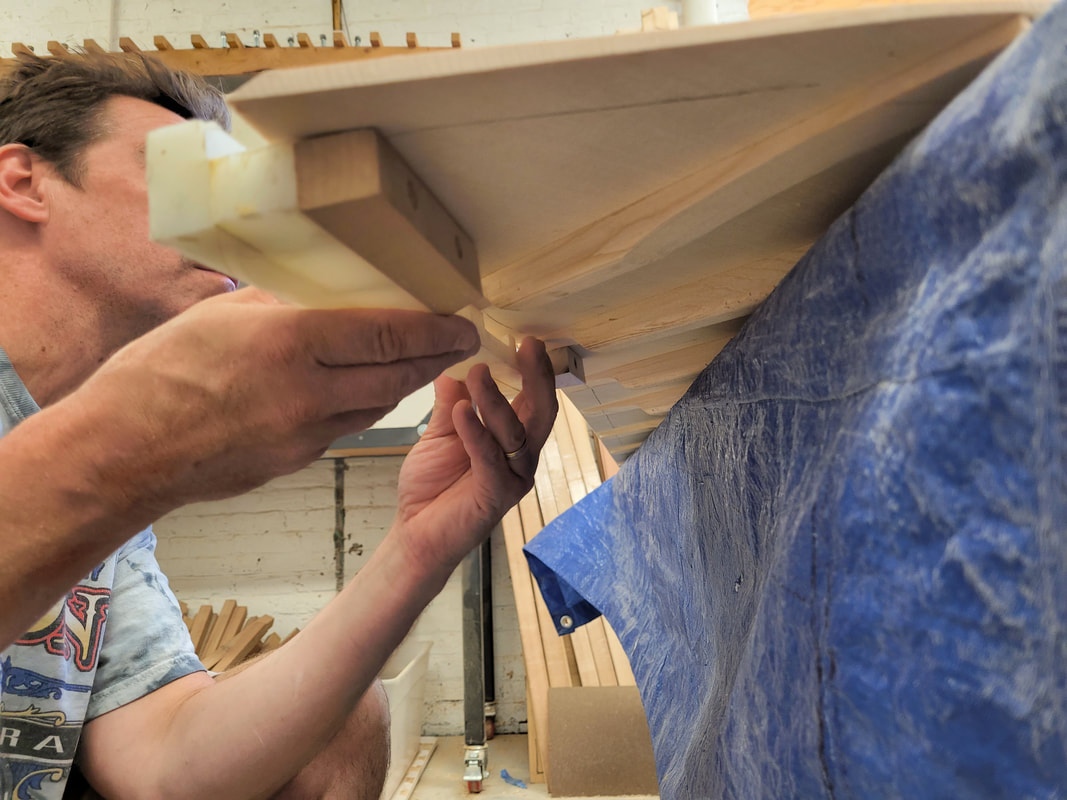
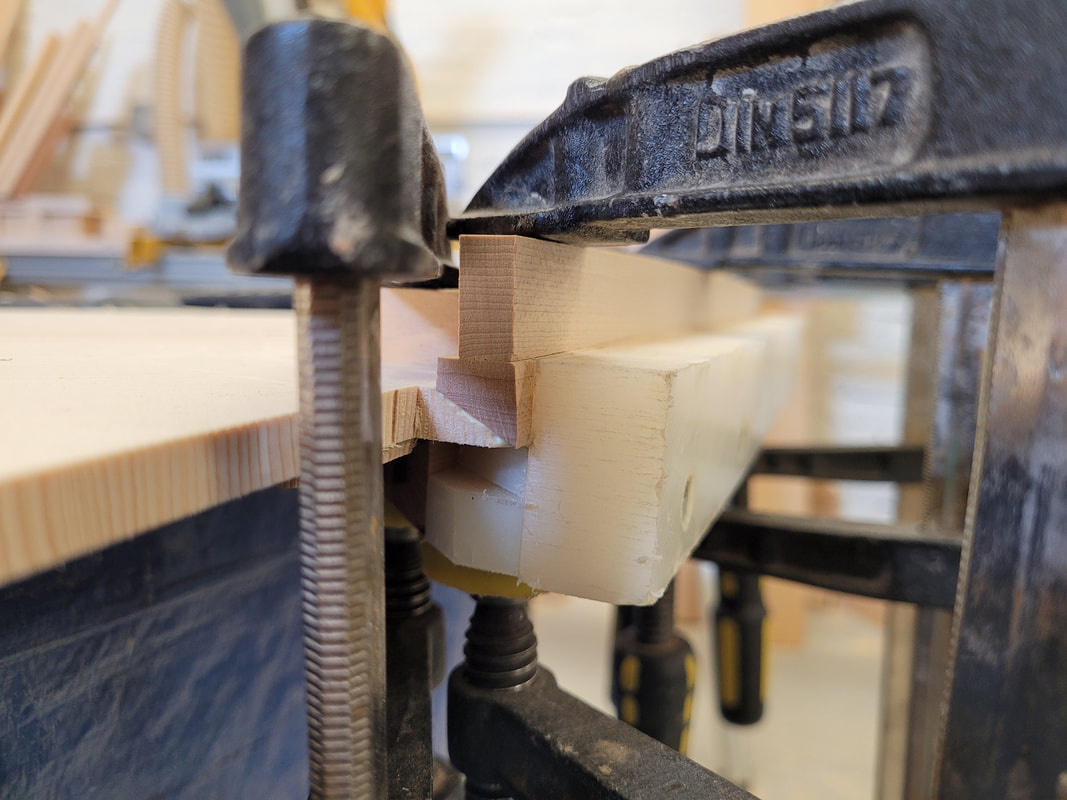
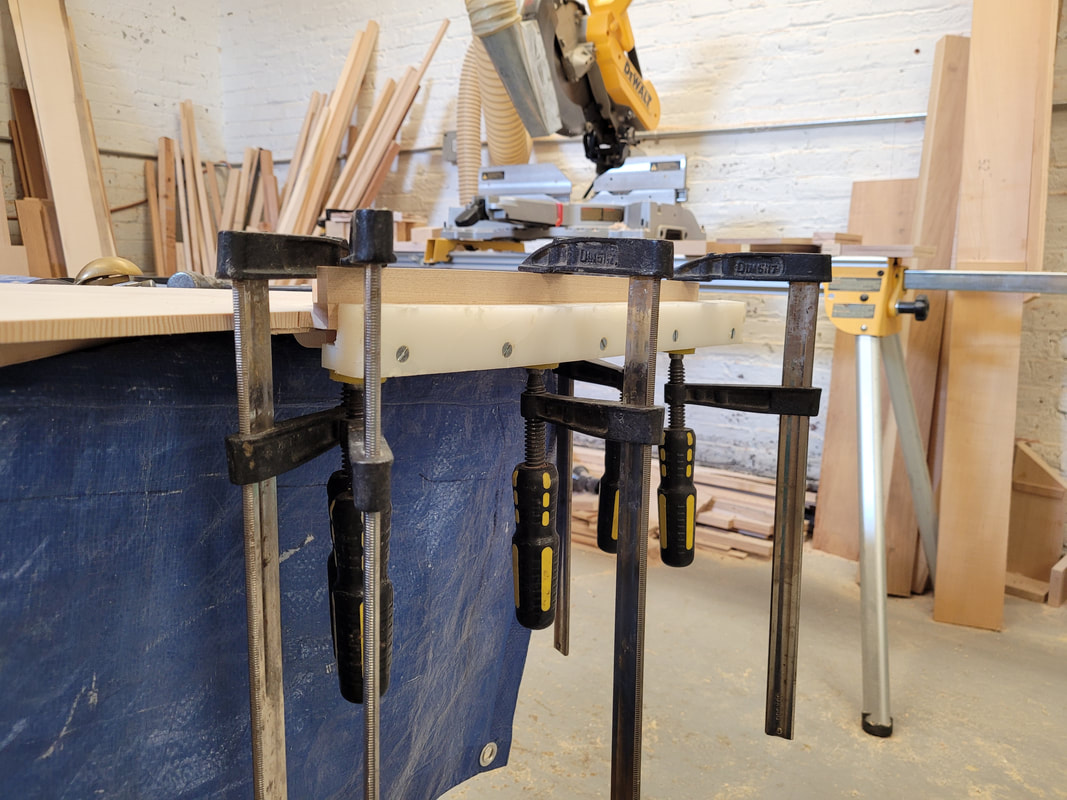
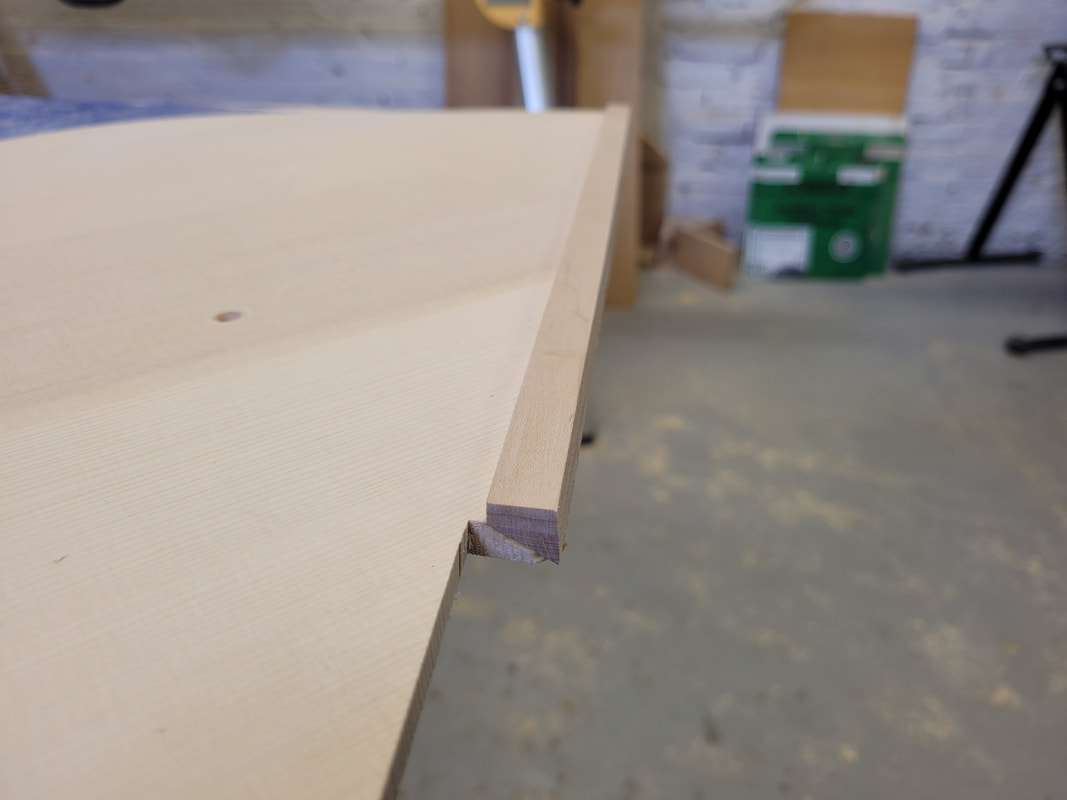
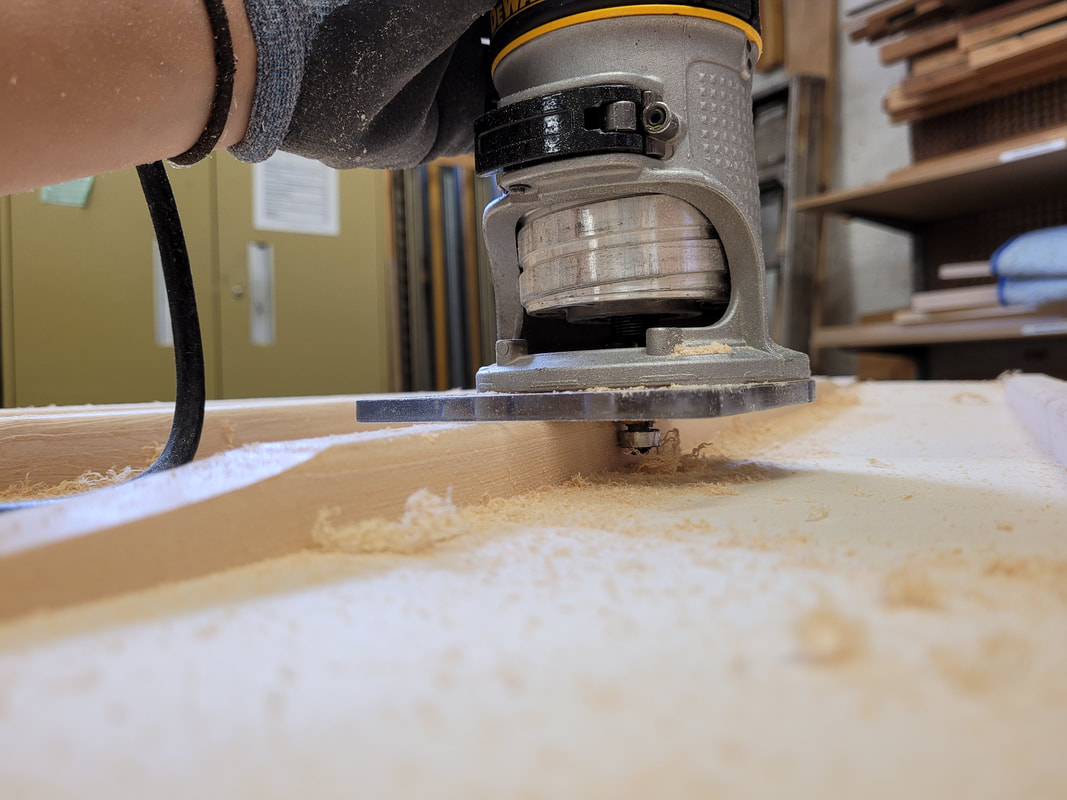
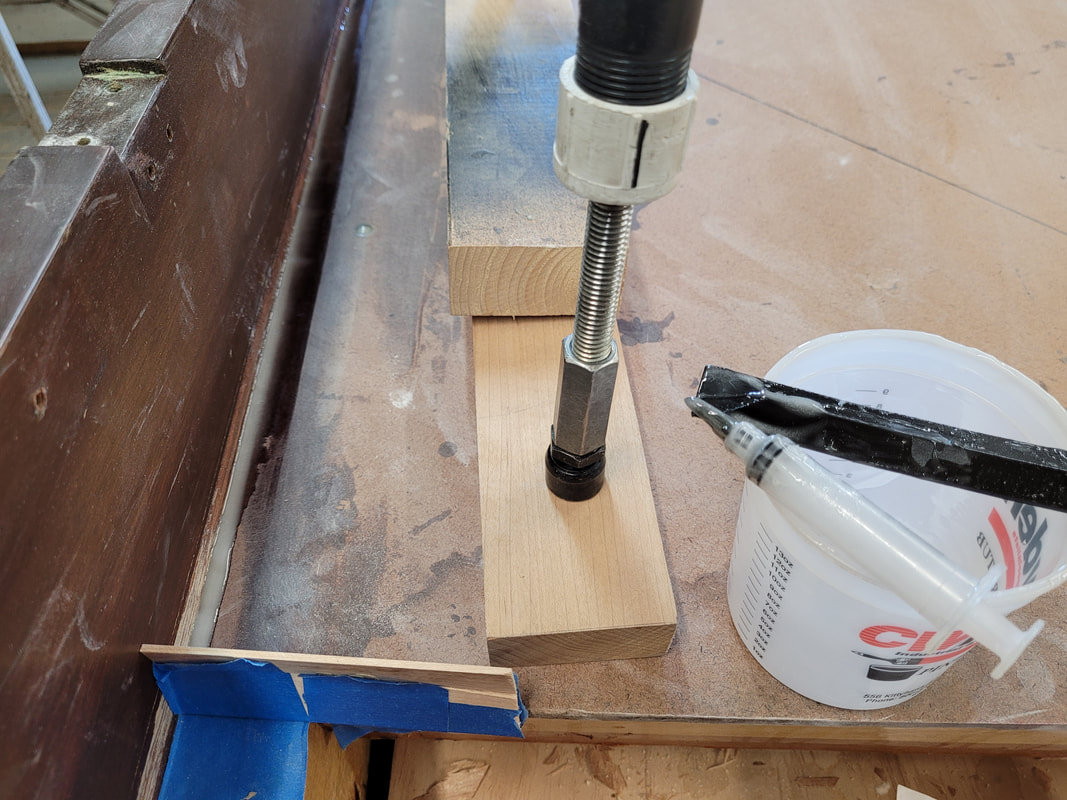
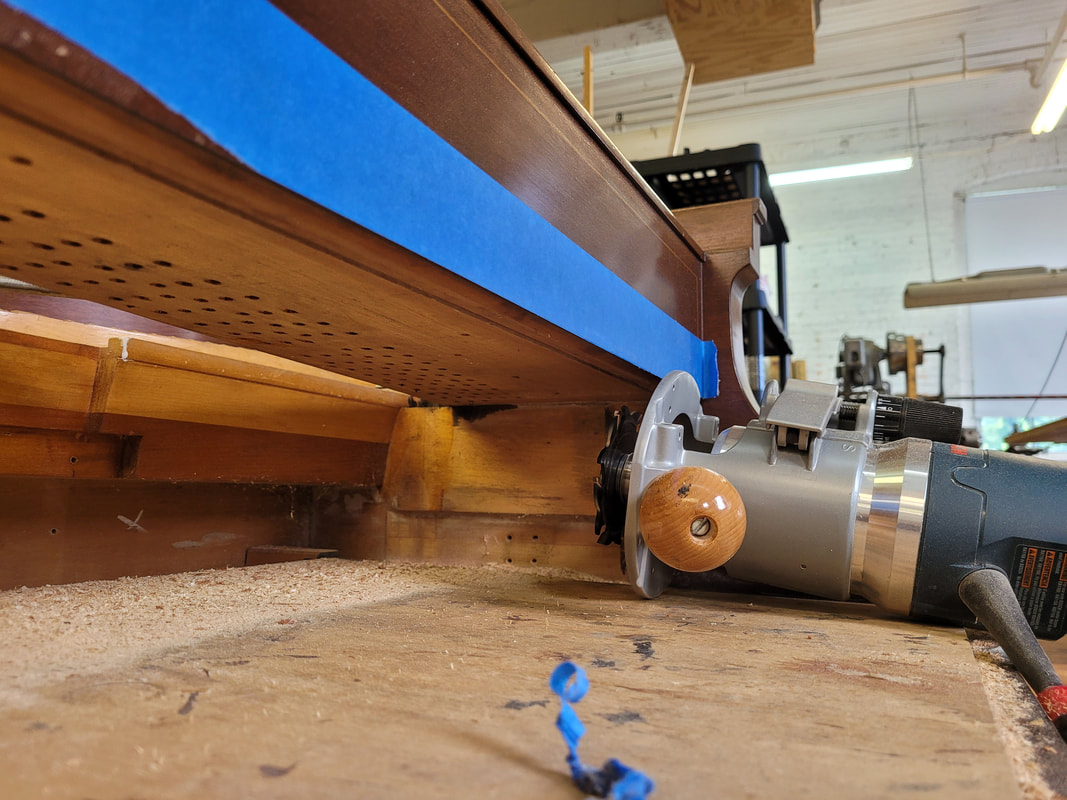
According to soundboard thickness and formula, mark how deep the bind bar goes. The router jig is designed by David Hughes. Jude, the shop owner, marked where the router handle shall be on the plexiglass. Rout a little at a time so the wood won't chip. Put soundboard in piano to check how well (or bad) the routing job is done. Adjust accordingly. Then sand the glue surface flush. The bottom clamping jig is cut to accommodate the ribs. Check width of bindbar between top of bevel and soundboard edge, trim premade & over sized bindbar to width. Glue on bindbar, clean glue squeeze-out thoroughly. Let dry at lease 1 hour before unclamping. Great demo by shop owner Mr. Jude Reveley.
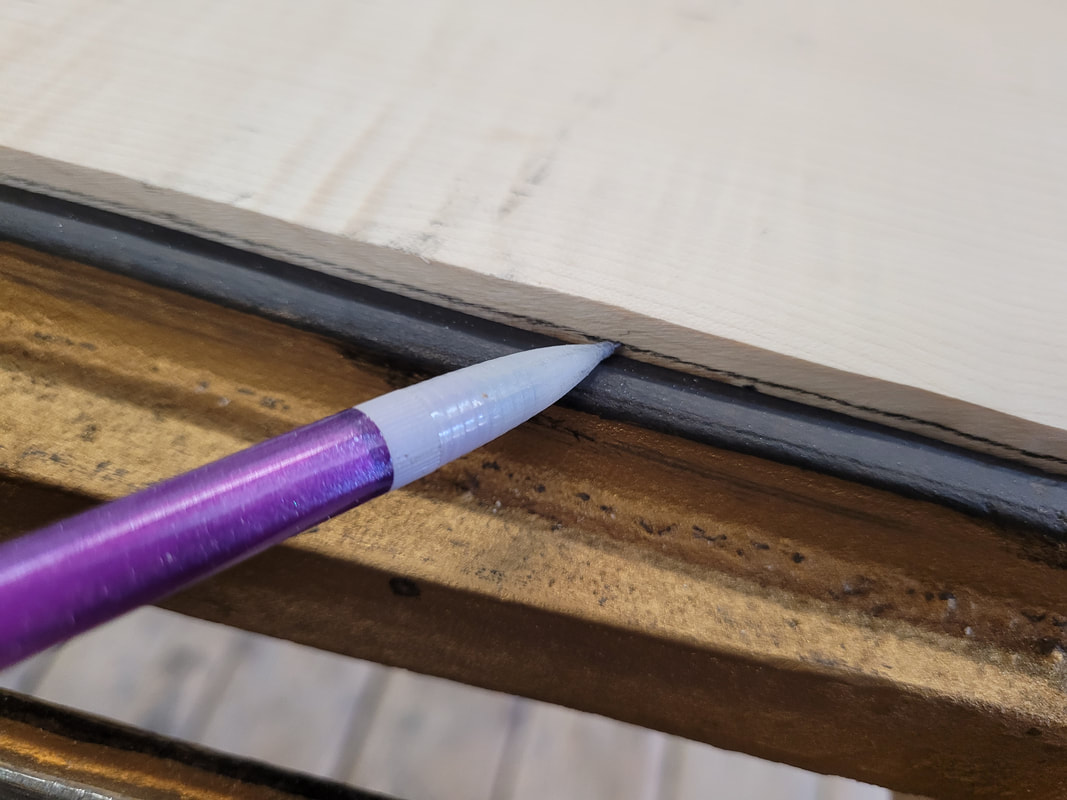
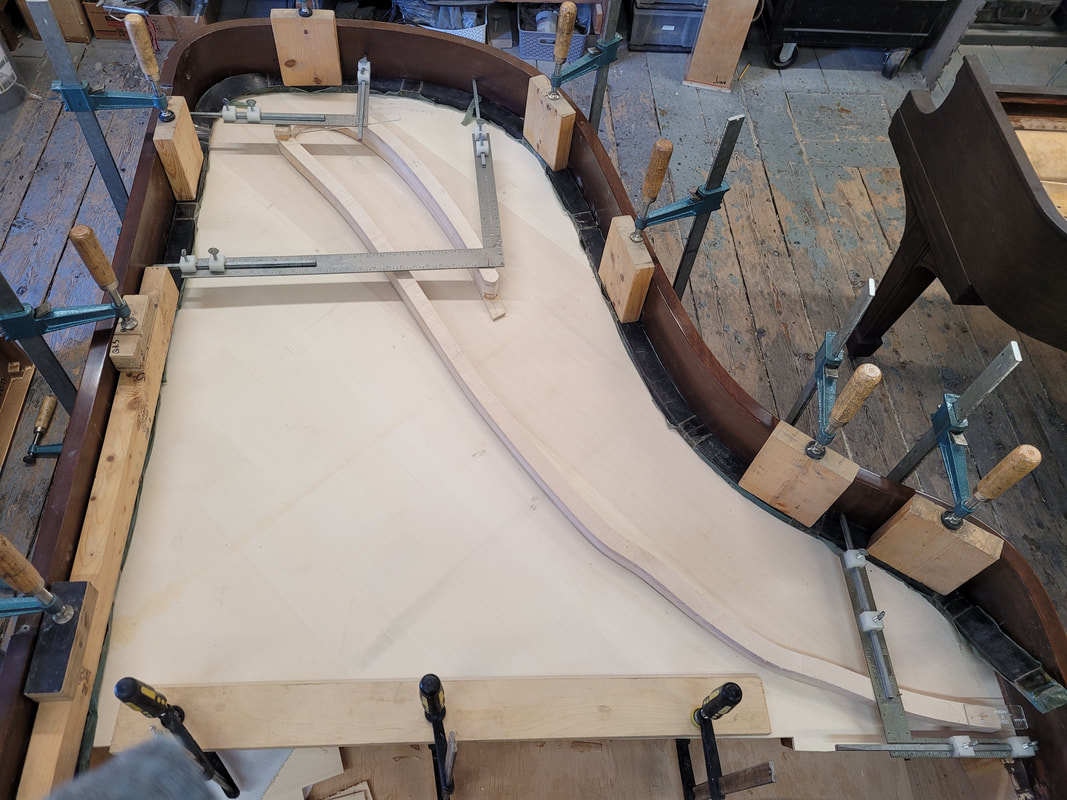
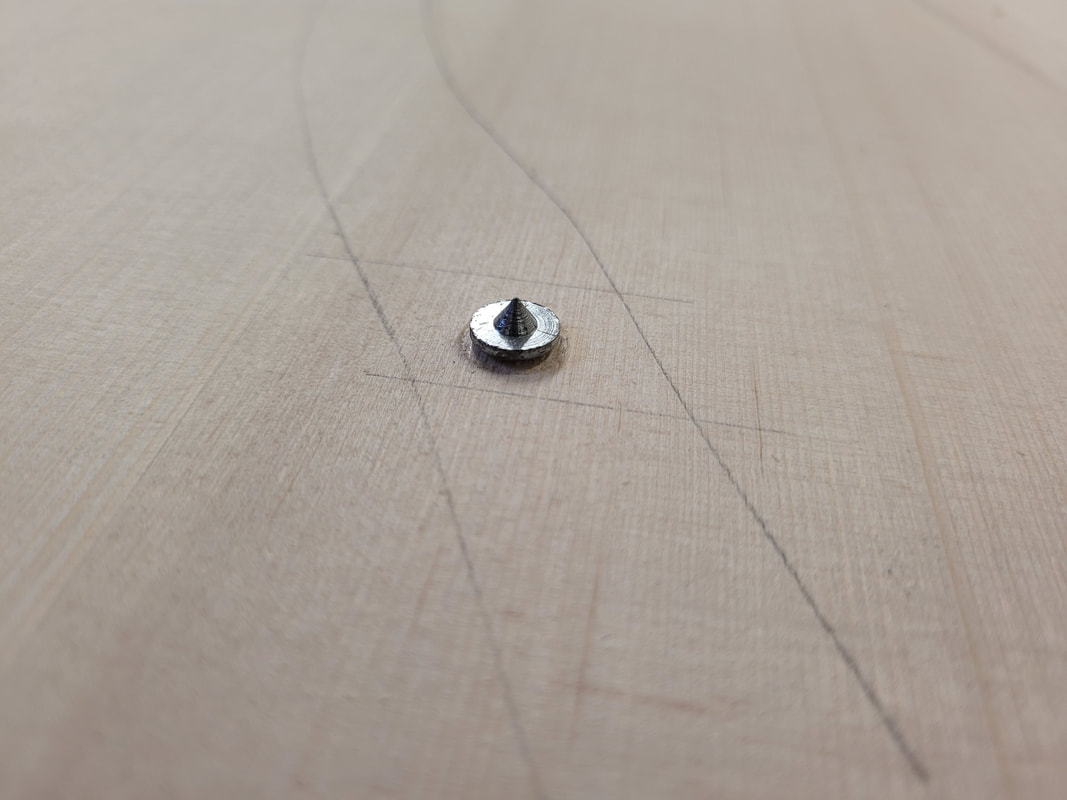
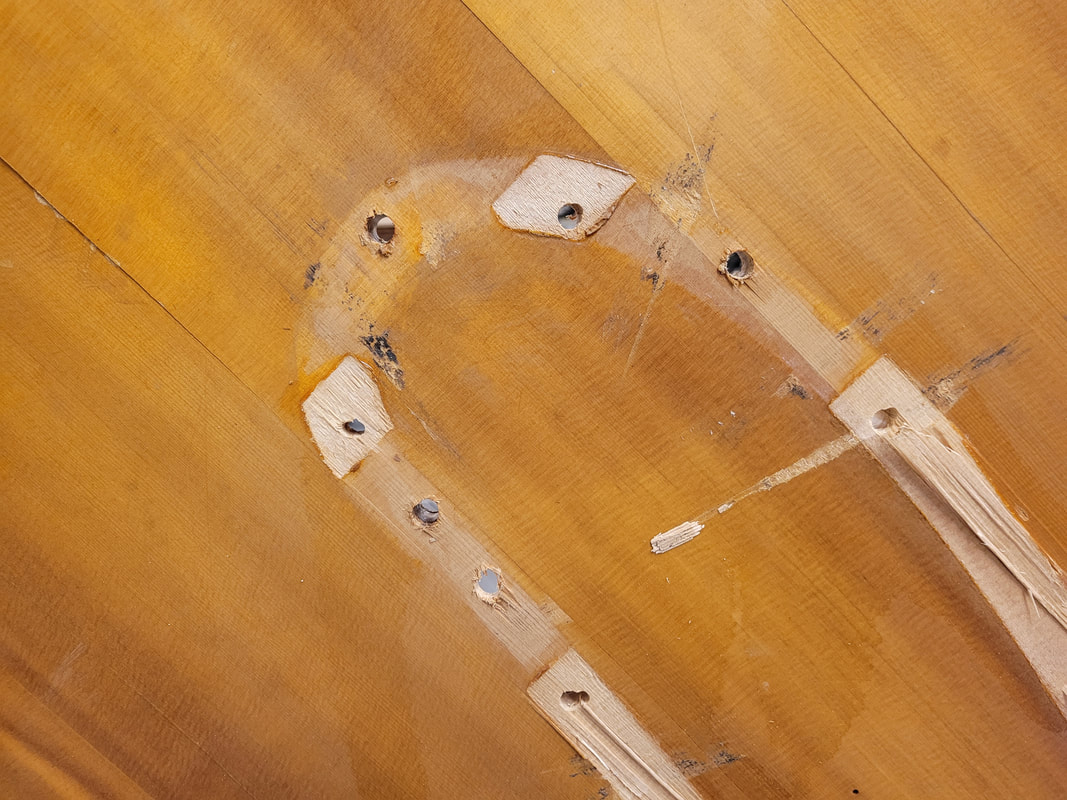
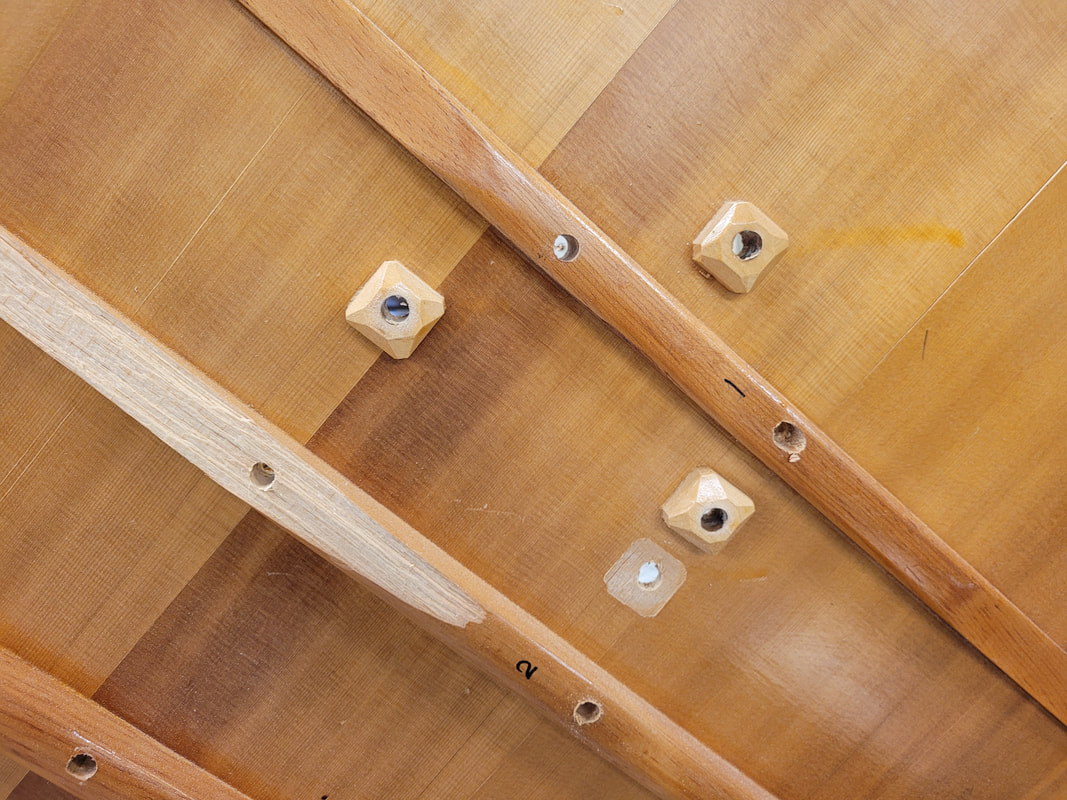
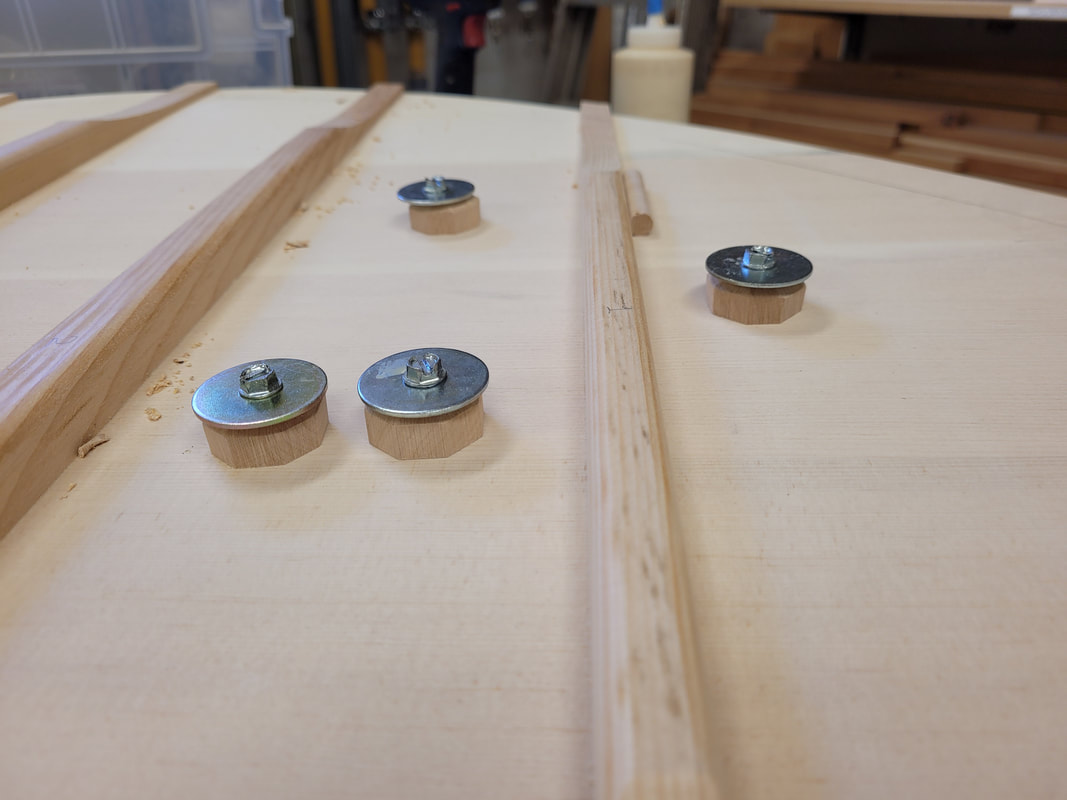
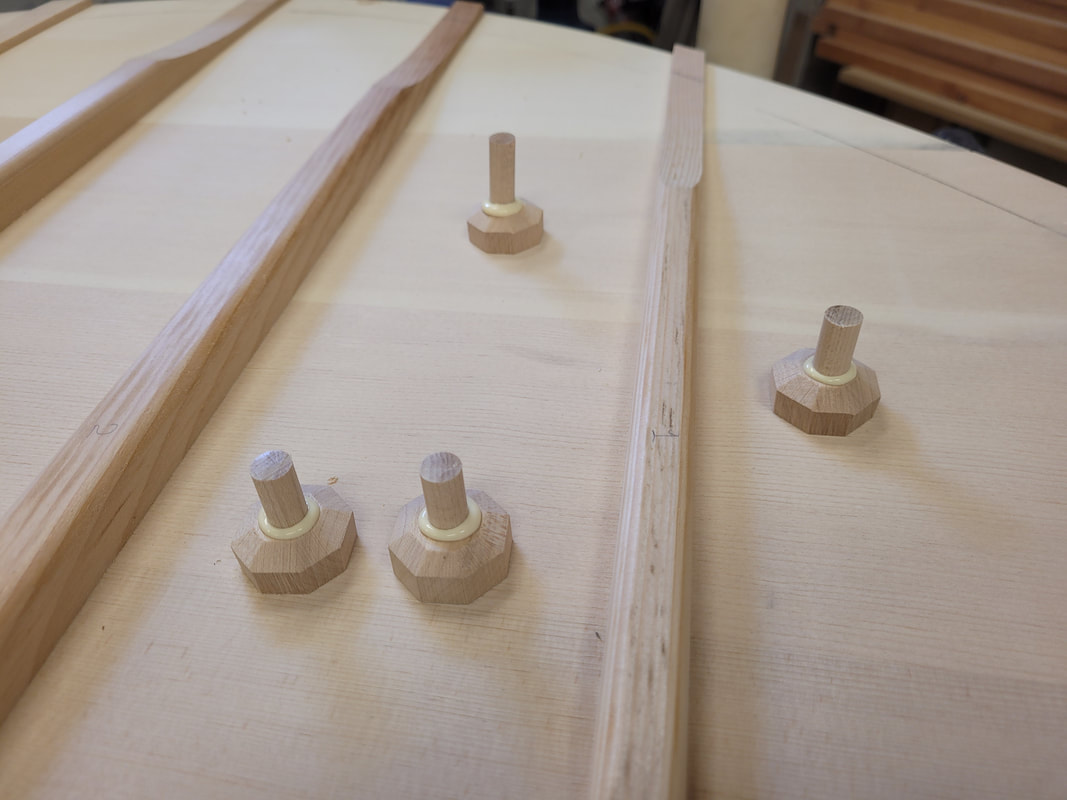
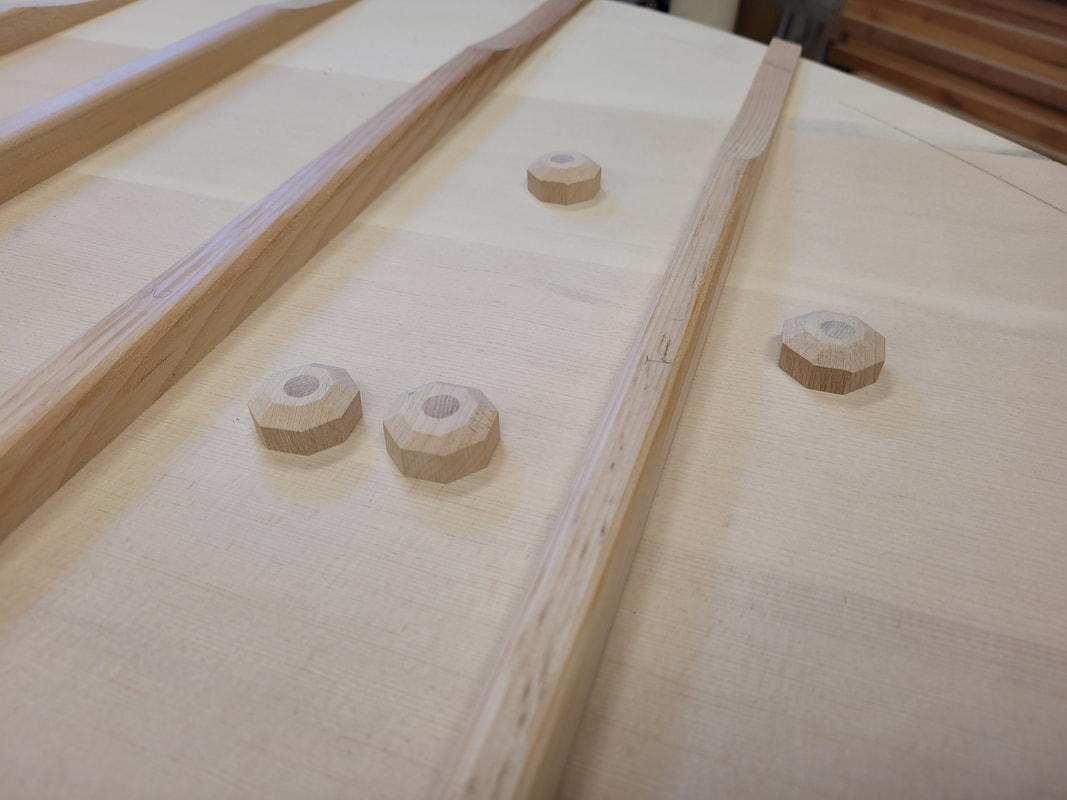
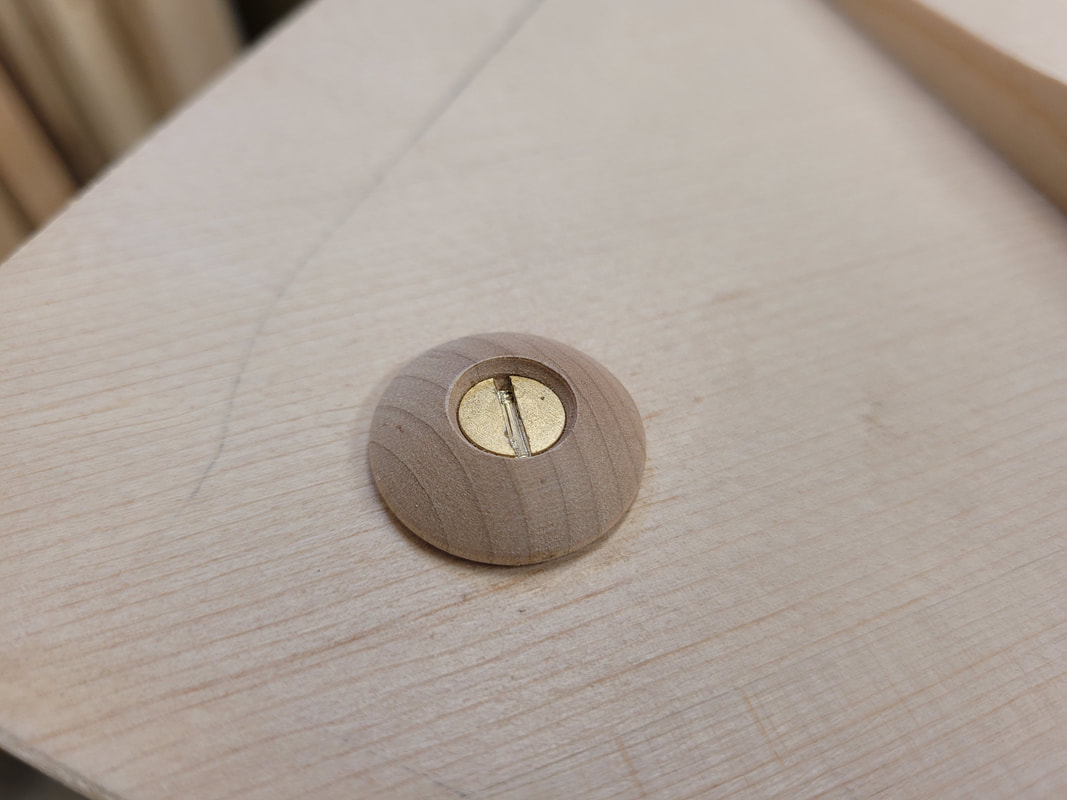
The bridge location was triangulated before old soundboard was taken out of piano. Clamp new soundboard in, triangulate new bridge according to the old one. Trace bridge location. Transfer rib line to the bridge mark using jig. Pick 3 to 4 places where ribs meet bridge across bridge length, drill for locator pins. Install pins, transfer the mark to bridge bottom. On bridge bottom, drill and dowel at the pin marks. Look at the soundboard button location on old bridge both from top and bottom of the board. Use a thin bit, drill mark where to install new buttons, drill through the board. Brush glue on bridge bottom, push dowels into locator holes where locator pins were, lock the bridge down. We use this go-bar type pressure device to fasten bridge to soundboard. Clean glue squeeze-out thoroughly. The next day, glue is dried. According to the little drill marks we made, glue on soundboard buttons, fasten them down by screws on washers. When glue is dried in about 30 minutes, drill for and tap dowels in about 1mm into bridge bottom. trim and sand flush. Yeah done for now. And there is a little button at the very treble side of the bridge. We'll later sand with 220 grid paper and spray with sealer then semi gloss finish.
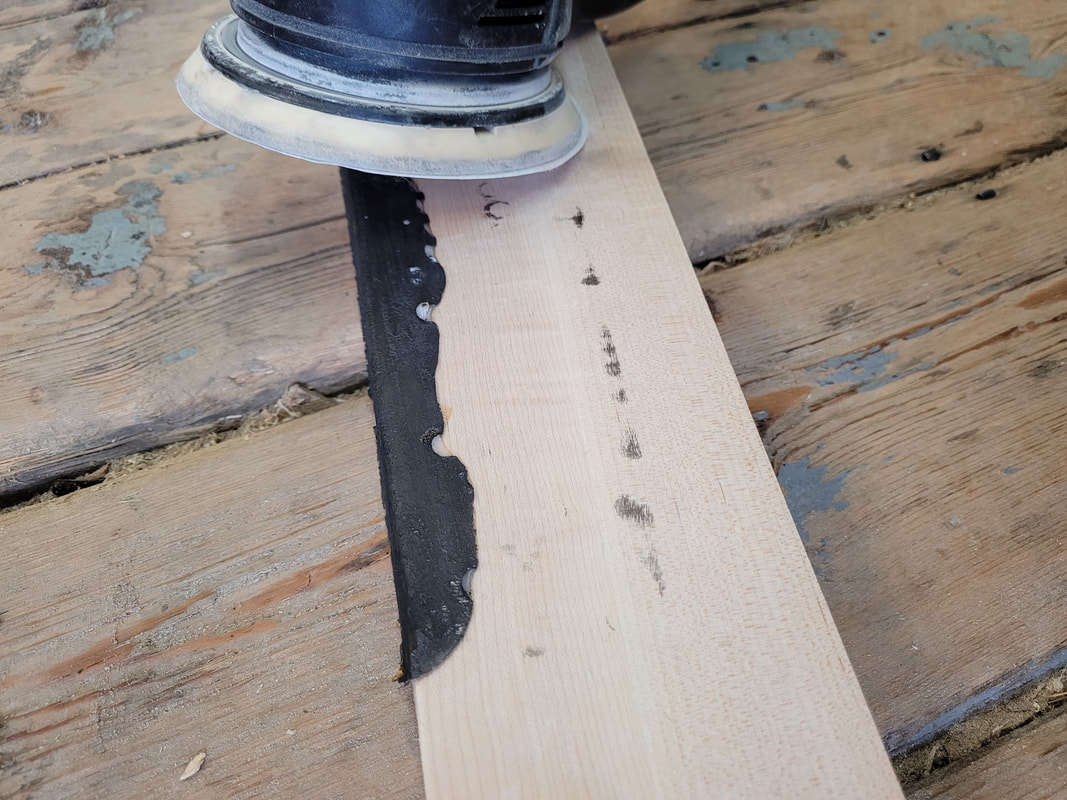
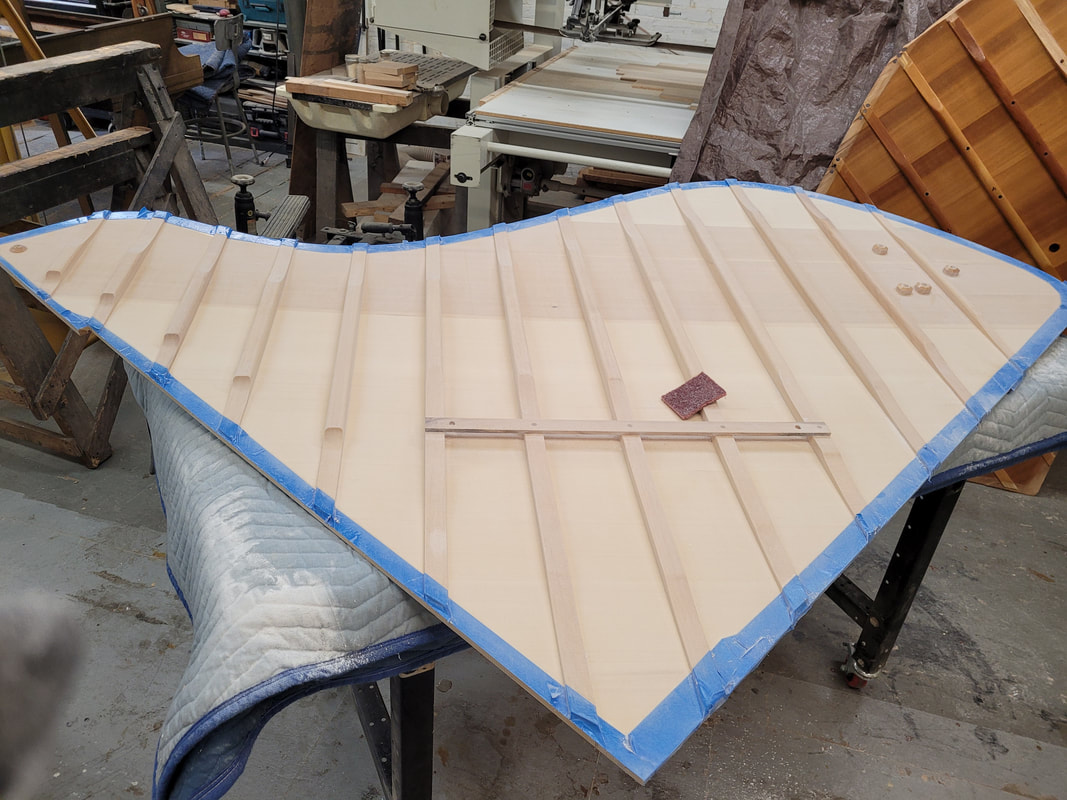
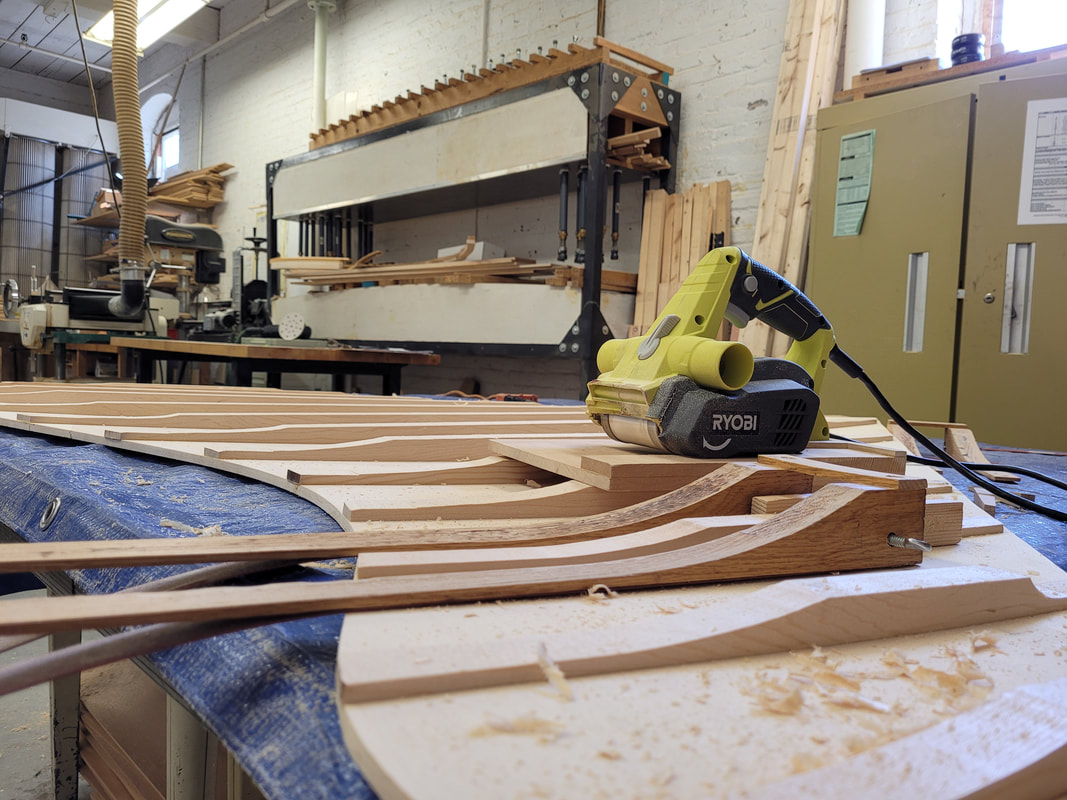
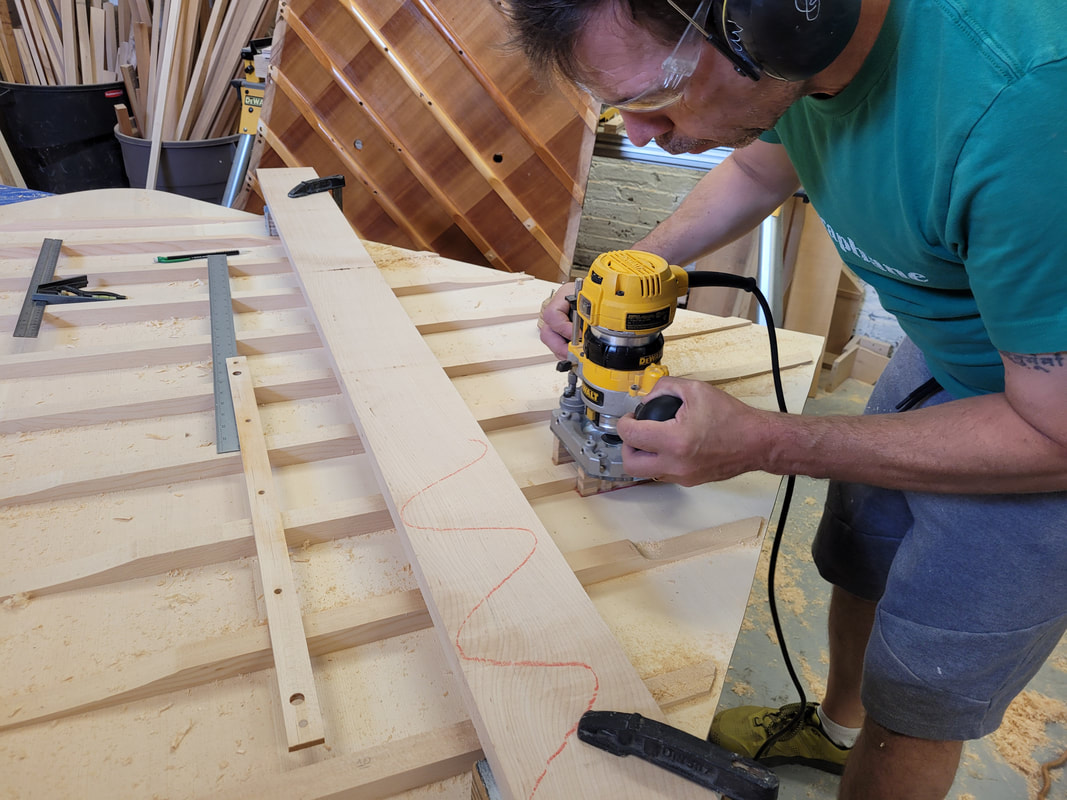
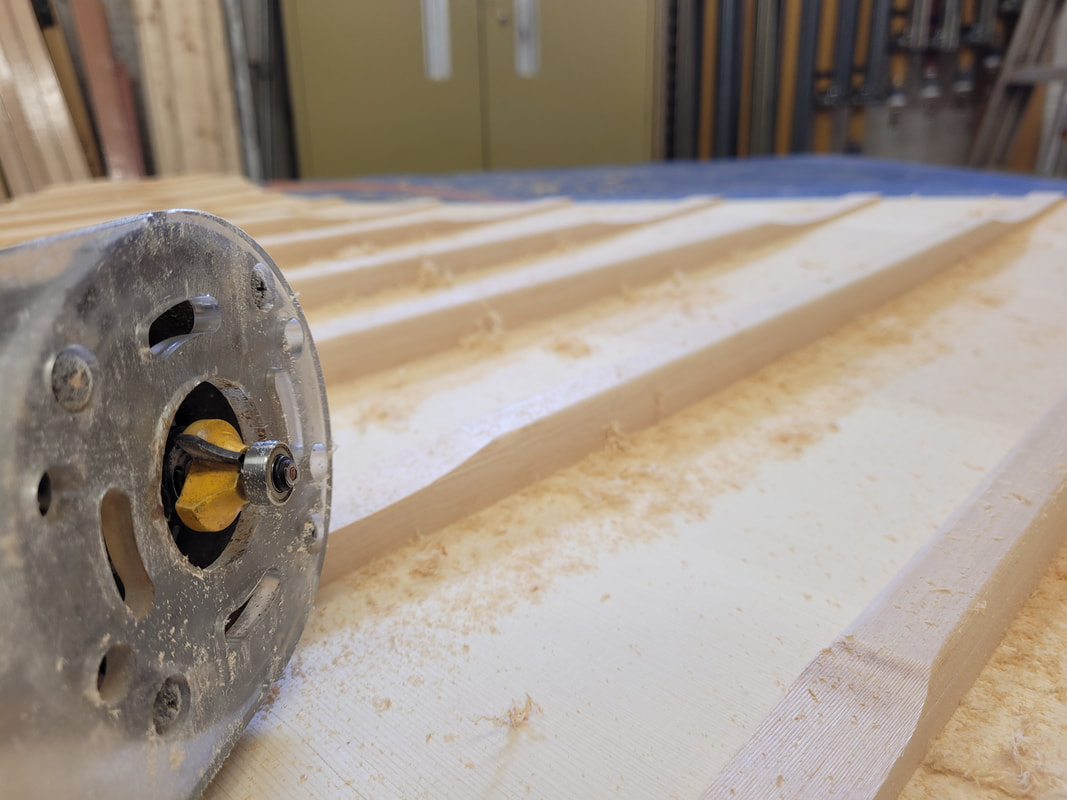
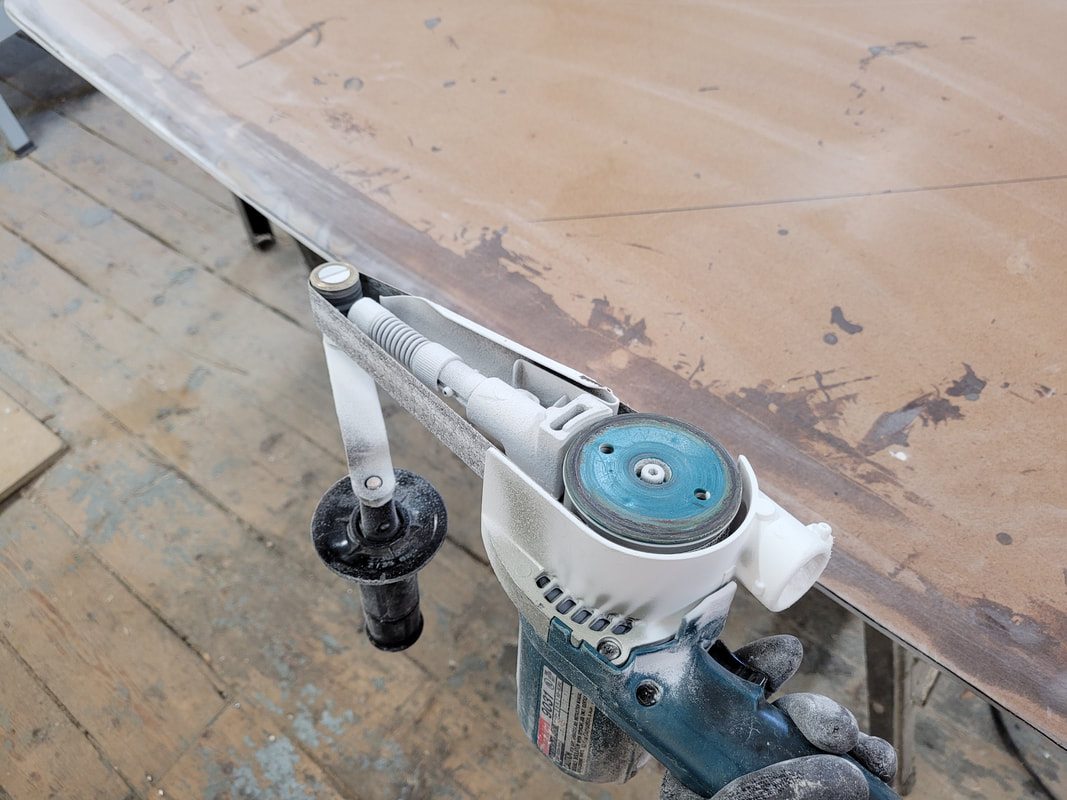
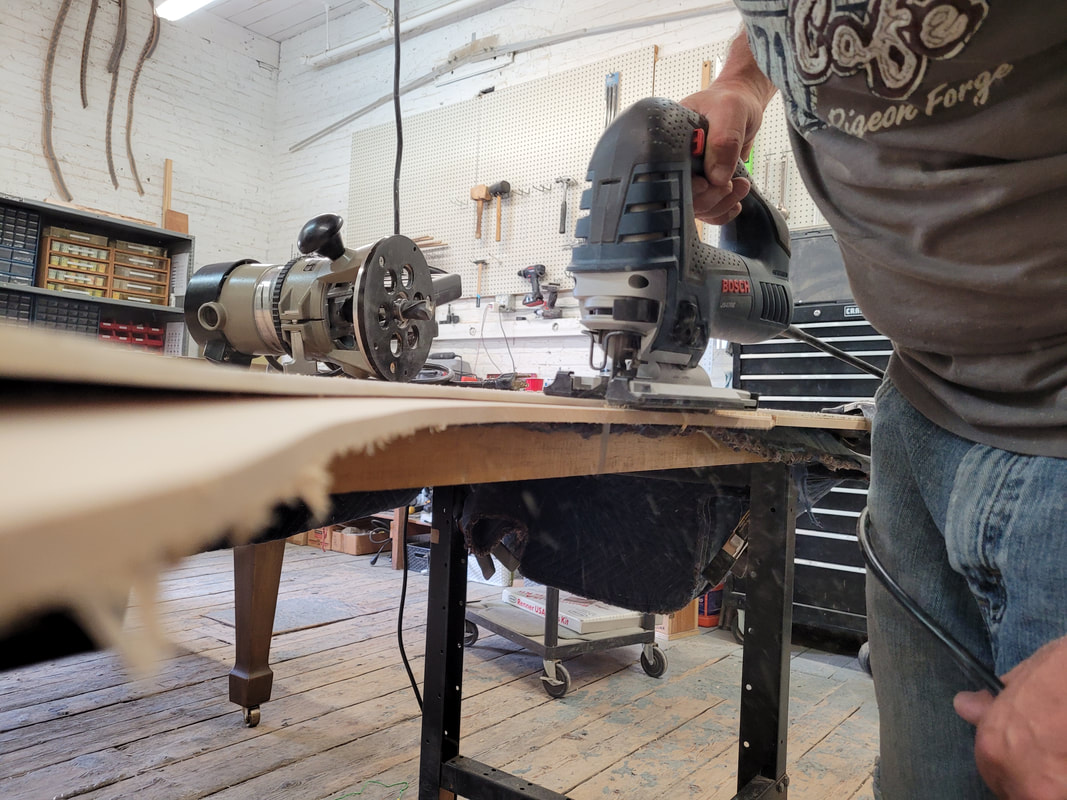
This process is surely not ideal. As a small shop, we do the best we can. This is a note of what's done now. Maybe next time we'll improve! Each rib has two locator holes drilled with 1/4" bit, and locator installed. The locators make marks on soundboard. Make sure the board is pressed down everywhere so all locators transfer marks clearly. Then glue dowels in locator holes on ribs, and trim short. Drill open the rib to soundboard marks with 1/4" bit. The jig makes sure drill bit goes down straights. Ribs are pressed on by air pressure. Dry fit before applying glue just to be sure dowels go into locator holes and not too long. We have only limited amount of press, so glue one half at a time. The next morning, unclamp everything, use jig to feather ribs. The power rotator plane is modified by the shop owner, two sides ride on jig, blade in the middle cuts wood. Steinway B has steps on feather. We shim the feather jig to different height to finish the steps. A cross bar is common on Bs as well. The shop owner routed the cross bar glue surface to let them be on same height. Use a router and rounded bit to round sides on ribs. Looks much better afterwards. A power sander would be much more efficient to smooth the feather surface. Soundboard is then put into kiln before further operation. Never forget to clean router bits with special cleaner to sustain their life ban.
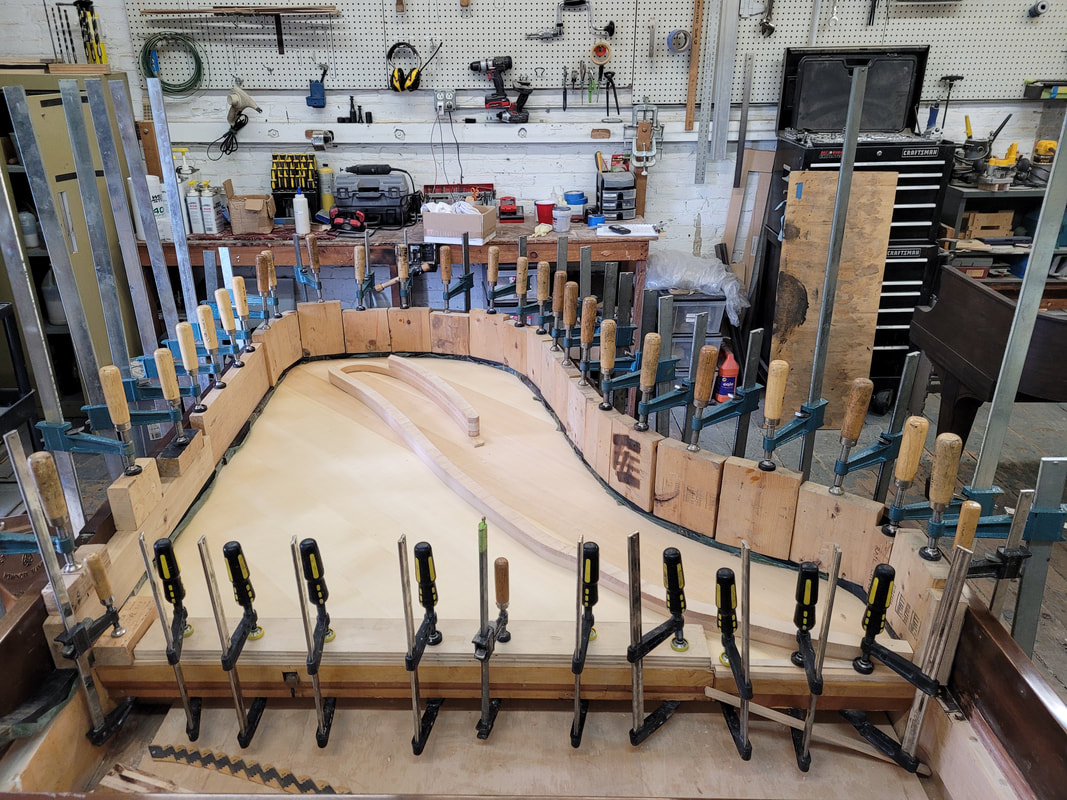
We have an old Steinway B soundboard pattern made out of masonite. It will be trimmed and modified to fit the new Steinway B rebuild. Woo, the old pattern almost fit in the "new" B. Mark where to trim, sand it down with a belt sander. Ware a mask for that because of the very fine dust out of masonite and old epoxy. Once the pattern fits in above the taped ribs, slightly smaller on size, smear a thick layer of wax on the tape and onto the side of outer rim. Fitting with ribs in makes sure that the pattern is exactly the size of soundboard that we'll trim later. Mix up epoxy resin, hardener, and filler to the consistency of mayonnaise. With the pattern pressed down under go bars, apply epoxy into gaps around the pattern. A syringe with a plastic tip works well here. The wax on tape and outer rim prevents epoxy from sticking onto rim and ribs. The next morning, epoxy is dried. Take the pattern out of piano, sand around till flat. clamp pattern onto soundboard, make the first cut with a jigsaw, 1/8" away from the pattern. This step reduces workload on the router and operator. Set router bit bearing height to ride along edge of masonite, trim soundboard flush. This method makes a well fitted soundboard. Worth the extra steps. The next will be mark and glue ribs to soundboard. Now everything will rest in kiln to keep the moisture content down at about 5% before the big gluing mess.
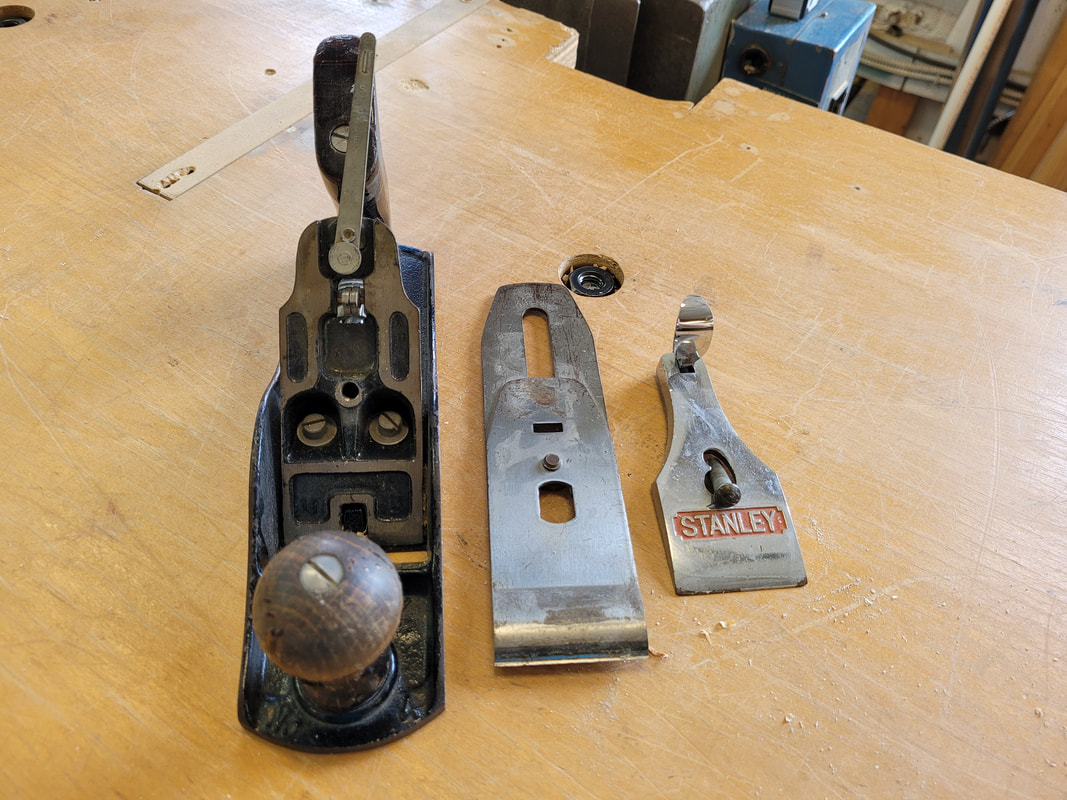
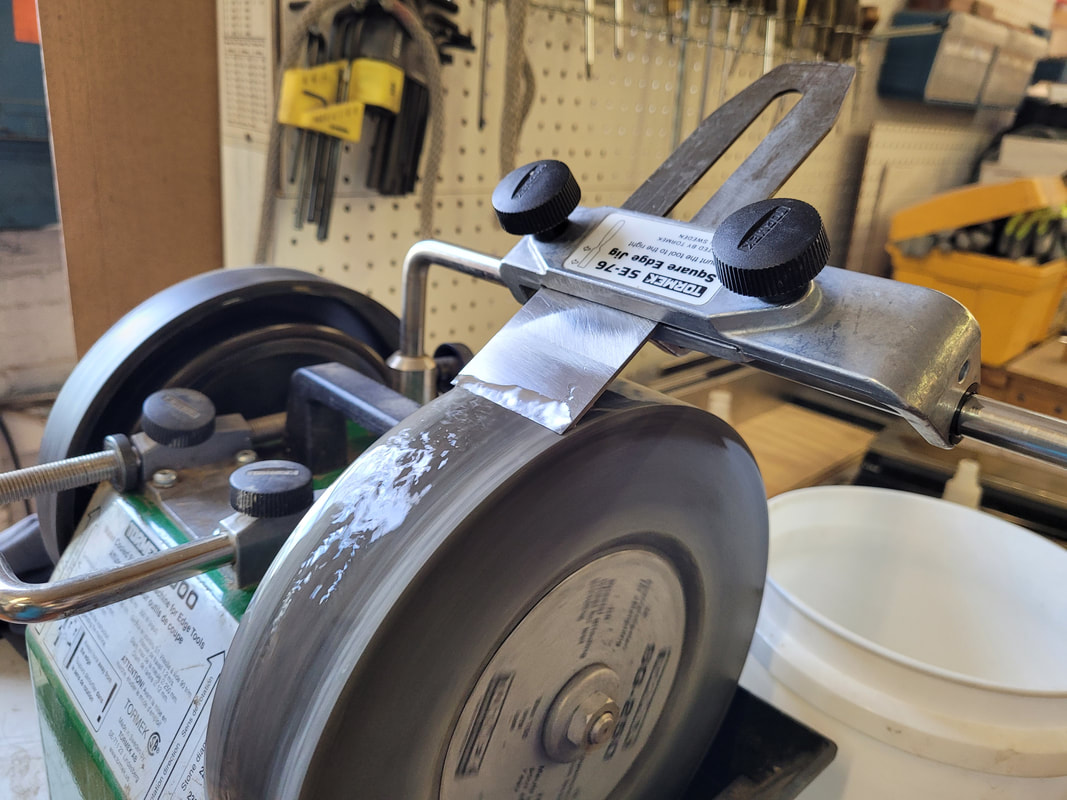
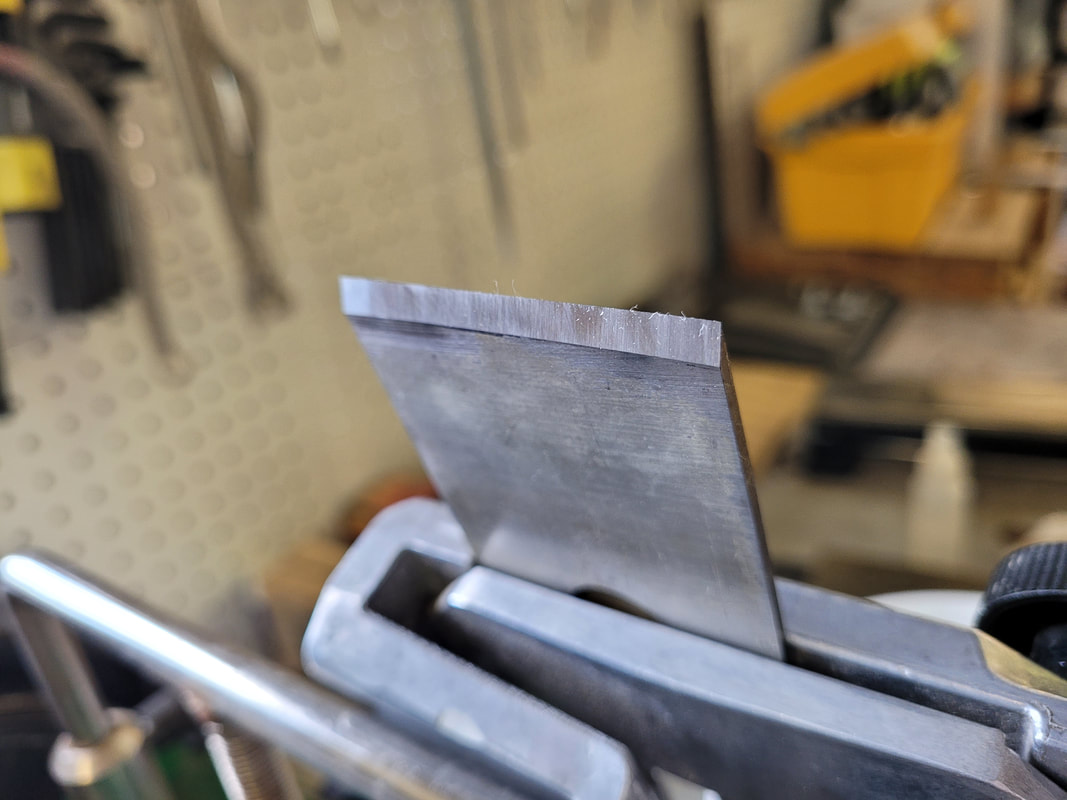
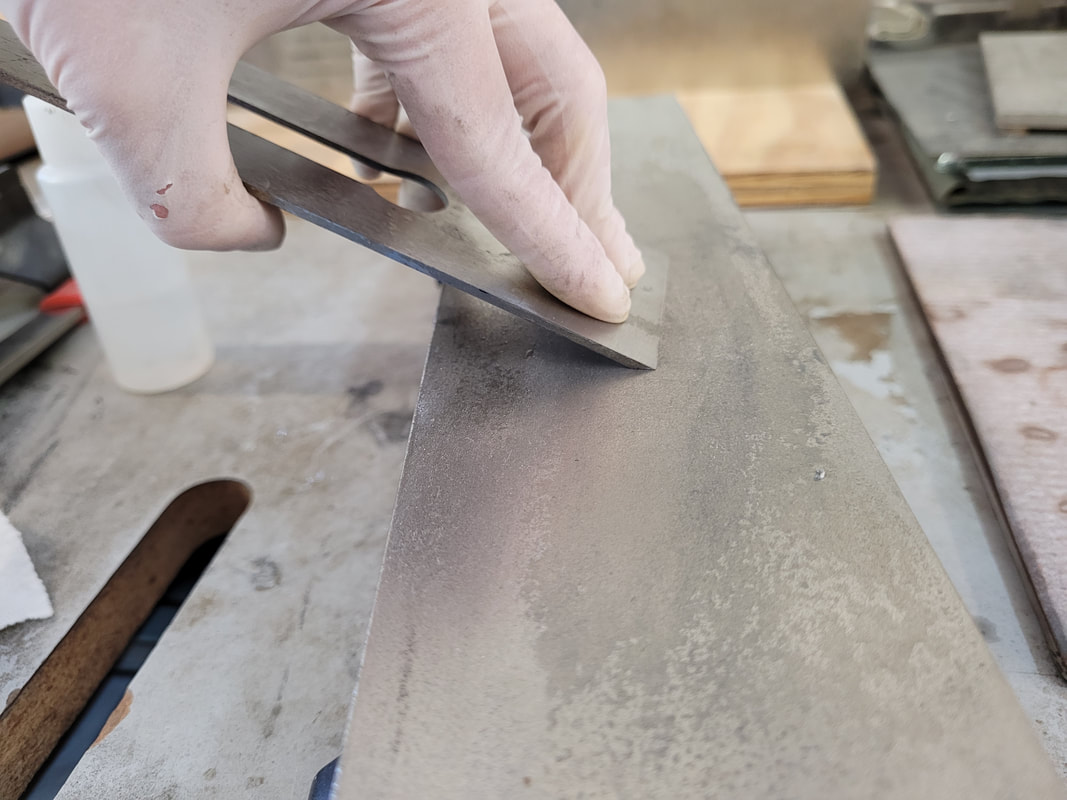
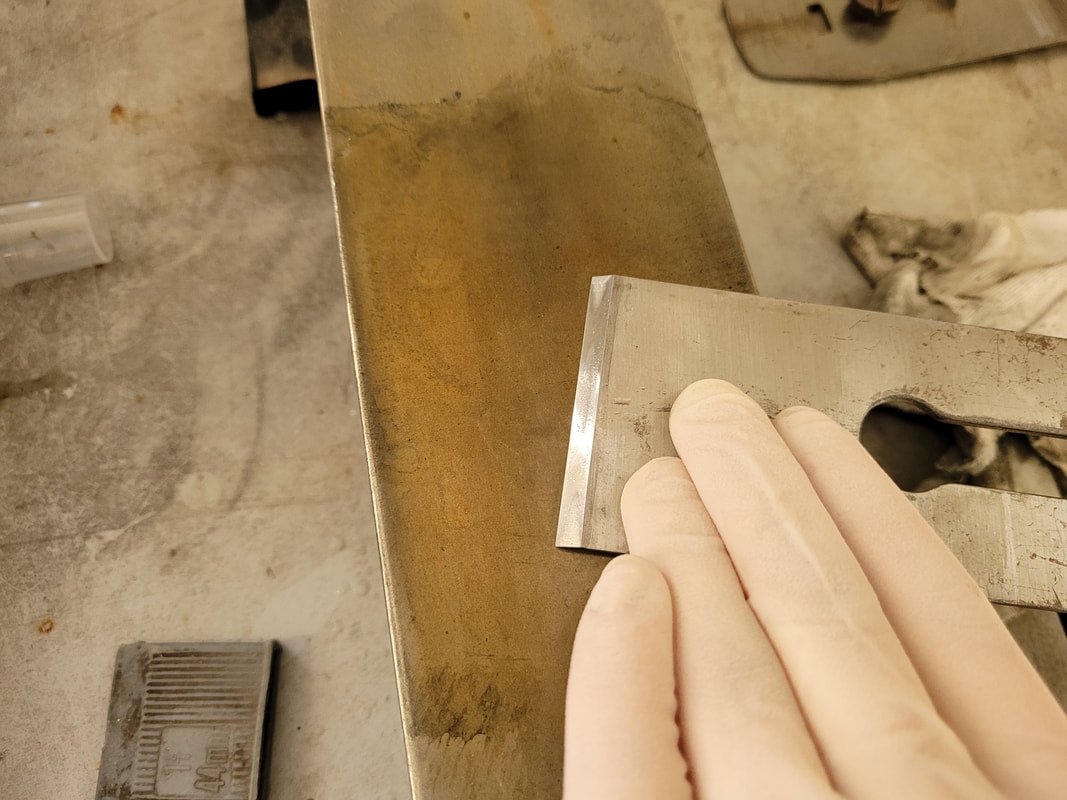
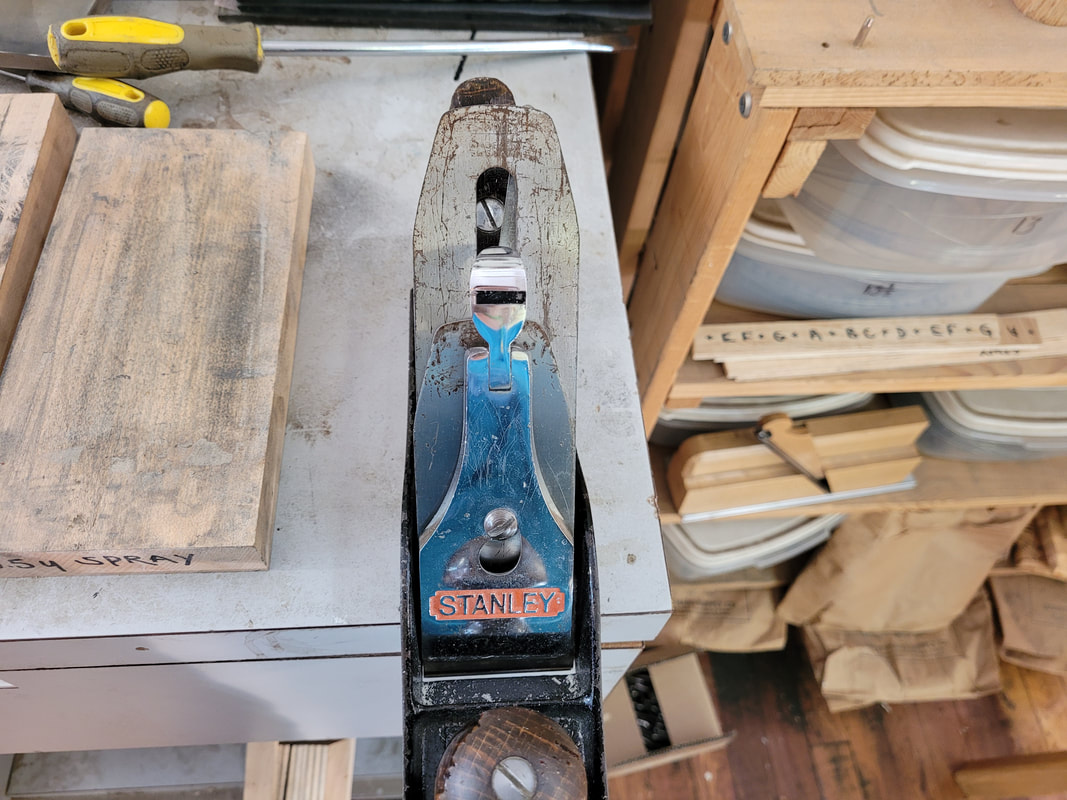
The 12-night hand tool class at Woodcraft has started. Following instruction from our wonderful teachers, the shop tools are going through trials and tribulations no matter they want it or not. Let's start from this Stanley plane. This beautiful lady belonged to Tom Rourk, our piano technician friend who passed away last year. Hope he doesn't mind that I practice on her. The blade is so chewed up. Can't make it worse, maybe. Pictures of plane taken partially apart to remind myself how to put it back together. On a coarse sharpening stone, flatten the bottom blade surface. When lifting it to check, lift away from the honing edge so nothing is damaged. As a newbie, it took more than 2 hours to do this job. How long does it usually take for average woodworkers? Here is an attempt to shape the bevel by hand on a wheeled honing guide. Didn't feel good and the bevel looks strange. Will try again when gaining more experience. It is way easier to shape the bevel on Tormek, a water-cooled sharpening system. It is slow but does not heat up. When the bevel is shaped, 4 hours have already passed by, and it is not finished yet. Now it is time to hone the bevel till very sharp. Feel that the bevel side is flat on honing stone, move steadily stroke by stroke, not to tilt over, until the cutting edge is shiny all the way across. A bur appears. Work on the flat side to get rid of the bur, then move on to finer stones till the blade is sharp enough to use. Screw the chipbreaker tightly on the flat side of blade leaving 1/32" room, put this couple above lateral adjustment lever, then put the cap on tightly. Tom's old plane is ready to work now. So happy.
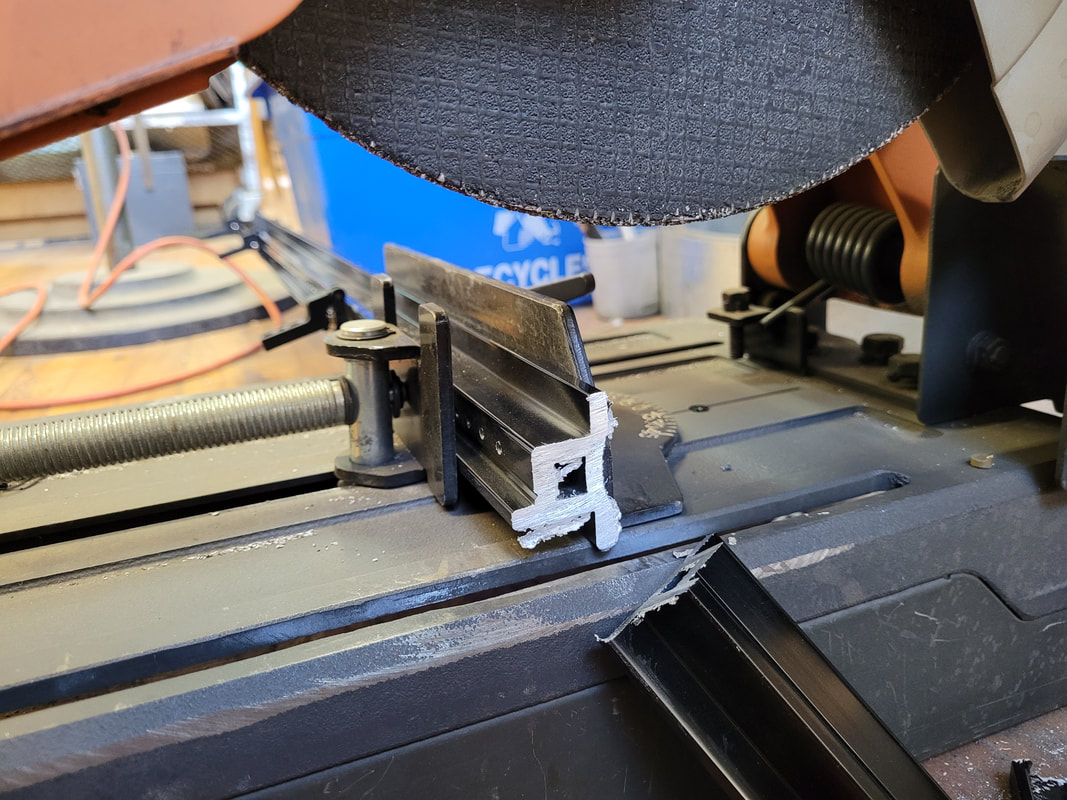
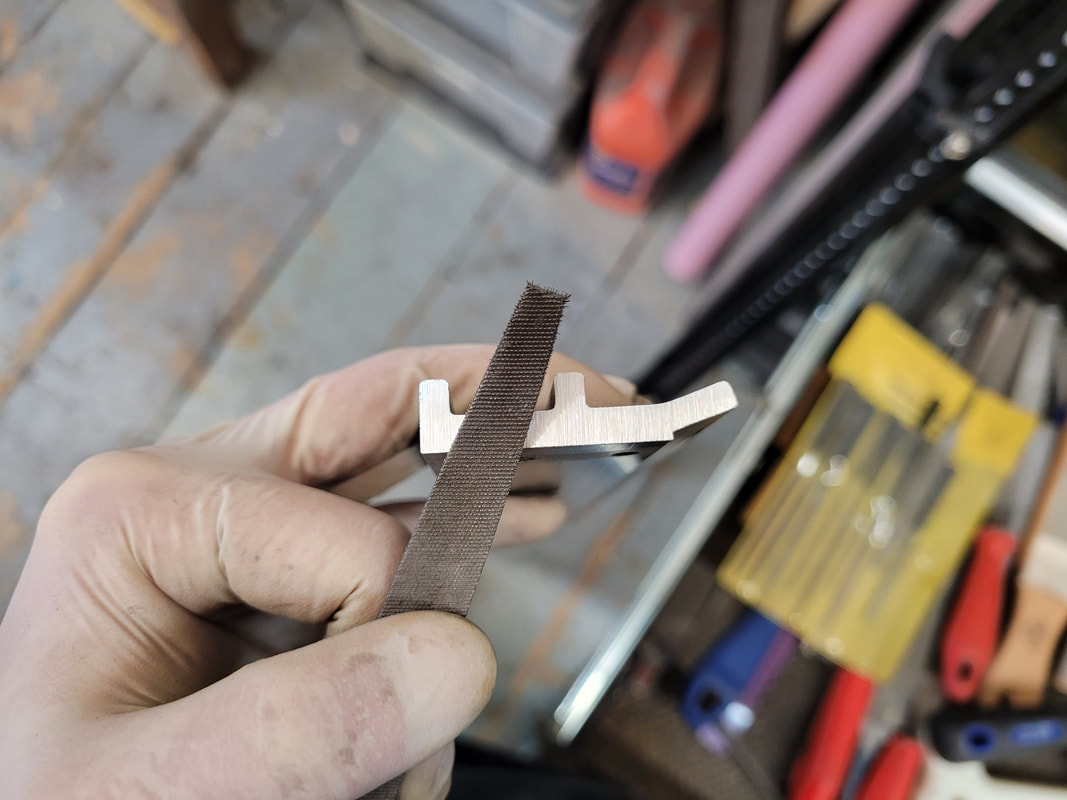
The process is put together from different pianos. And there must be some better ways to do this. Remove screws on pinblock, drill out dowels with spade drill bit. This type of drill bits are pointy, won't slide everywhere. Mark a line on both bass and treble, 3 inches away from case. This will be where we'll saw. Put a mirror on keybed, get a reading on stretcher thickness with a combo square, set it about 2mm over the actual thickness. Set the router bit to match the stretcher thickness including the 2mm room so we won't cut into the stretcher. Route from under the stretcher. Safety classes shall be put on very tightly. Saw dust shoots everywhere. Use sawzall to cut at the 3 inch mark on two ends. Hammer the pinblock off. Chisel the rest of block off layer by layer. The shop owner uses power plane to remove the remainder thin layer of pinblock. To be safer, use a wet rag plus hot water or steam to soften glue, then chisel off the remaining thin layer.
|